How can we help you today?
Find quick answers, learn how Calenderify works, and get help with Booking Types, Date Polls, Availability, and Integrations.
Help and Support
Step-by-step guides for sign in, booking types, polls, availability, integrations, teams, and account settings.
Sign In and Dashboard
Quick StartSign up
To create a Calenderify account, go to the registration page.
Sign up URL: https://app.calenderify.com/register
-
Enter your full name, email address, and password, then submit.
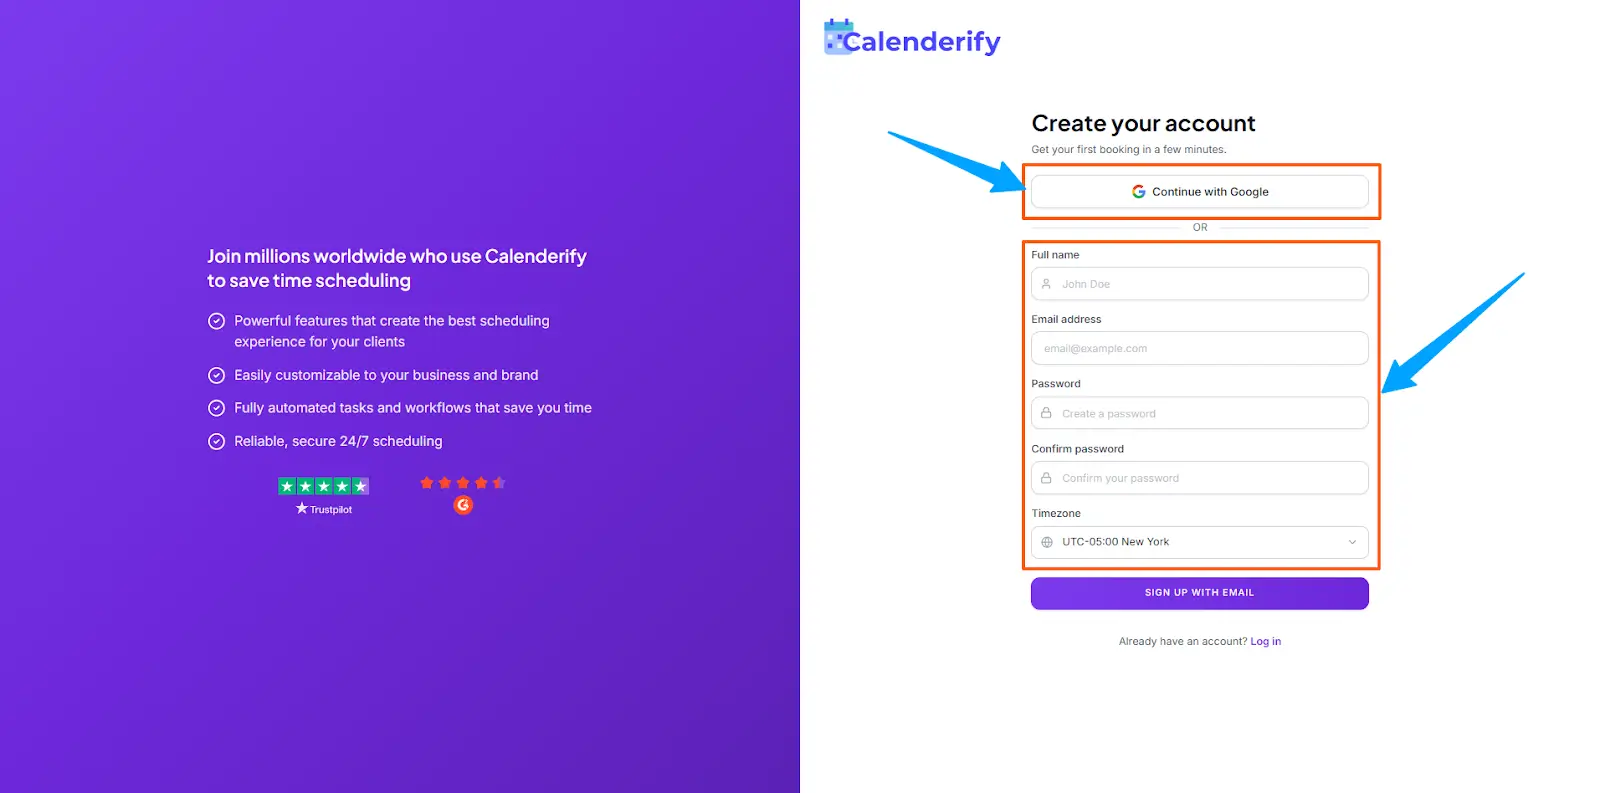 Fill in your details and submit the registration form
-
Or choose Sign up with Gmail.
Use Gmail to sign up faster
-
Check your inbox or spam folder for the verification email.
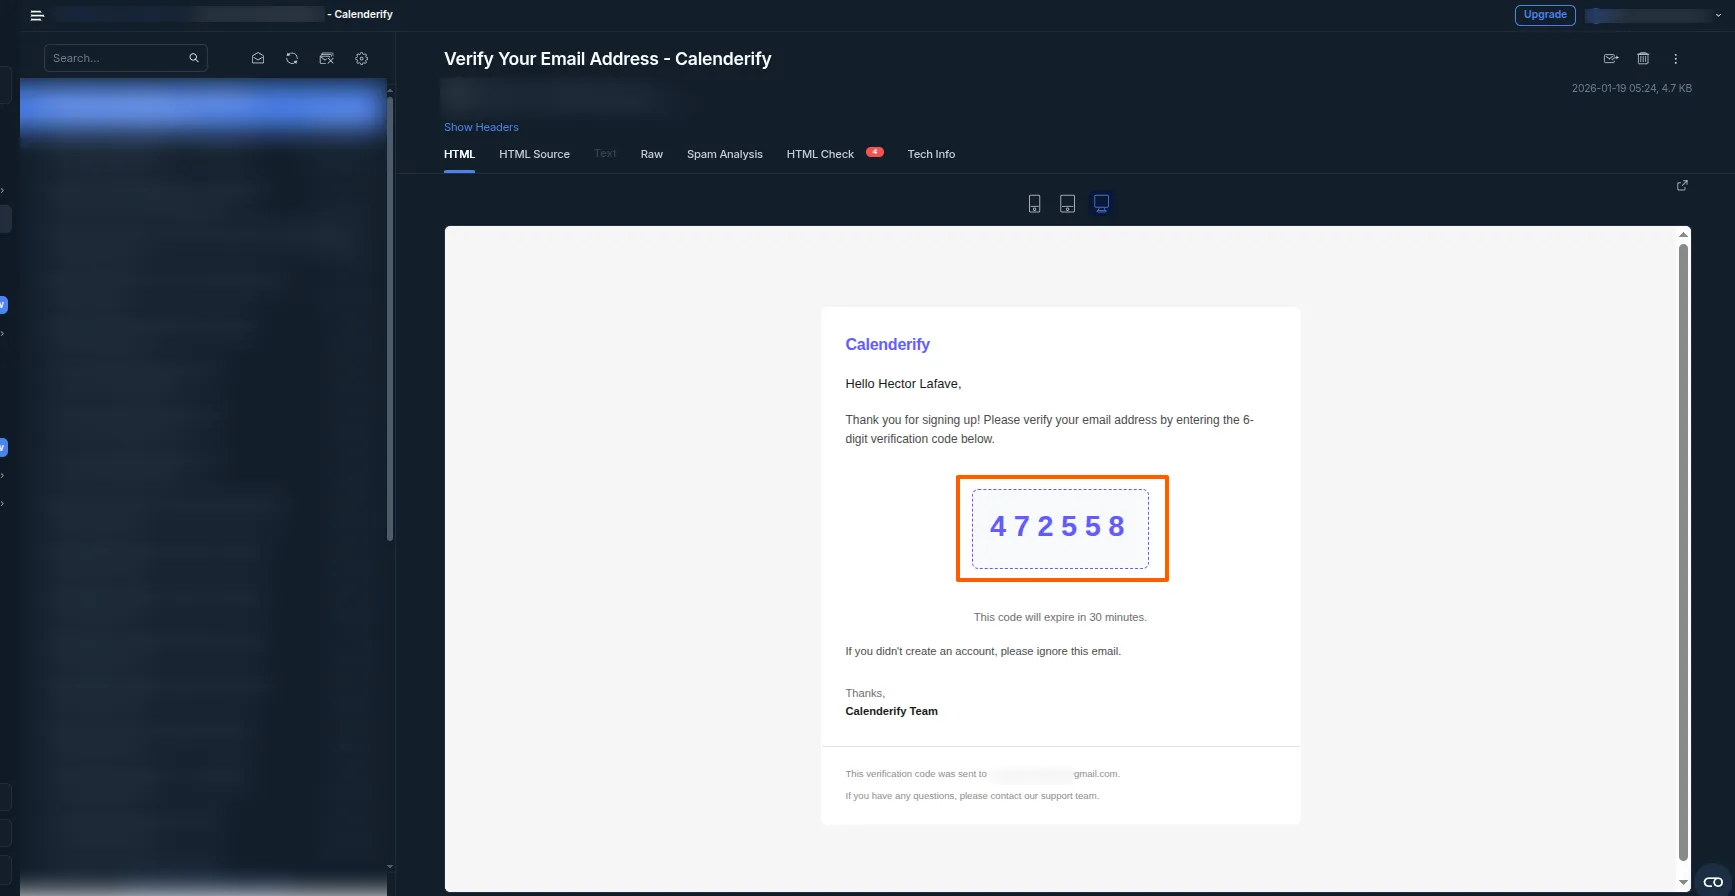 Open the verification email from Calenderify
-
Verify your account to continue.
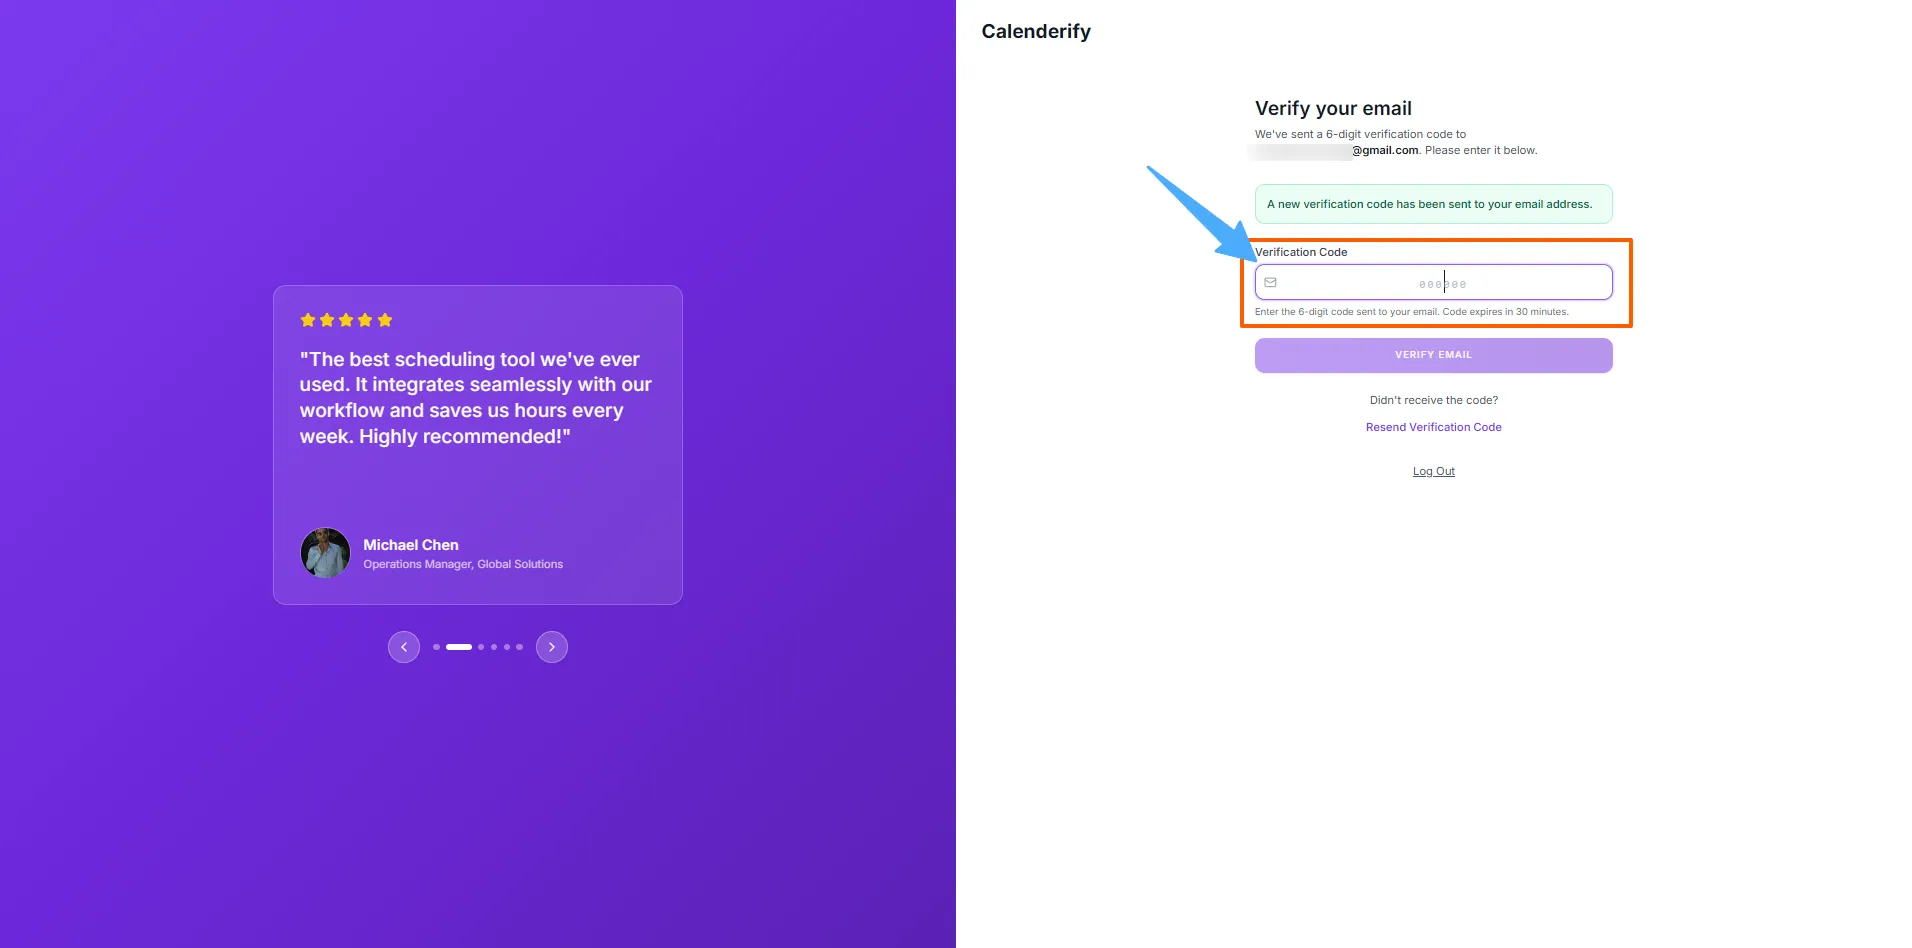 Click Verify to activate your account
Sign in
Sign in URL: https://app.calenderify.com/login
-
Log in using email and password.
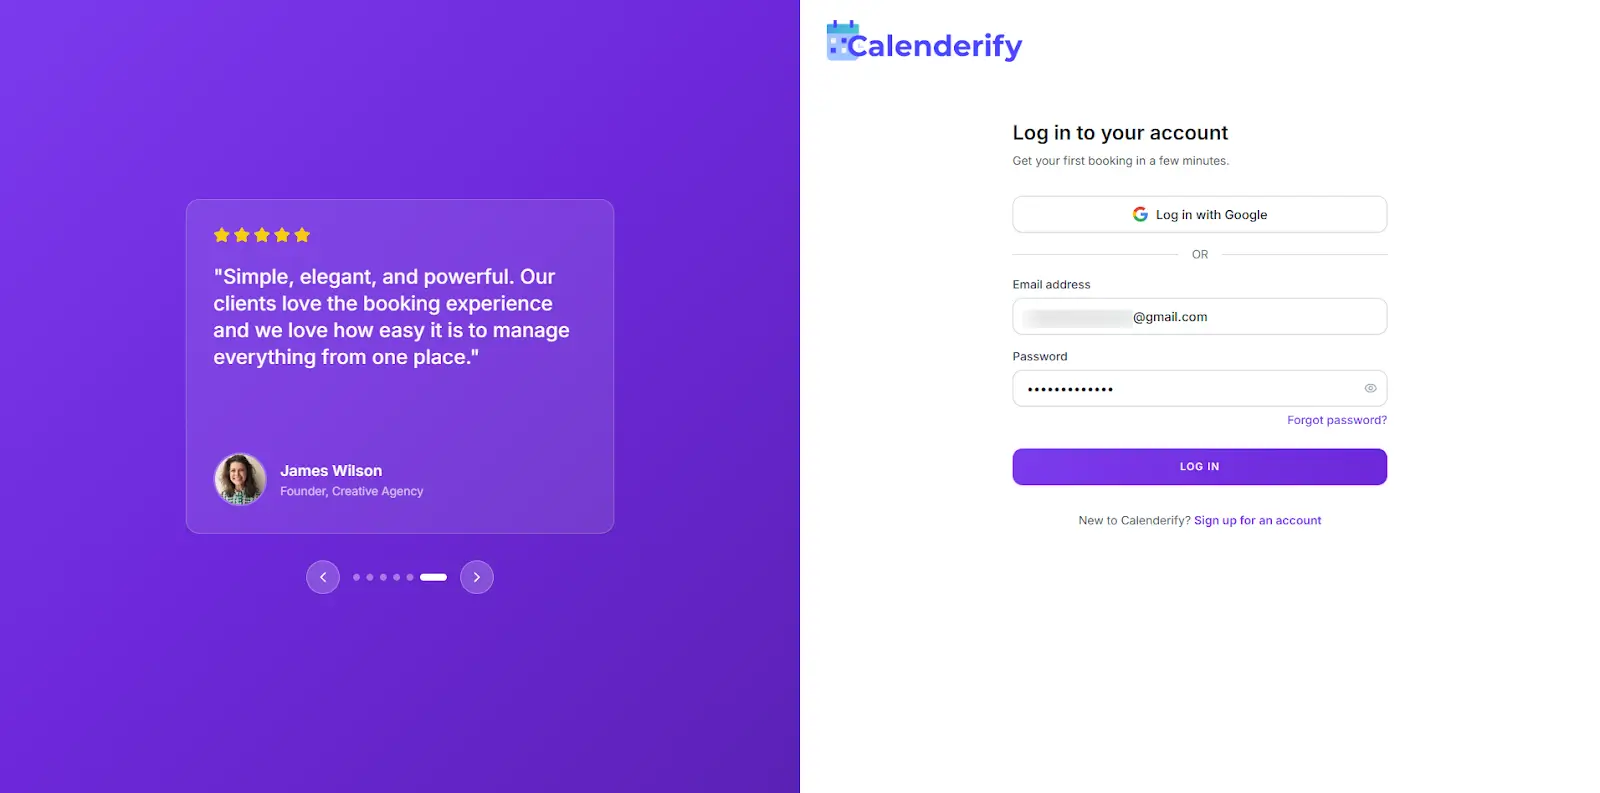 Enter email and password to sign in
-
Or log in with Gmail (authentication permissions are required).
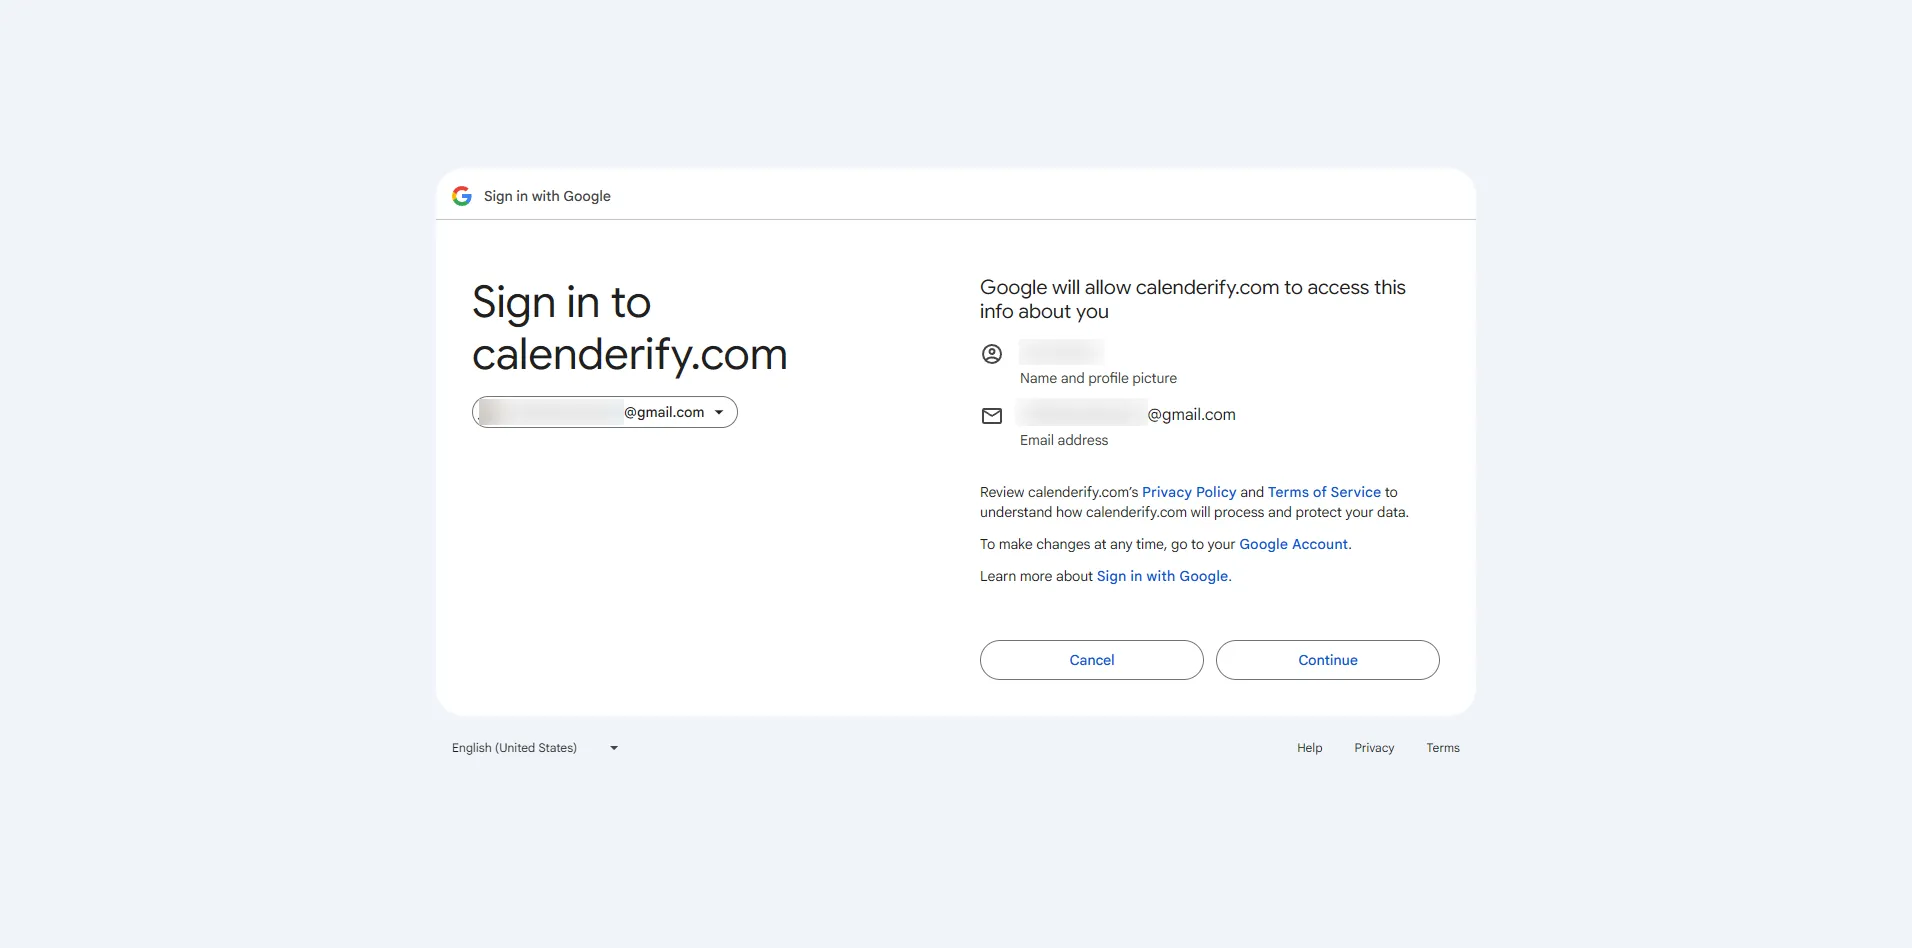 Choose your Google account and approve permissions
Dashboard overview
After verification, log in to access your Calenderify Dashboard.
-
After logging in, you will see the Dashboard overview, which acts as your main control center for scheduling.
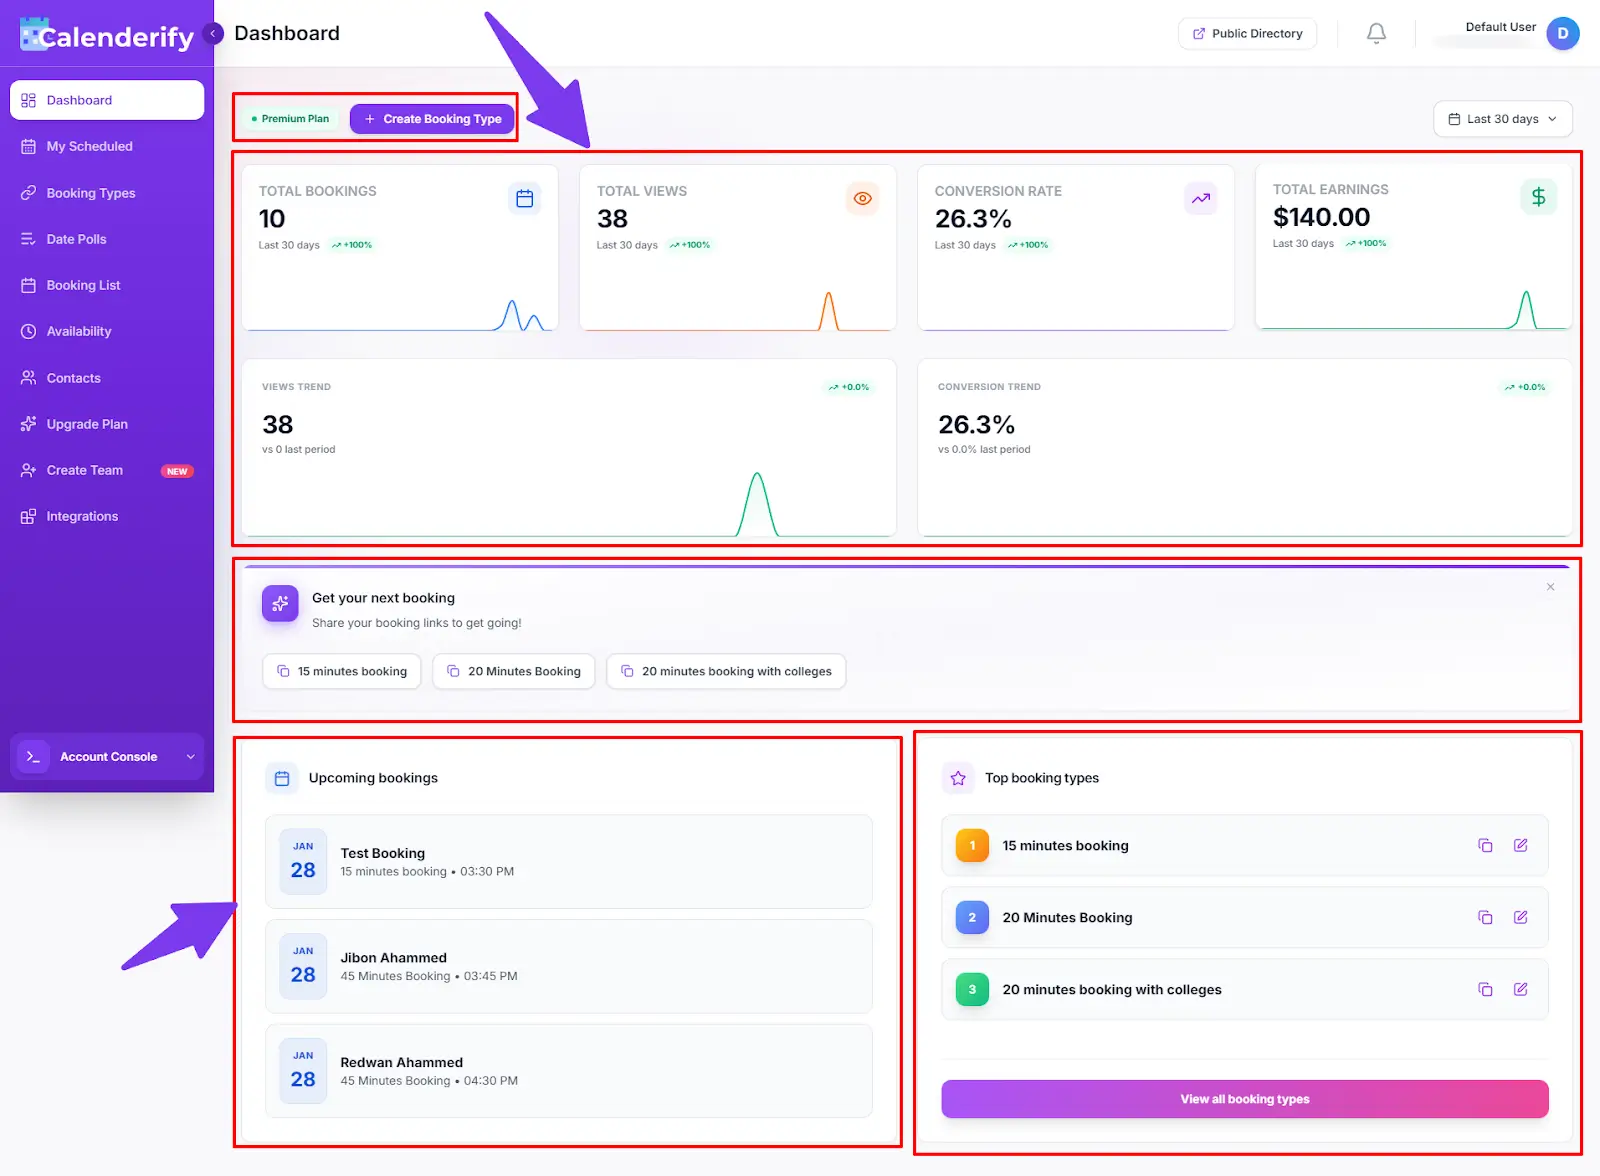 The Dashboard gives you a complete overview of your bookings, availability,
booking types, integrations, and account activity in one place.
The Dashboard gives you a complete overview of your bookings, availability,
booking types, integrations, and account activity in one place.
-
In the Dashboard, you will see a “Get started with Calenderify” option in the bottom-right corner.
Before you can start accepting bookings, a short setup process must be completed to activate your account.
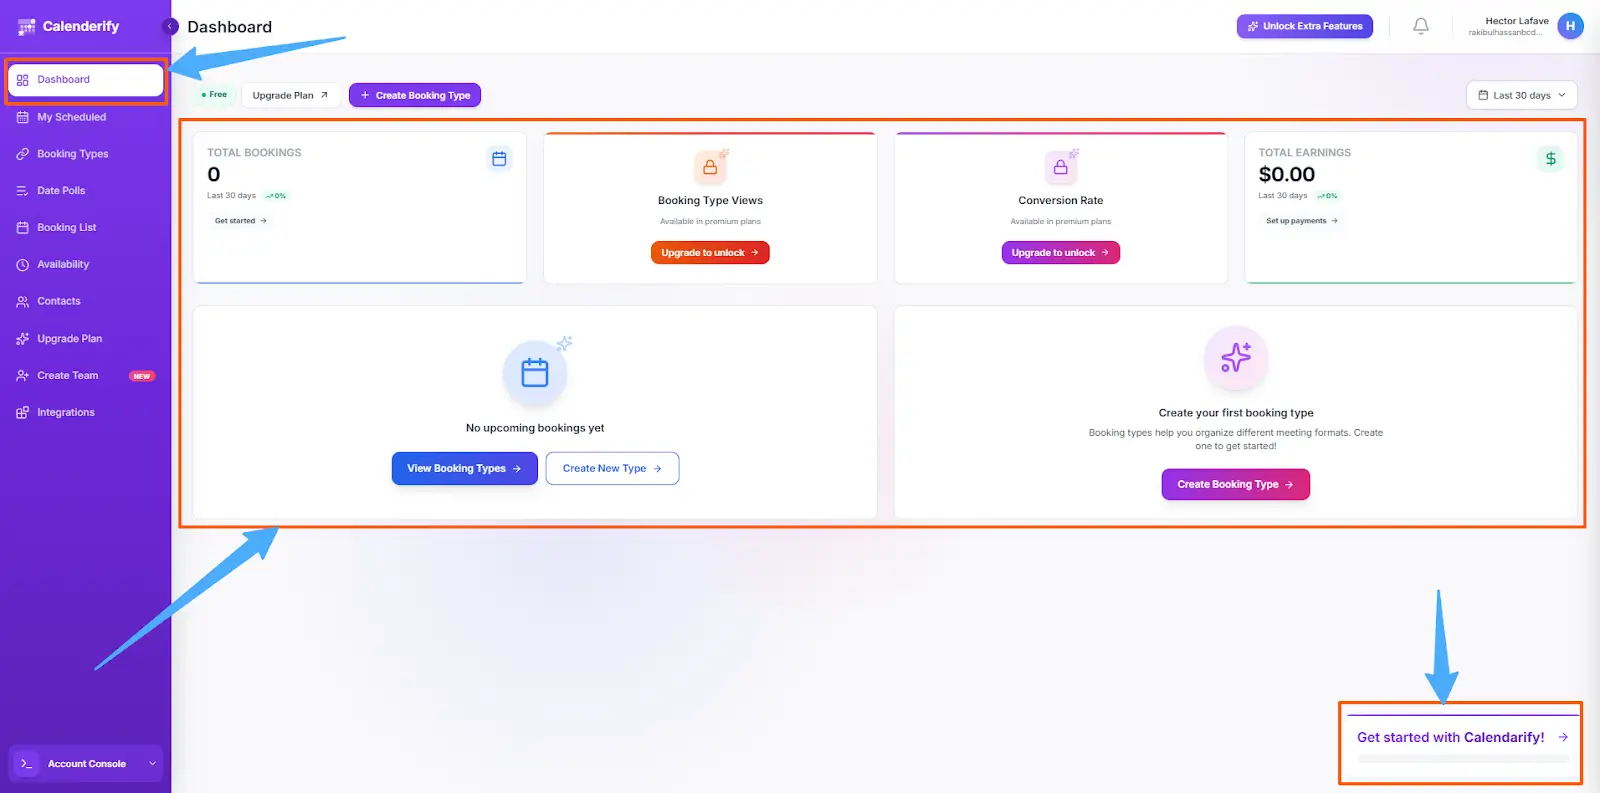 Complete the guided setup to ensure availability, meetings, and payments work correctly
-
To start accepting bookings, every user must complete the initial account setup.
Once these steps are finished, your booking pages become fully active and shareable.
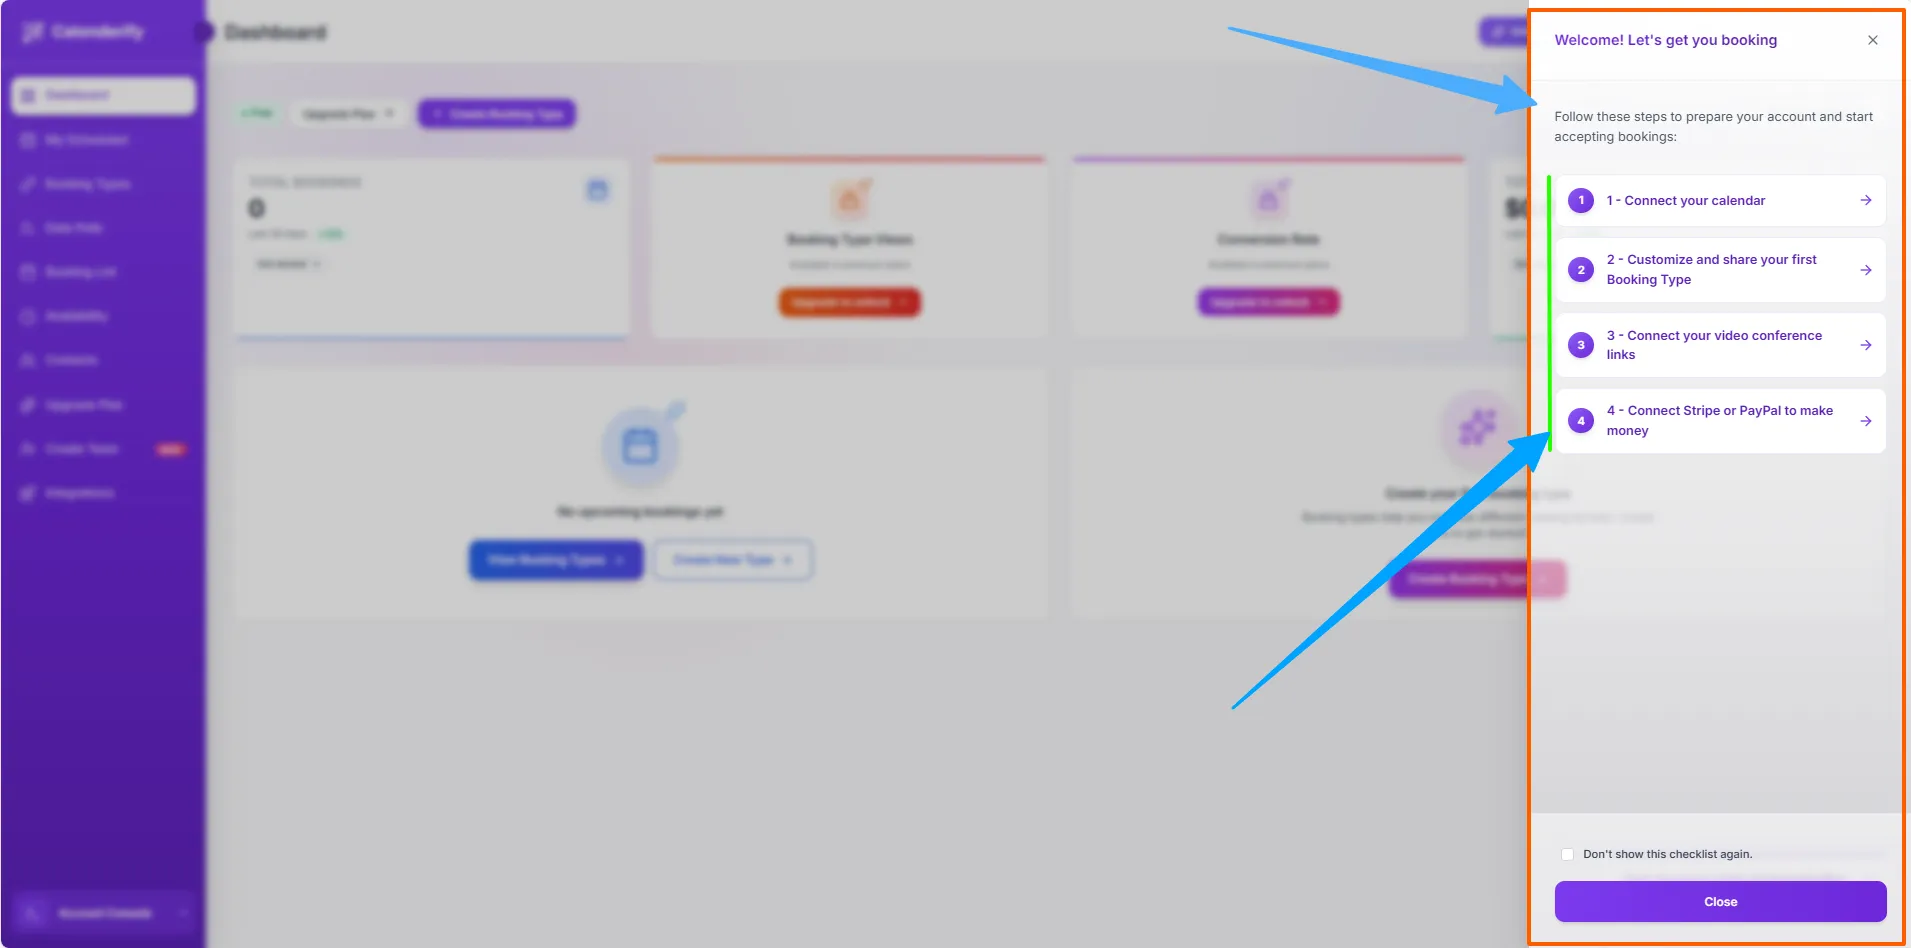 Complete the setup checklist to activate your booking features
- Connect your calendar (Google Calendar or Microsoft Calendar)
- Create, customize, and share your first Booking Type
- Connect video conferencing tools (Google Meet, Zoom, or Microsoft Teams)
- Connect Stripe or PayPal to unlock paid booking features
Recommended setup: Connect your calendar, customize your first Booking Type, connect video conferencing, and connect Stripe or PayPal.
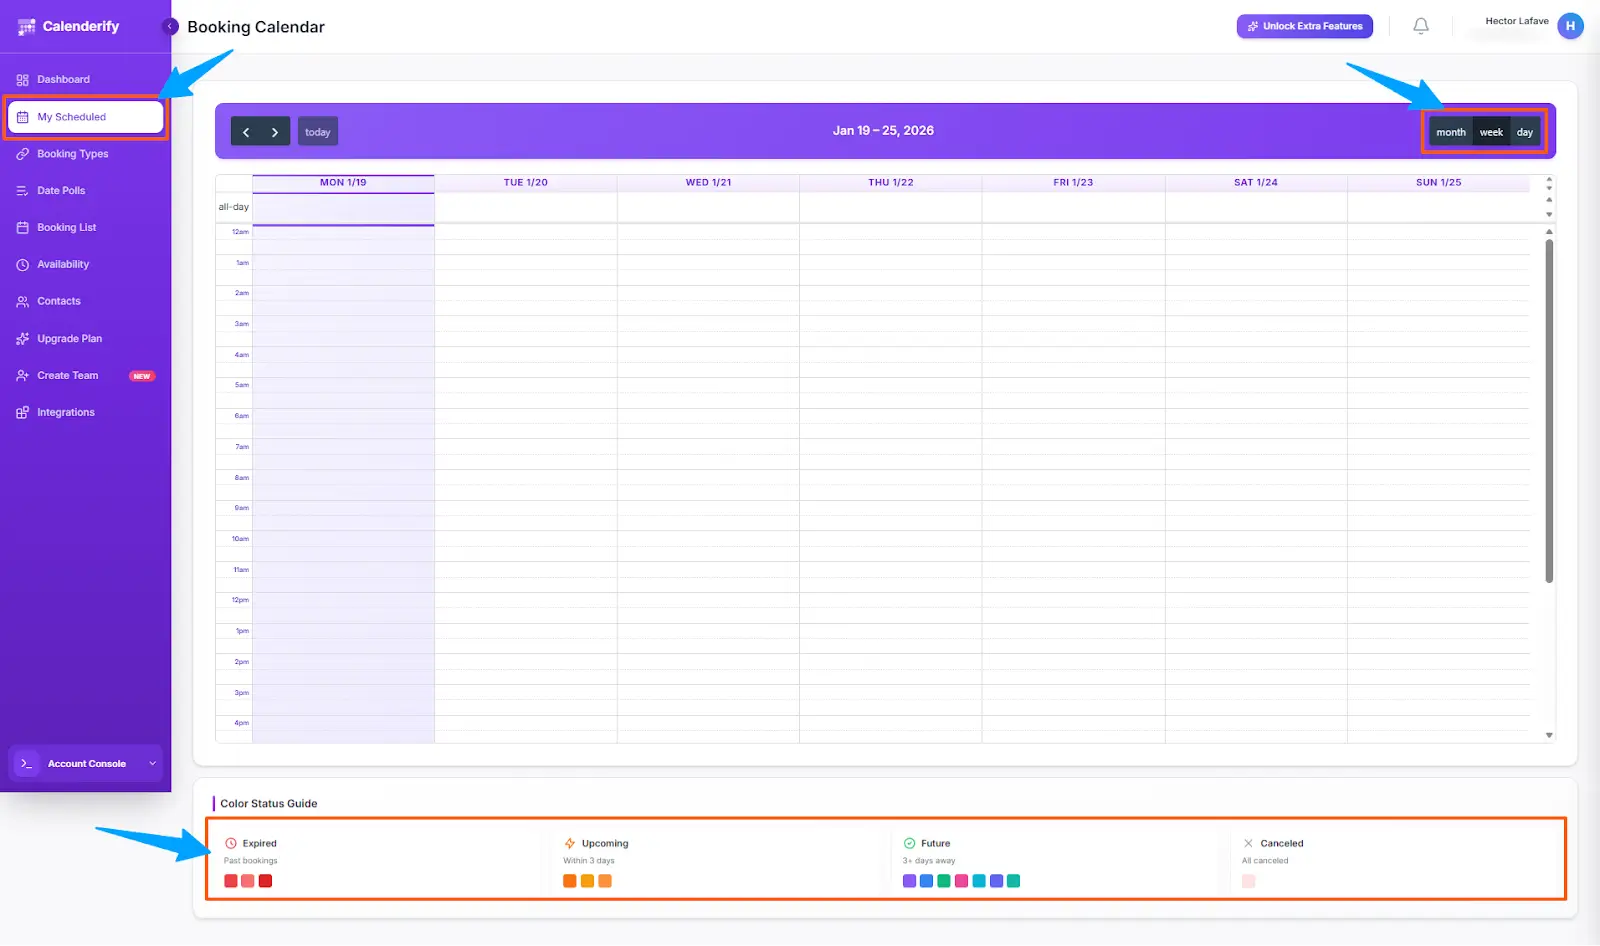
My Schedule
TimelineWhat you can do
My Schedule helps you manage all scheduled meetings from one place.
-
View all upcoming meetings and booking summaries.
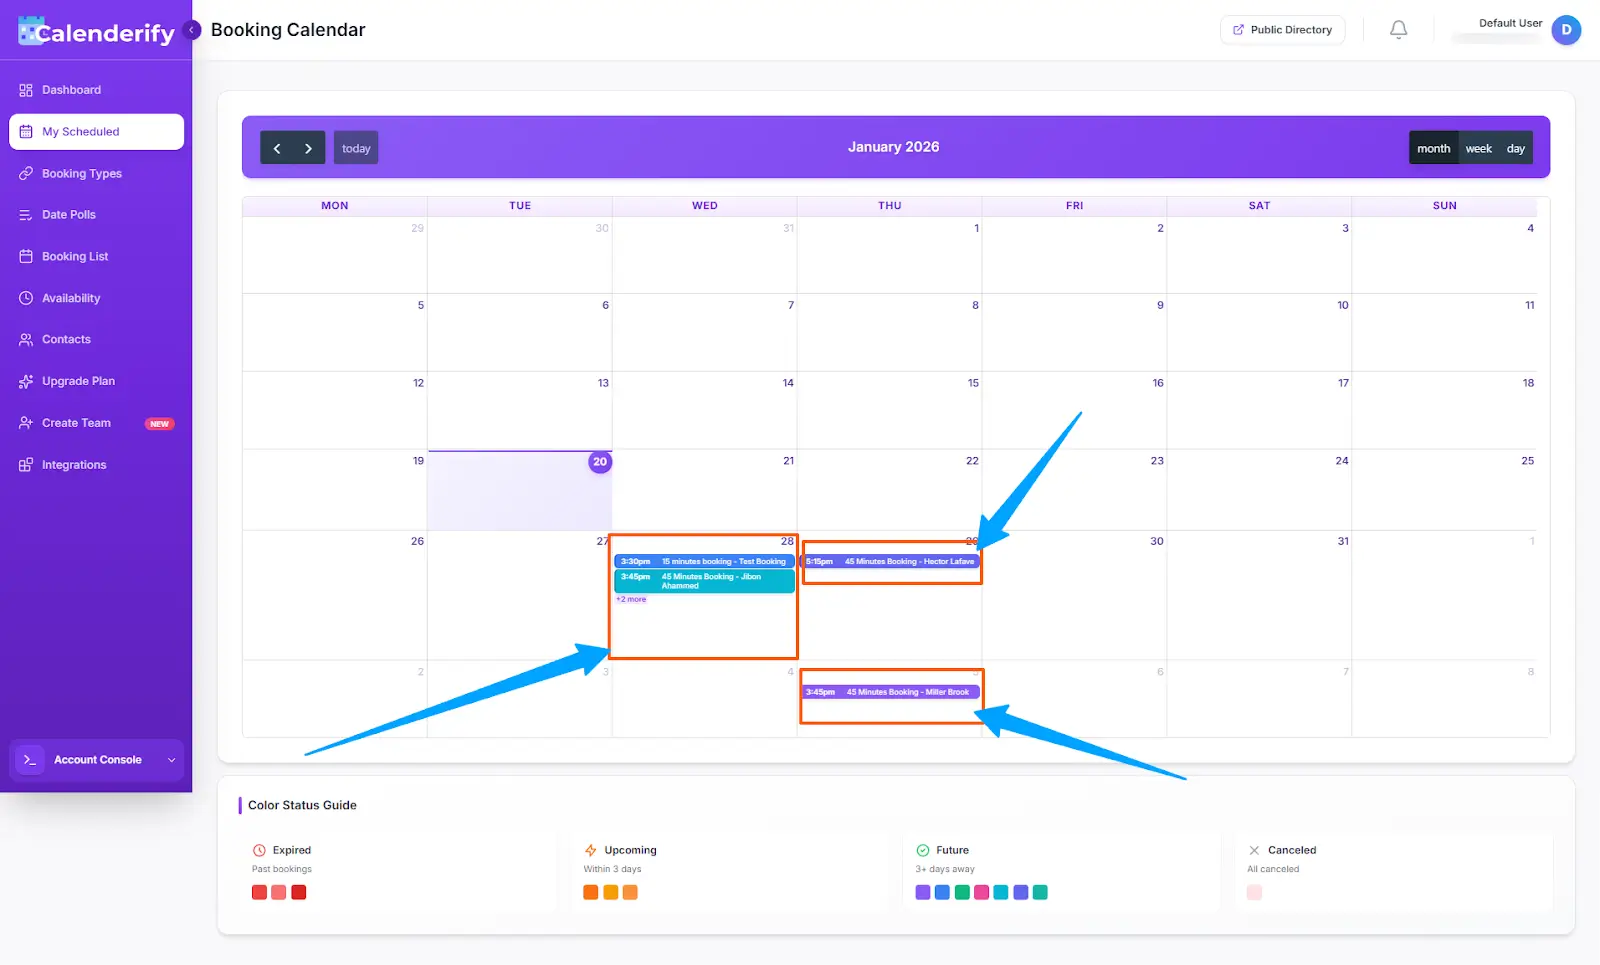 View upcoming meetings and summaries
-
Use month filters to review meetings for a specific period.
 Select a month to review meetings
-
Switch between weekly and daily scheduling views.
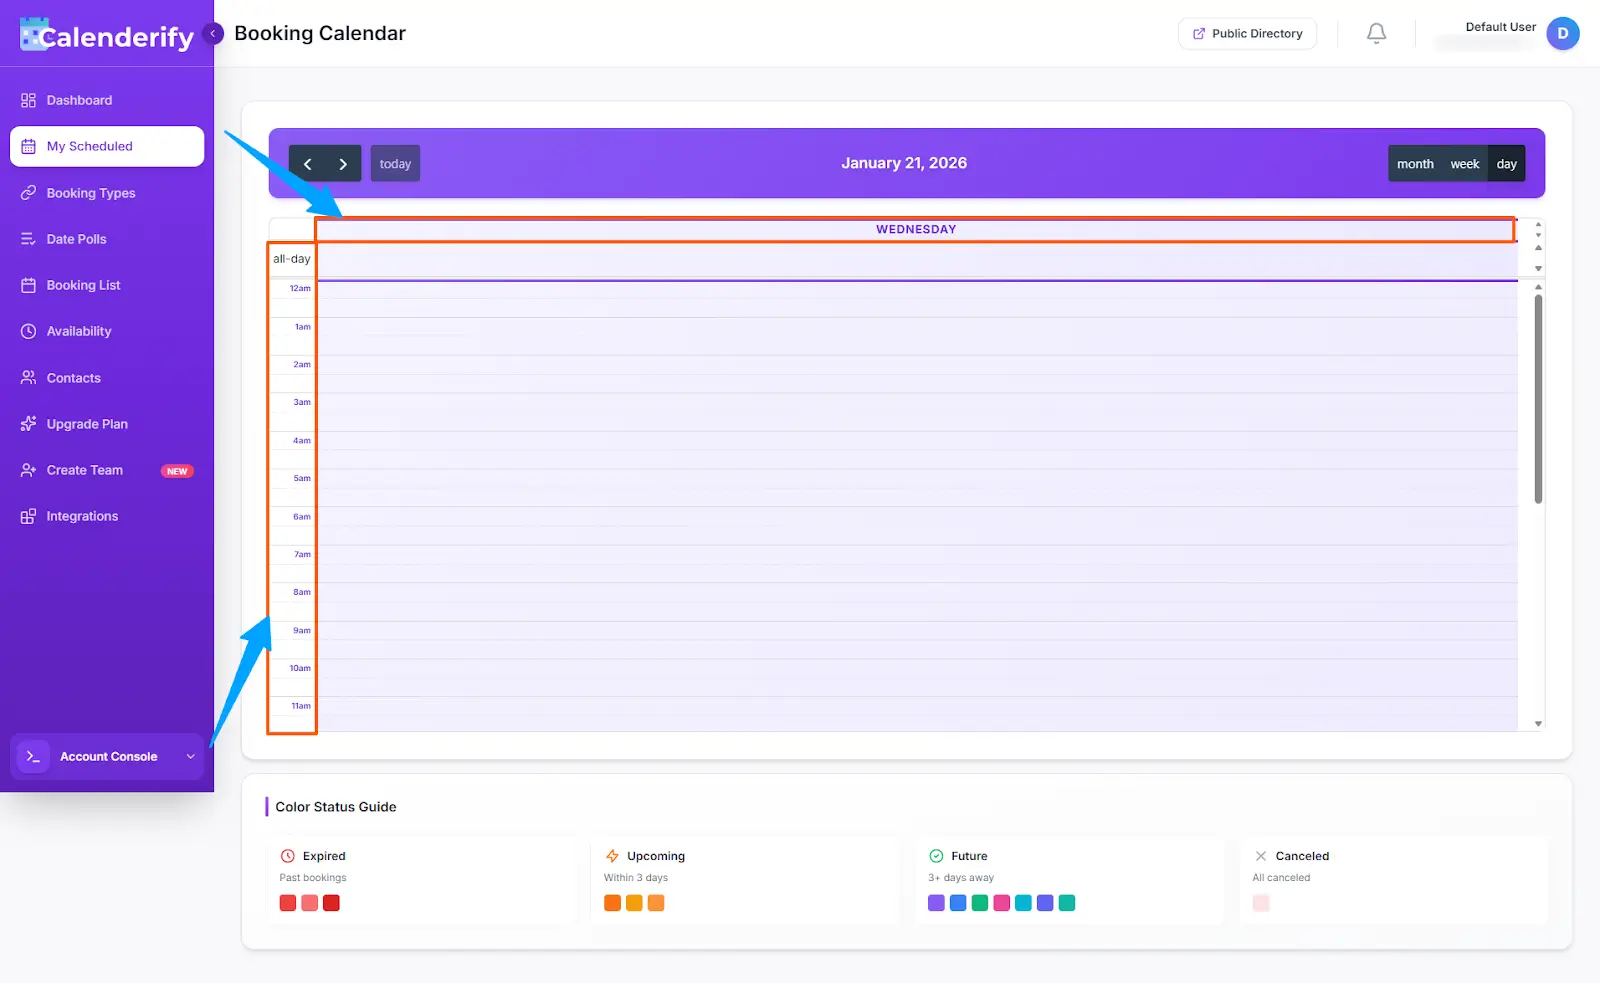 Toggle between weekly and daily views
Booking Types
Booking LinkCreate and customize booking types
Booking Types let you create a booking link that opens a landing page where guests can book your available time.
-
Create a booking type and set details like duration and scheduling rules.
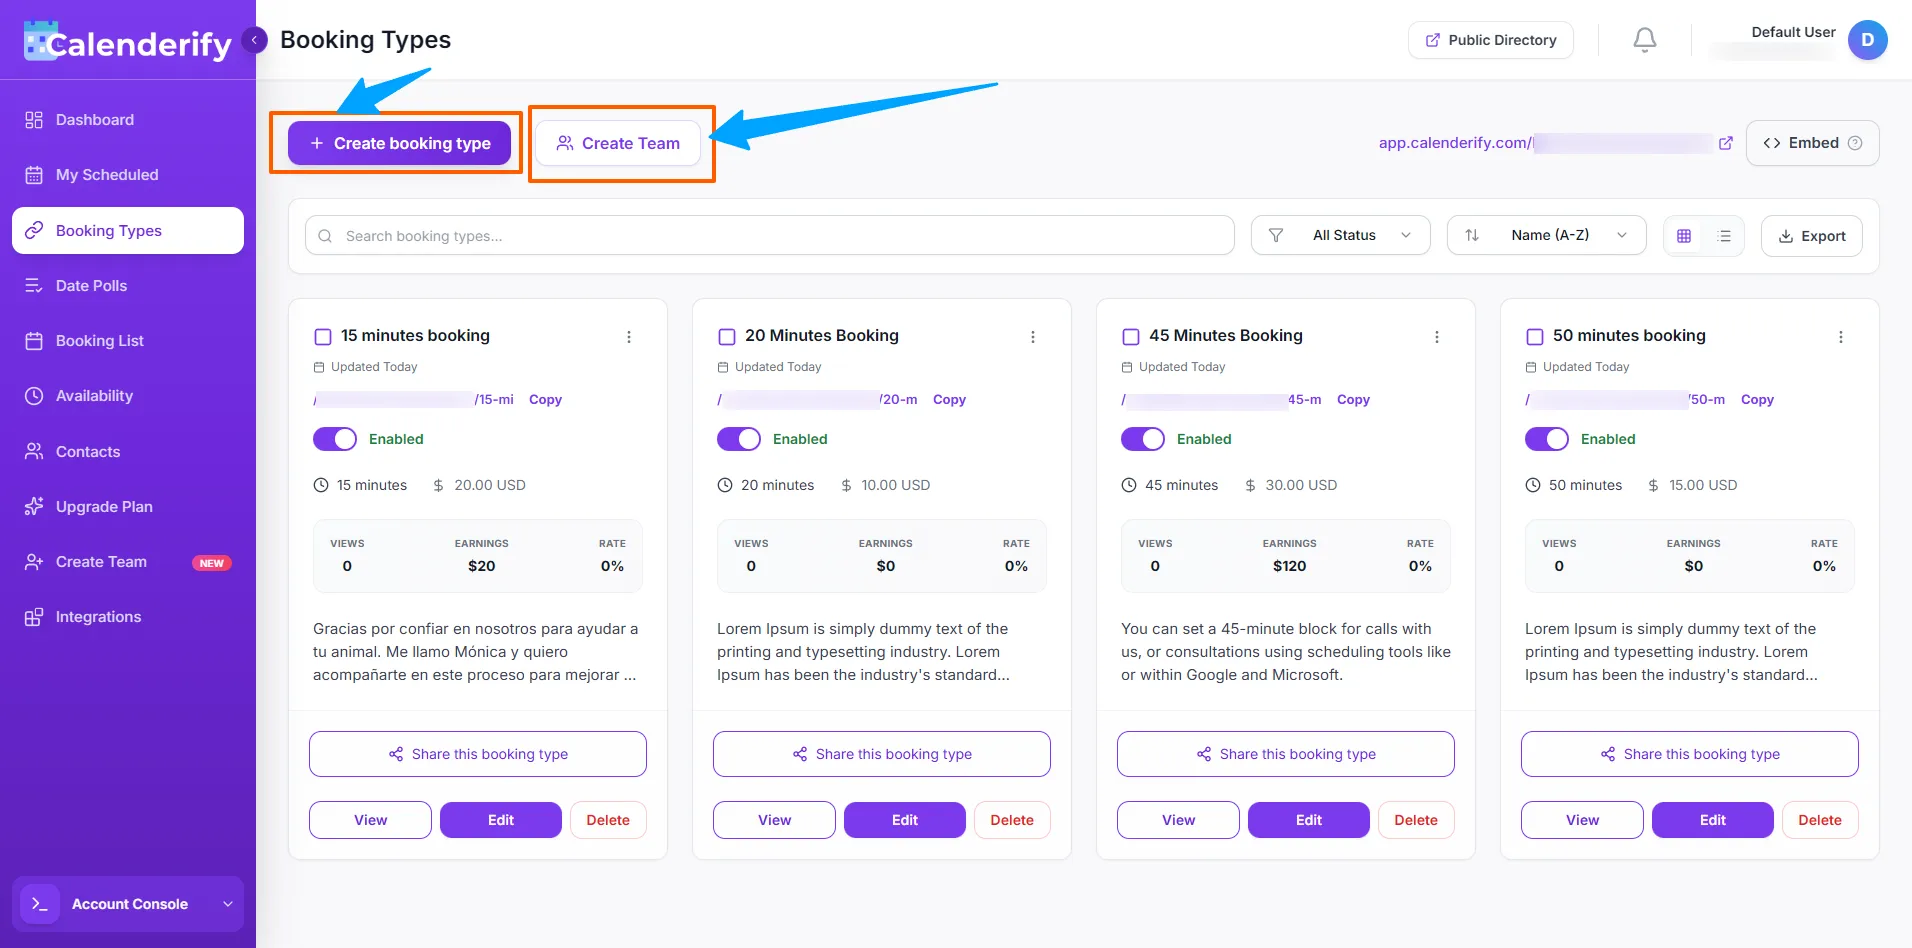 Create a booking type and configure details
-
Customize it as your personal canvas.
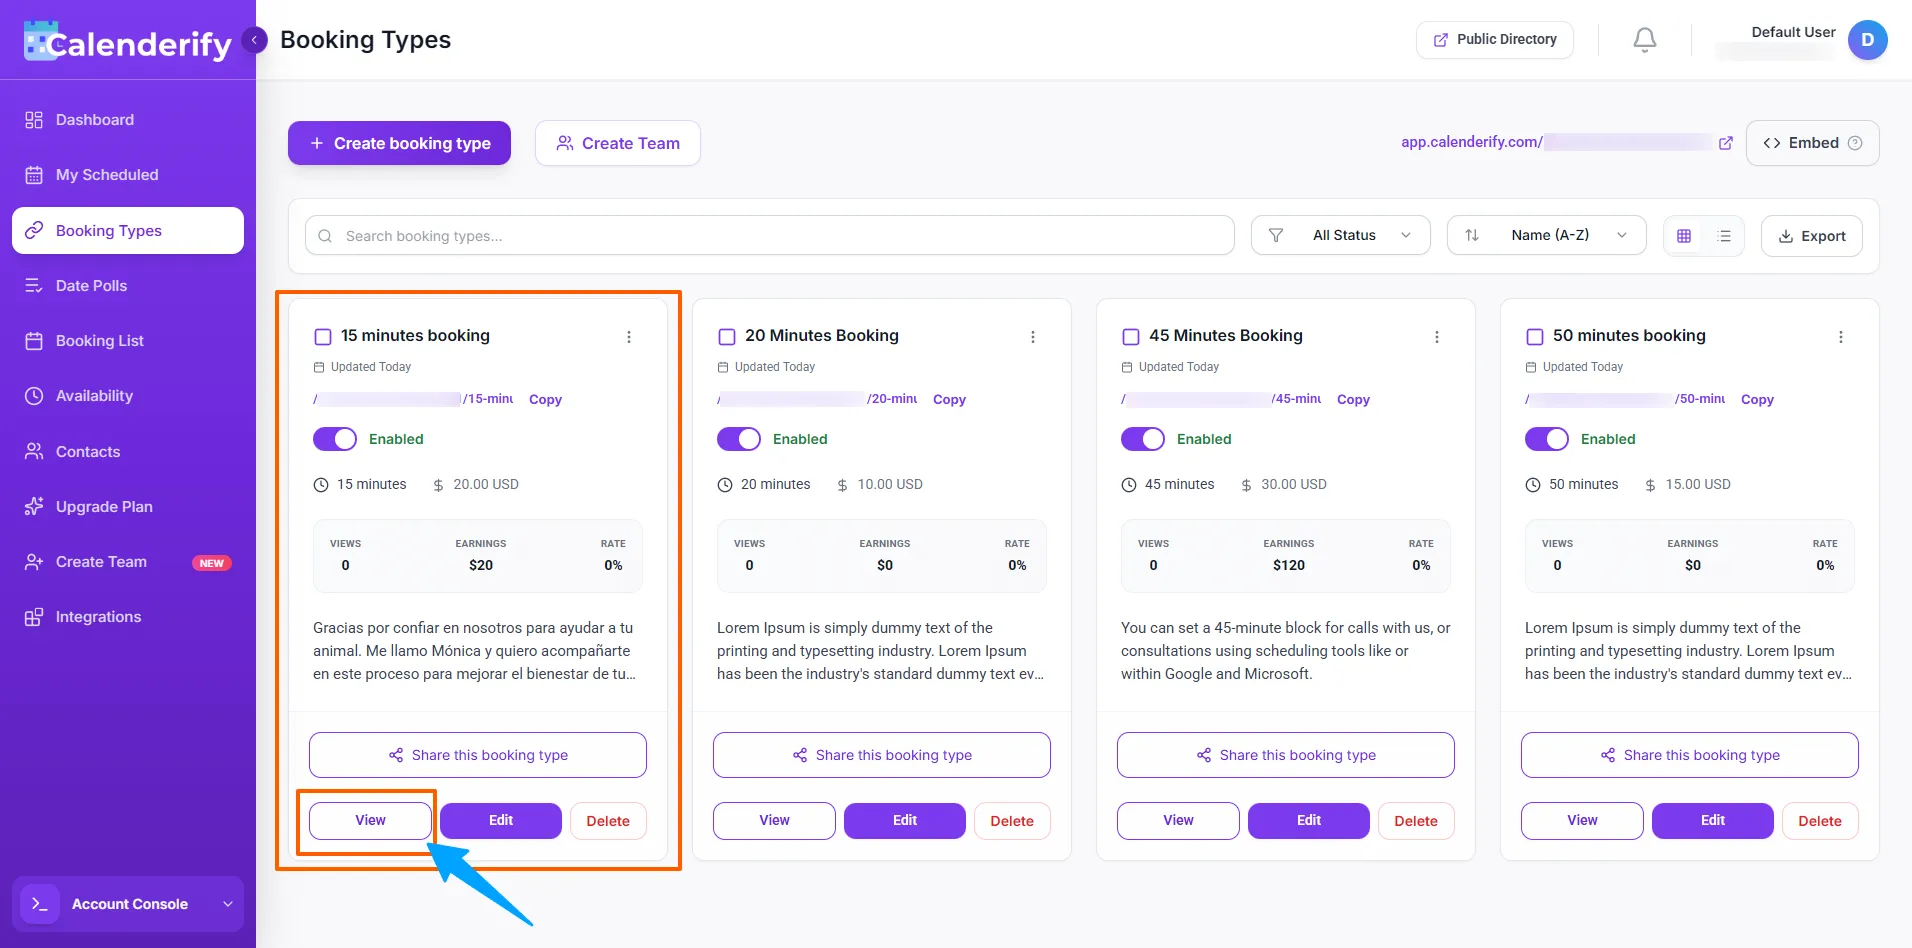 Customize your booking landing page
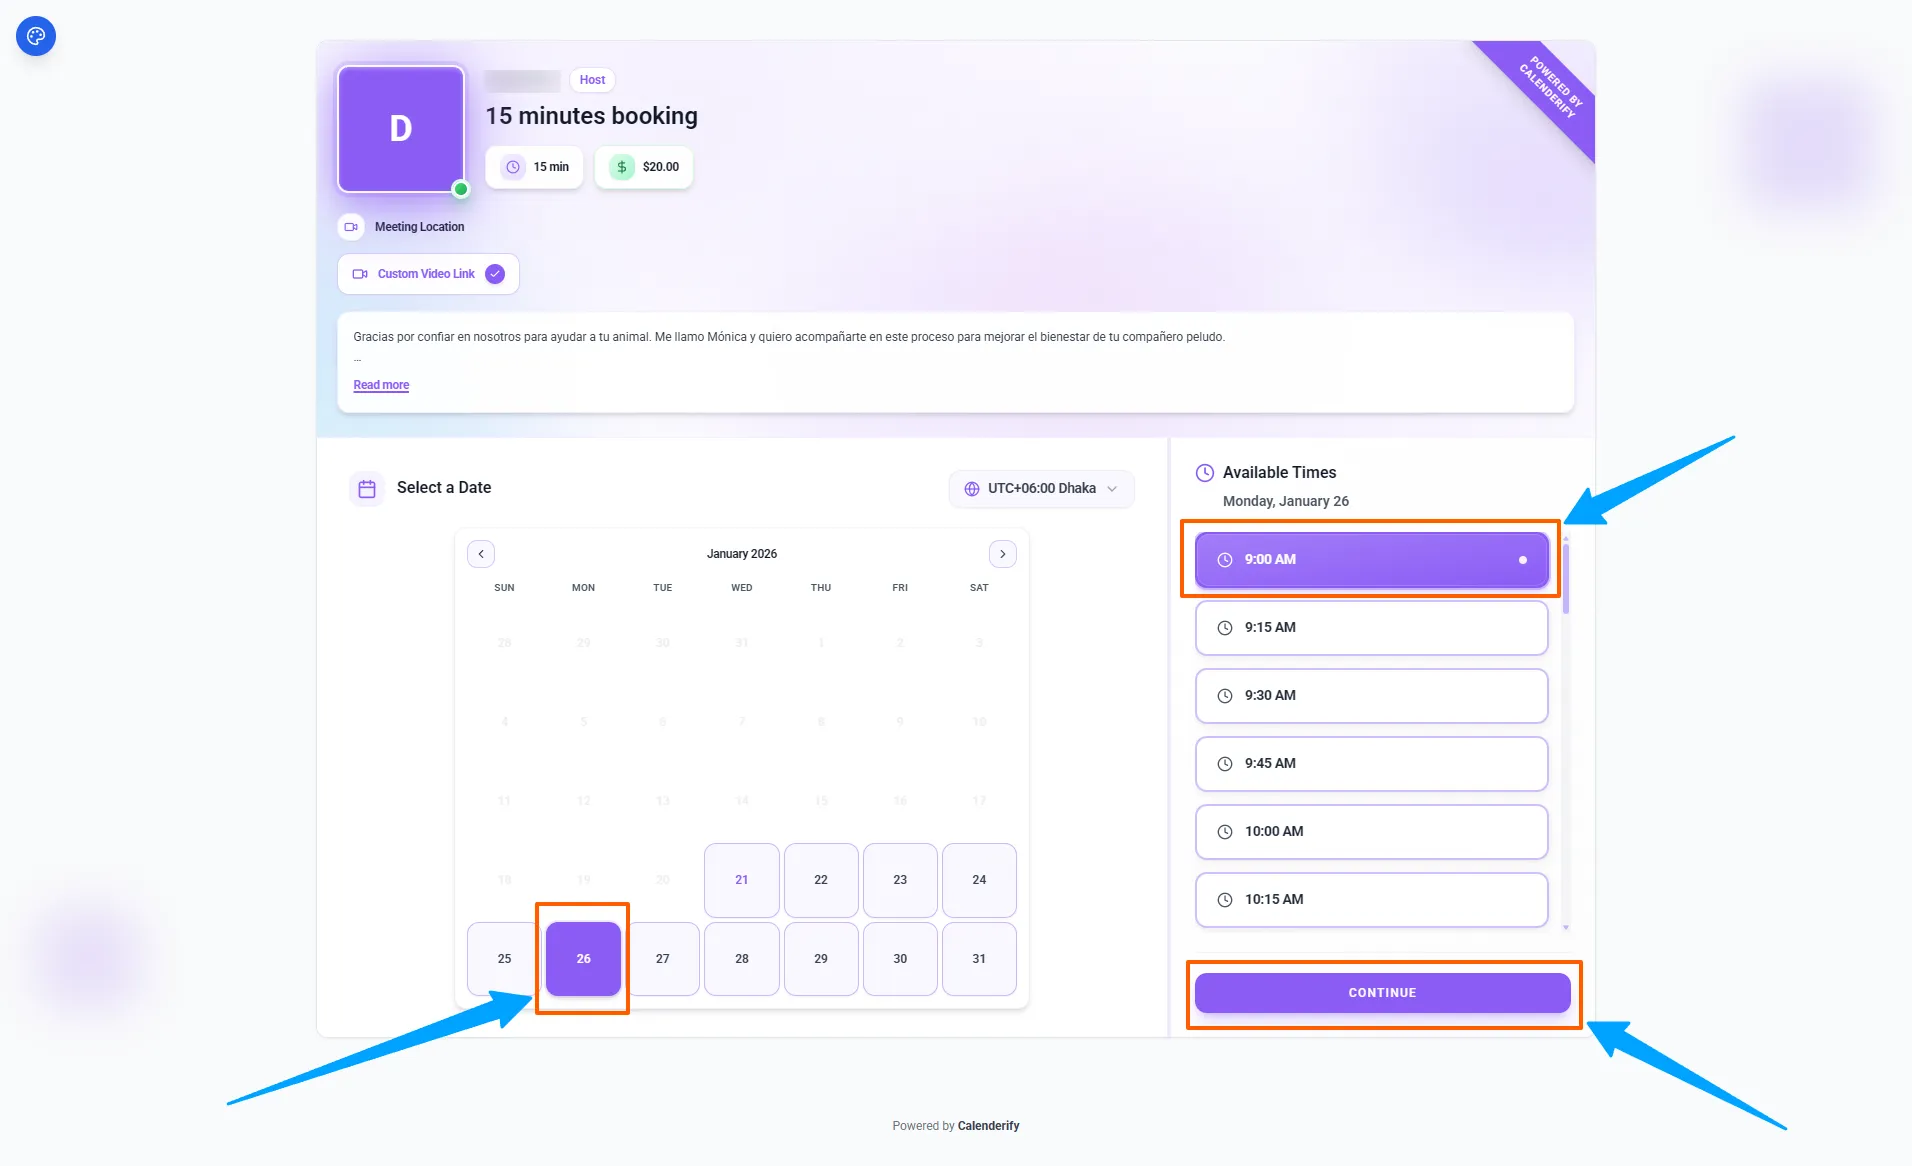 To book your available slot, you can schedule the time that works best for you.
 Then you can customize it as their personal canvas.
- Share the booking link to start receiving bookings.
Tip: Share option includes a booking landing page link that guests can open and book from.
Date Polls
Group SchedulingCreate a poll for group availability
Date Polls help you collect availability from multiple participants for seminars or group meetings.
-
Create a date poll and add multiple date and time options.
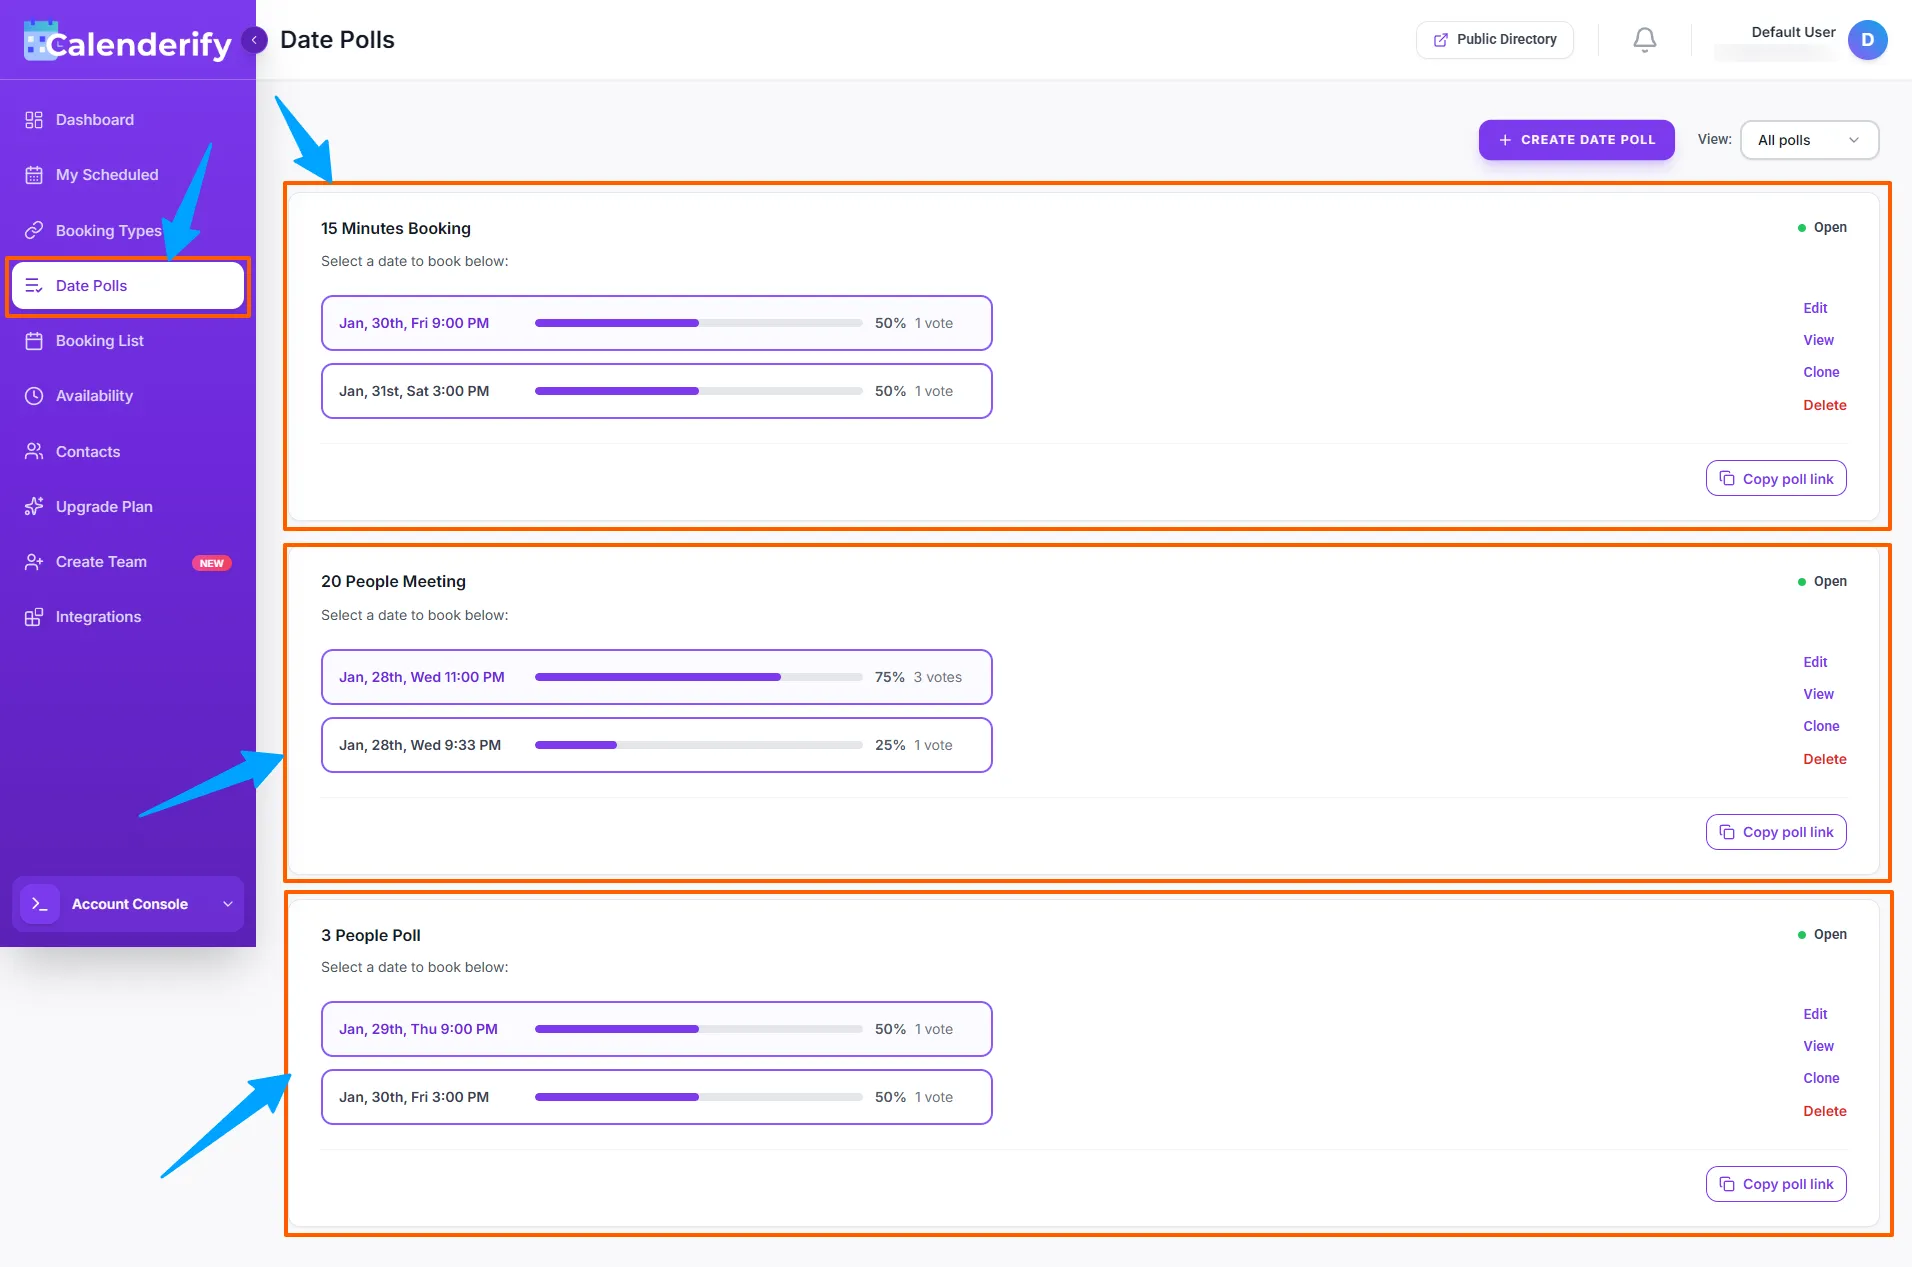 Create a poll and add date and time options
-
Managing date polls is easy. You can edit options anytime.
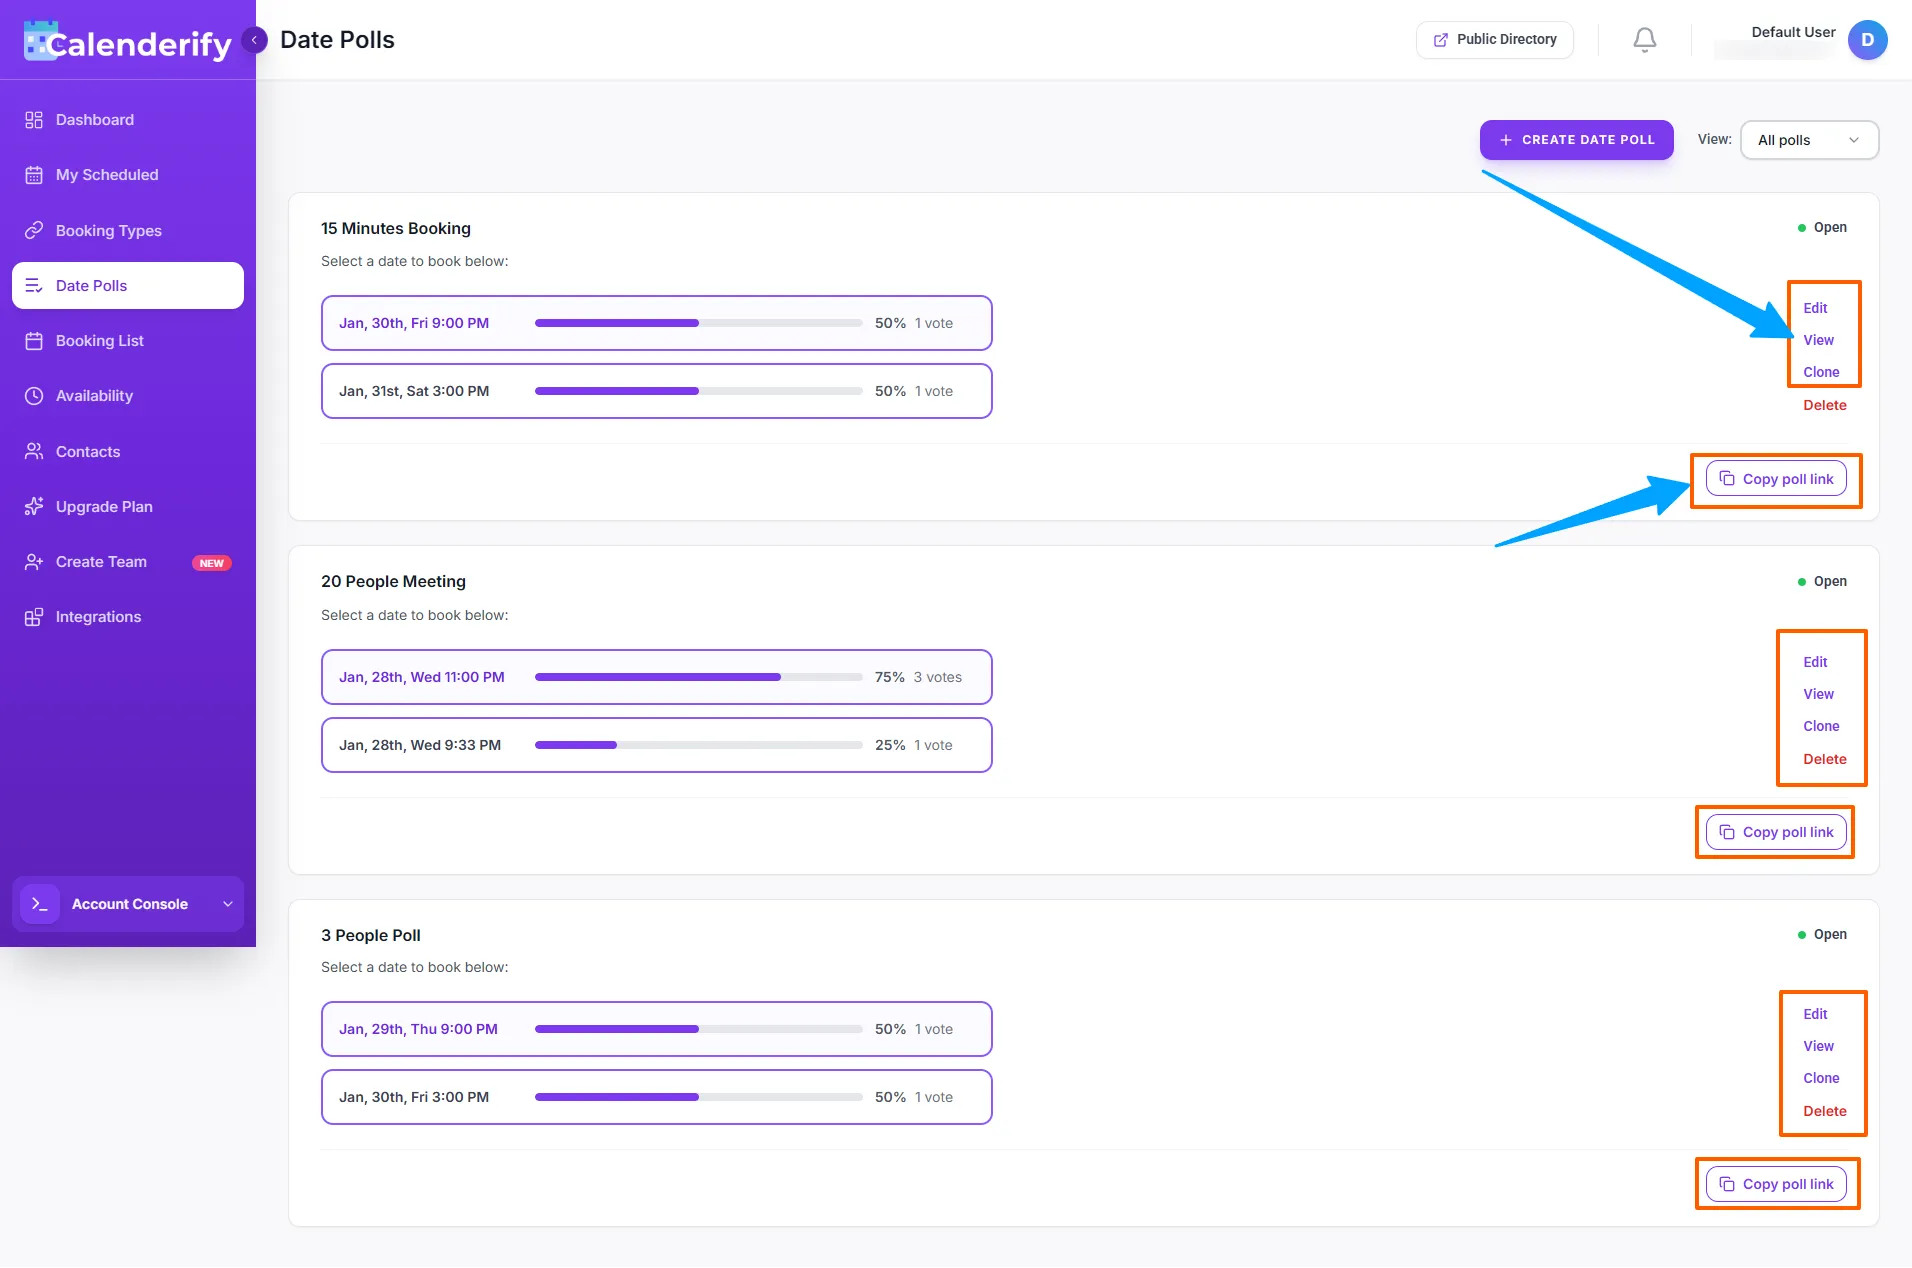 Edit options and manage participants
-
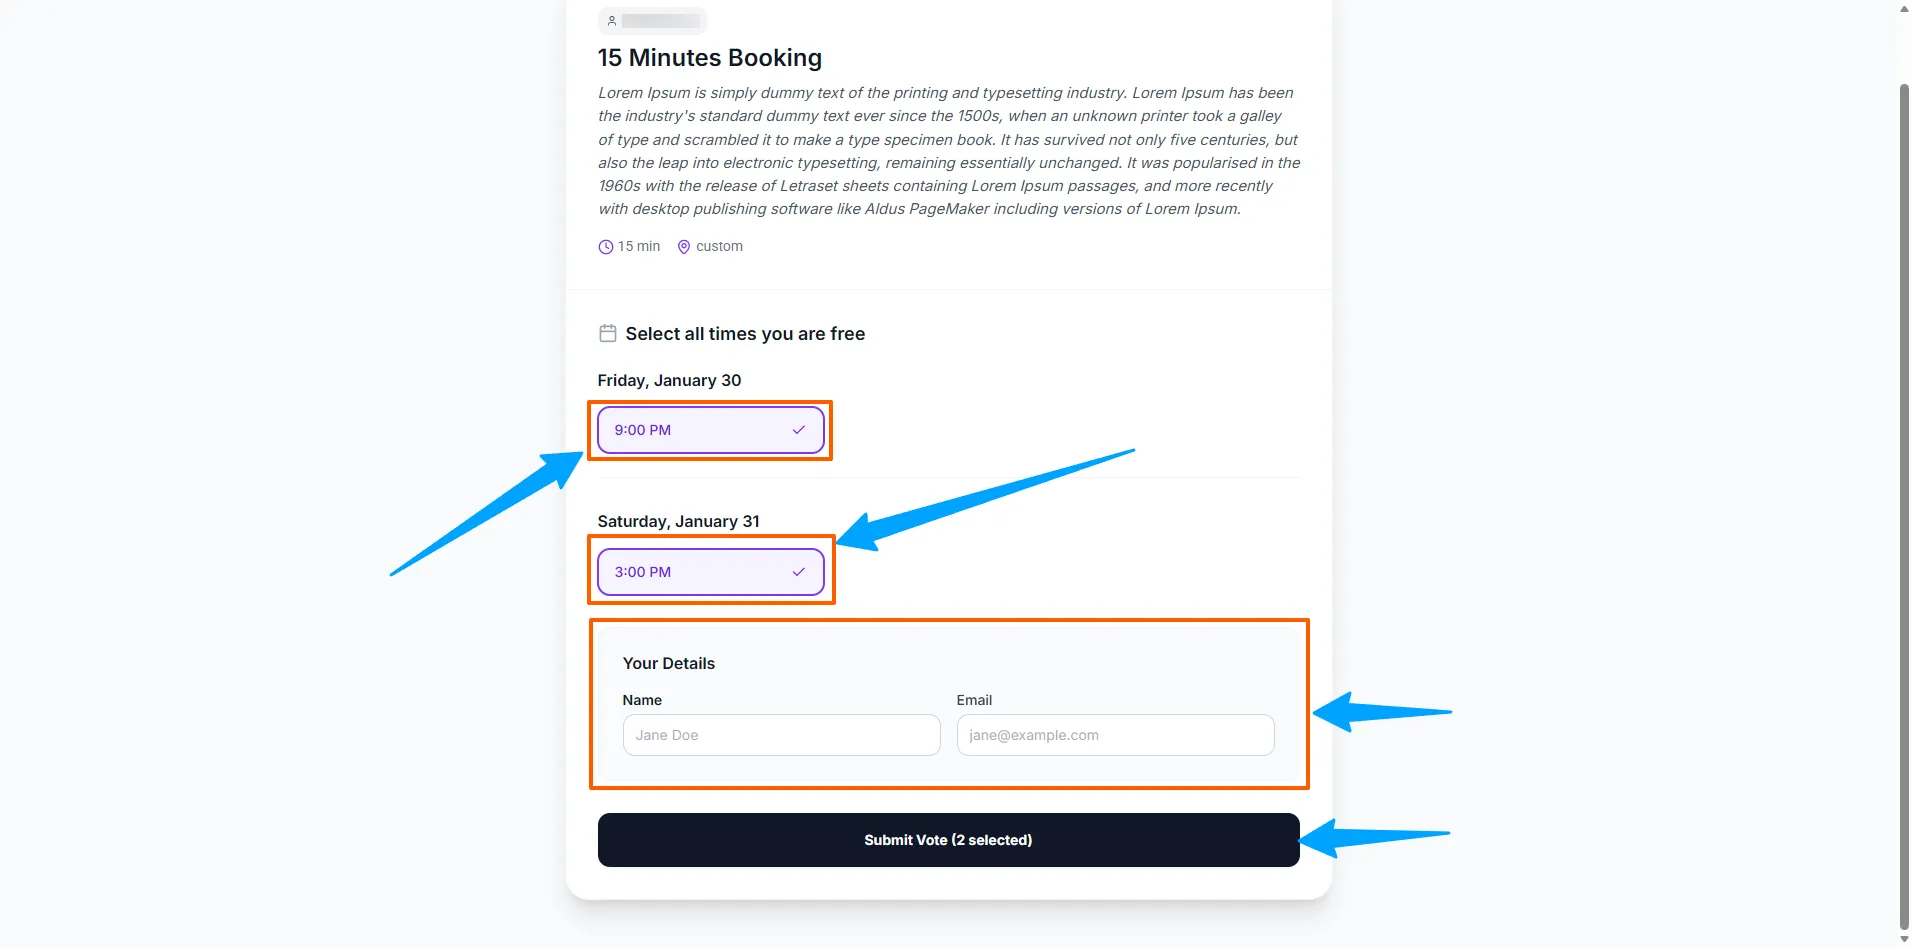
Create a conference based on individual voting slots selected by participants.
Once votes are collected, you can finalize the time that works best for everyone.
 Turn participant votes into a confirmed conference time
-
Send invitations using participant names and email invitations.
 Invite participants via email
Bookings List
Confirmed BookingsRequired fields
When creating or updating a booking, all required fields must be filled. If not, an error message will appear.
-
You must fill out all required fields to get results
 Complete all required fields to avoid errors
-
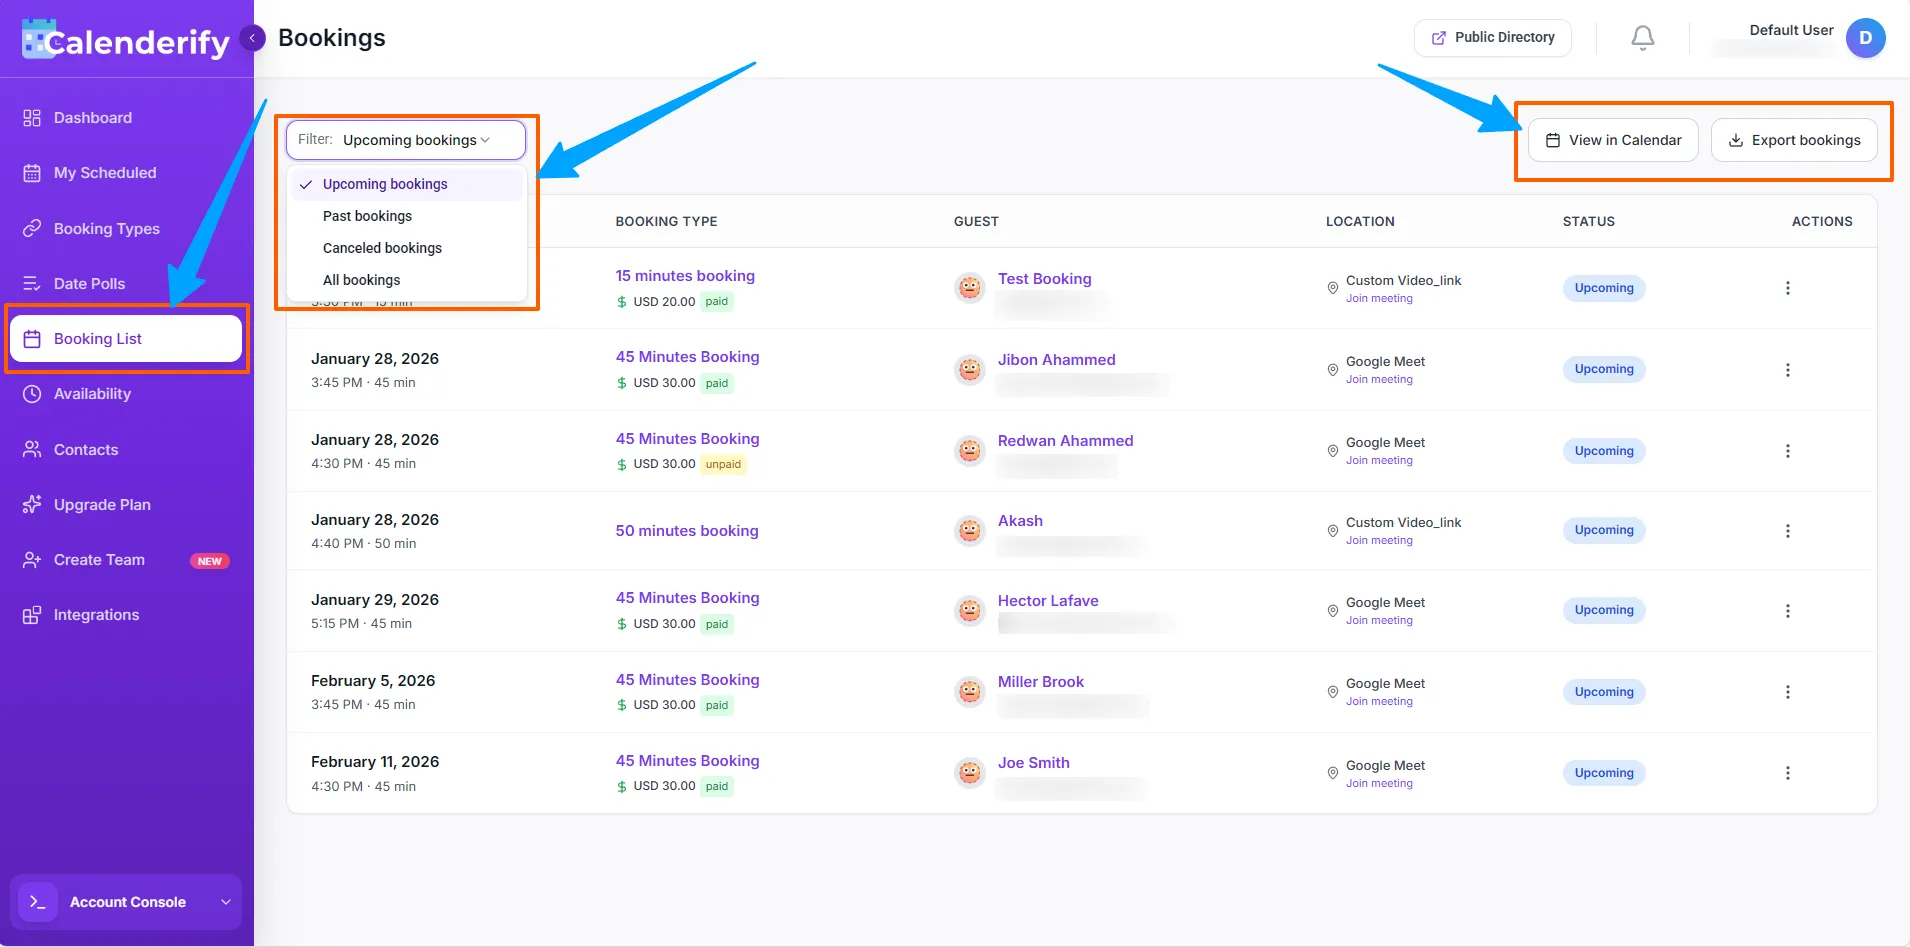
Once data is complete, you will see the final result in the Bookings List and manage them.
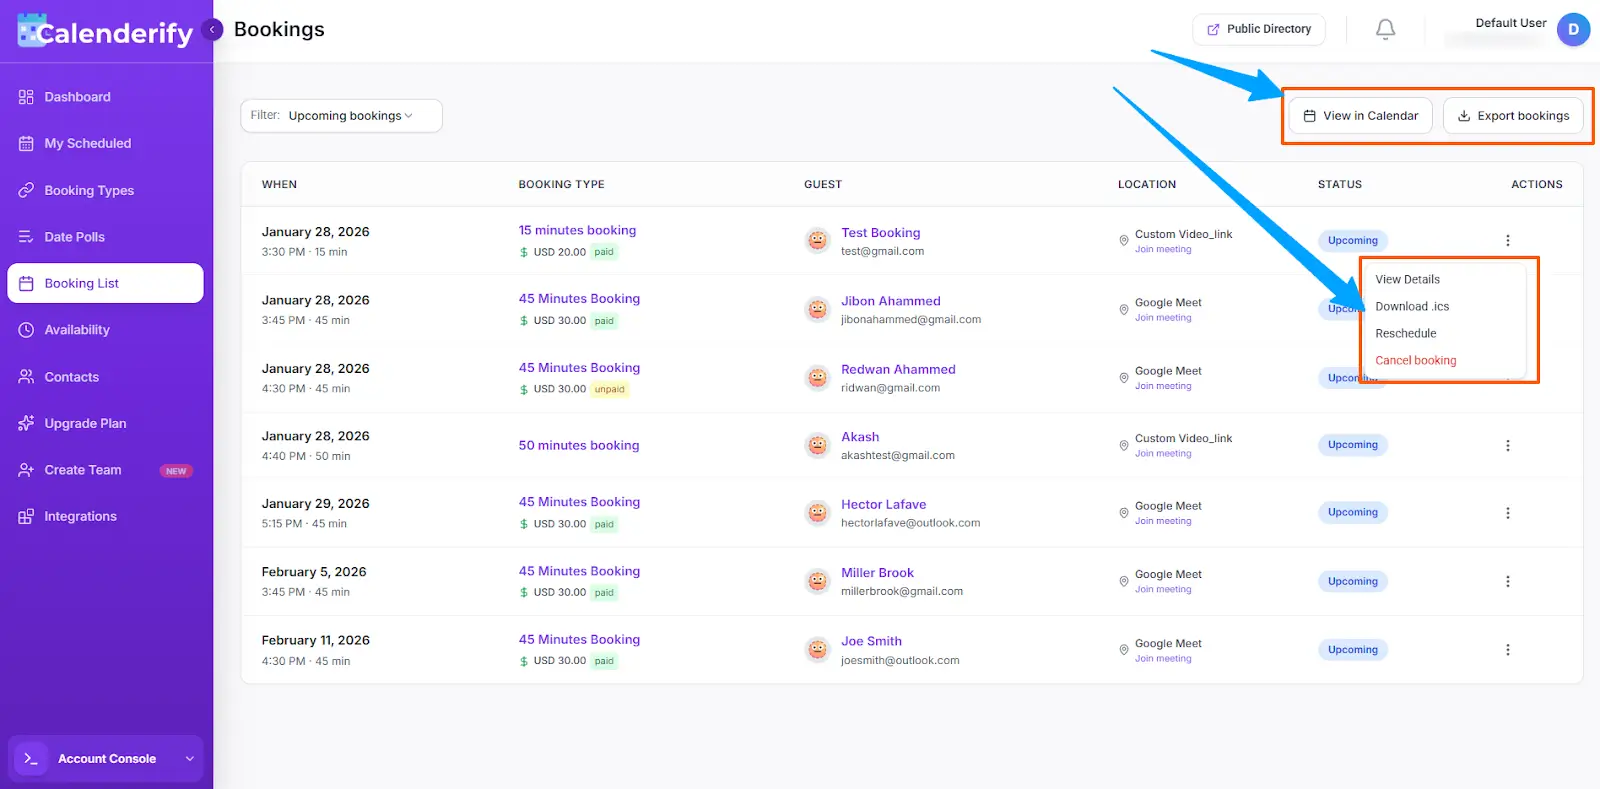 View confirmed bookings in the list
Availability
Time SlotsManage availability time slots
Availability controls when others can book you. You can manage availability time slots easily.
-
Set the time slots you want to be available for bookings.
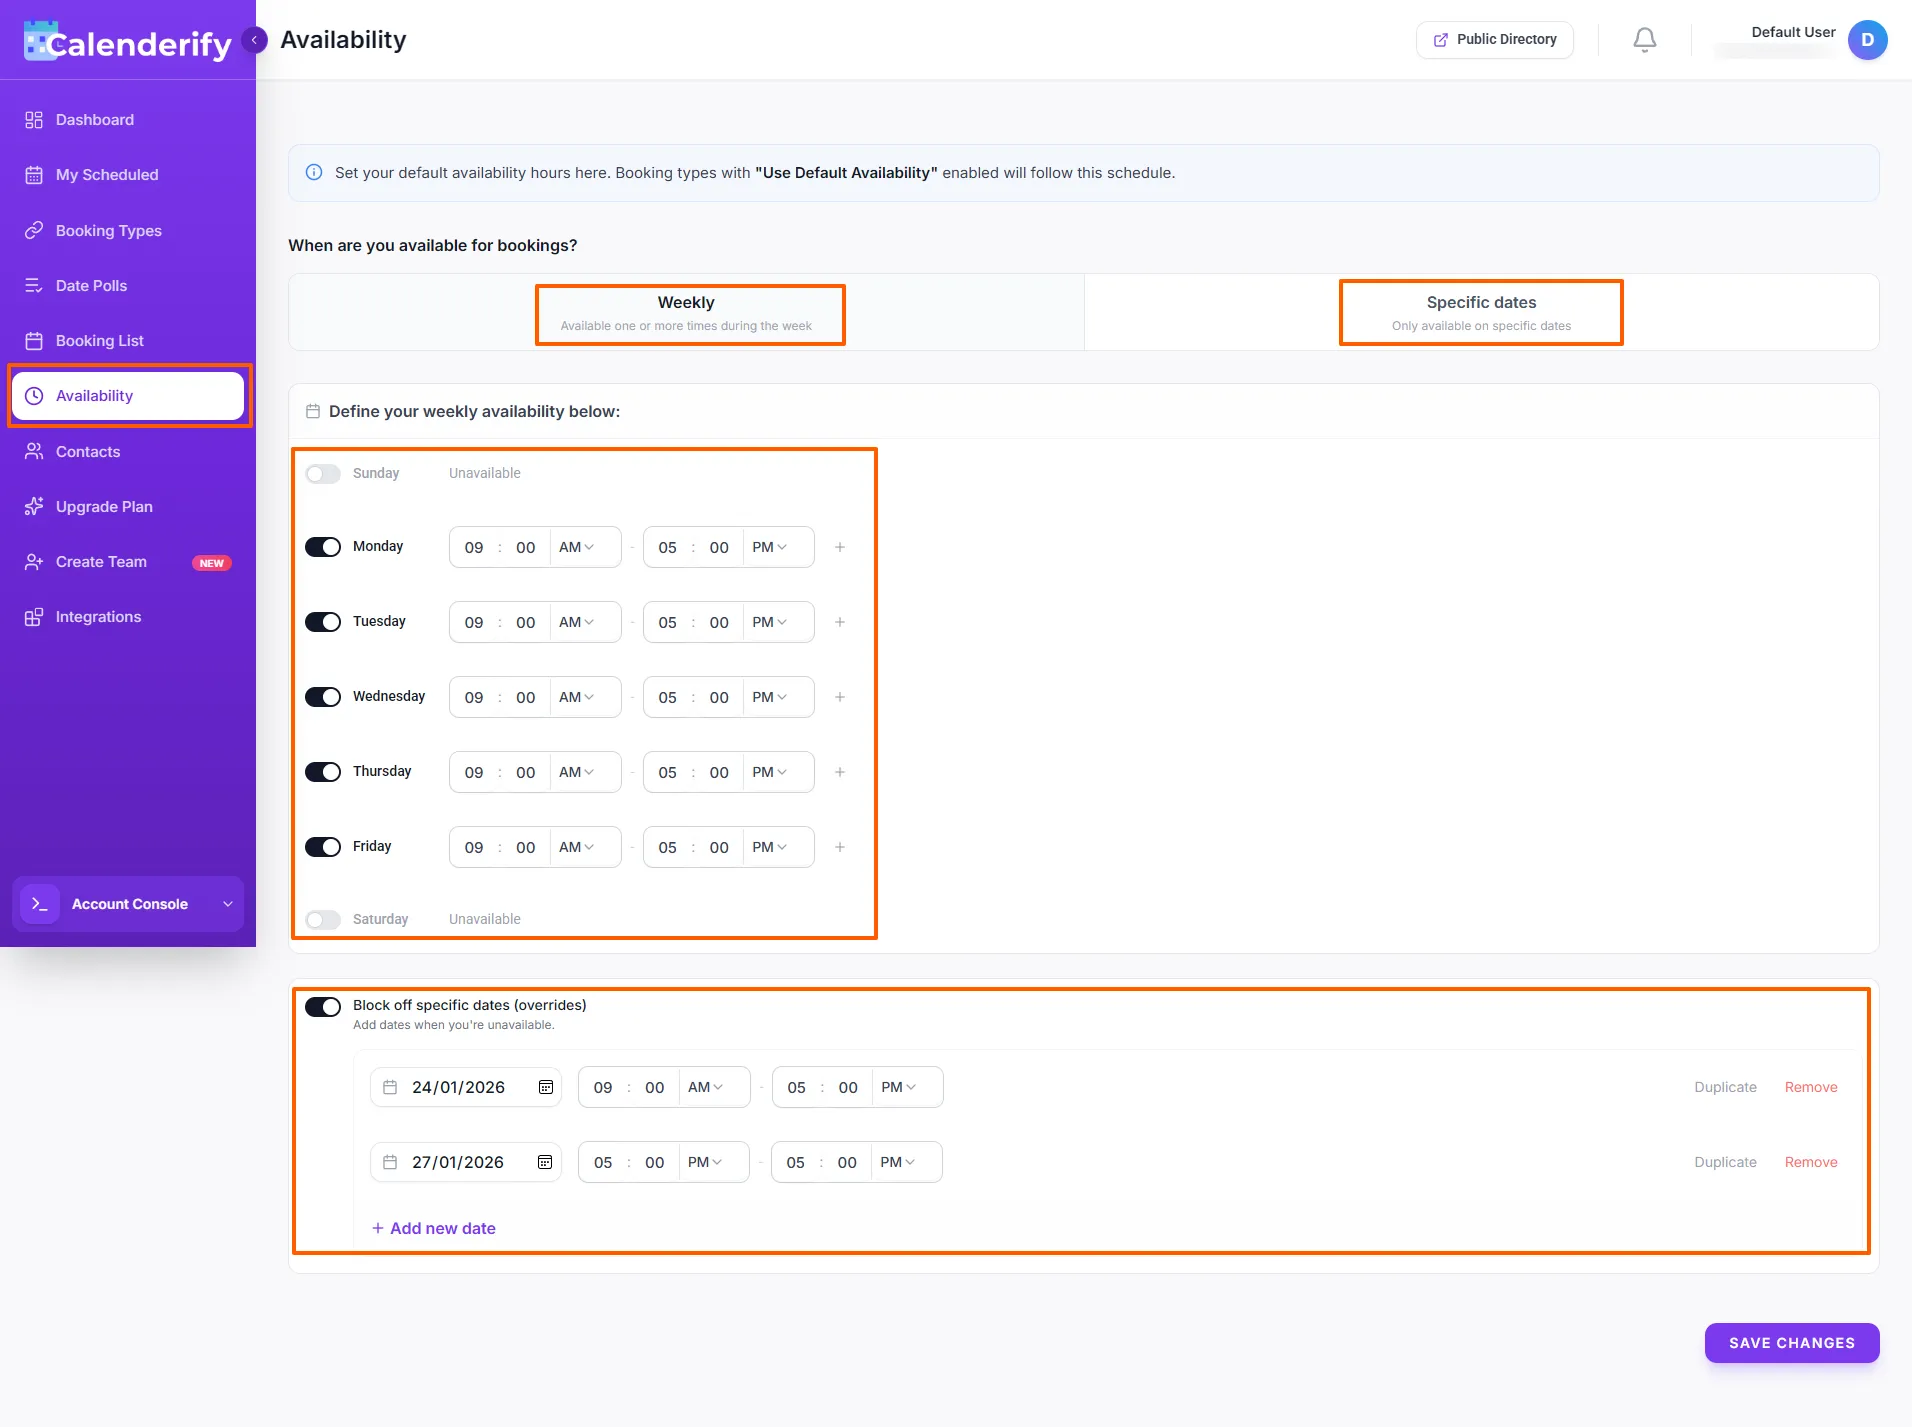 Set your available time slots
- Update availability when your plans change.
- Your booking pages use these availability rules to show open times.
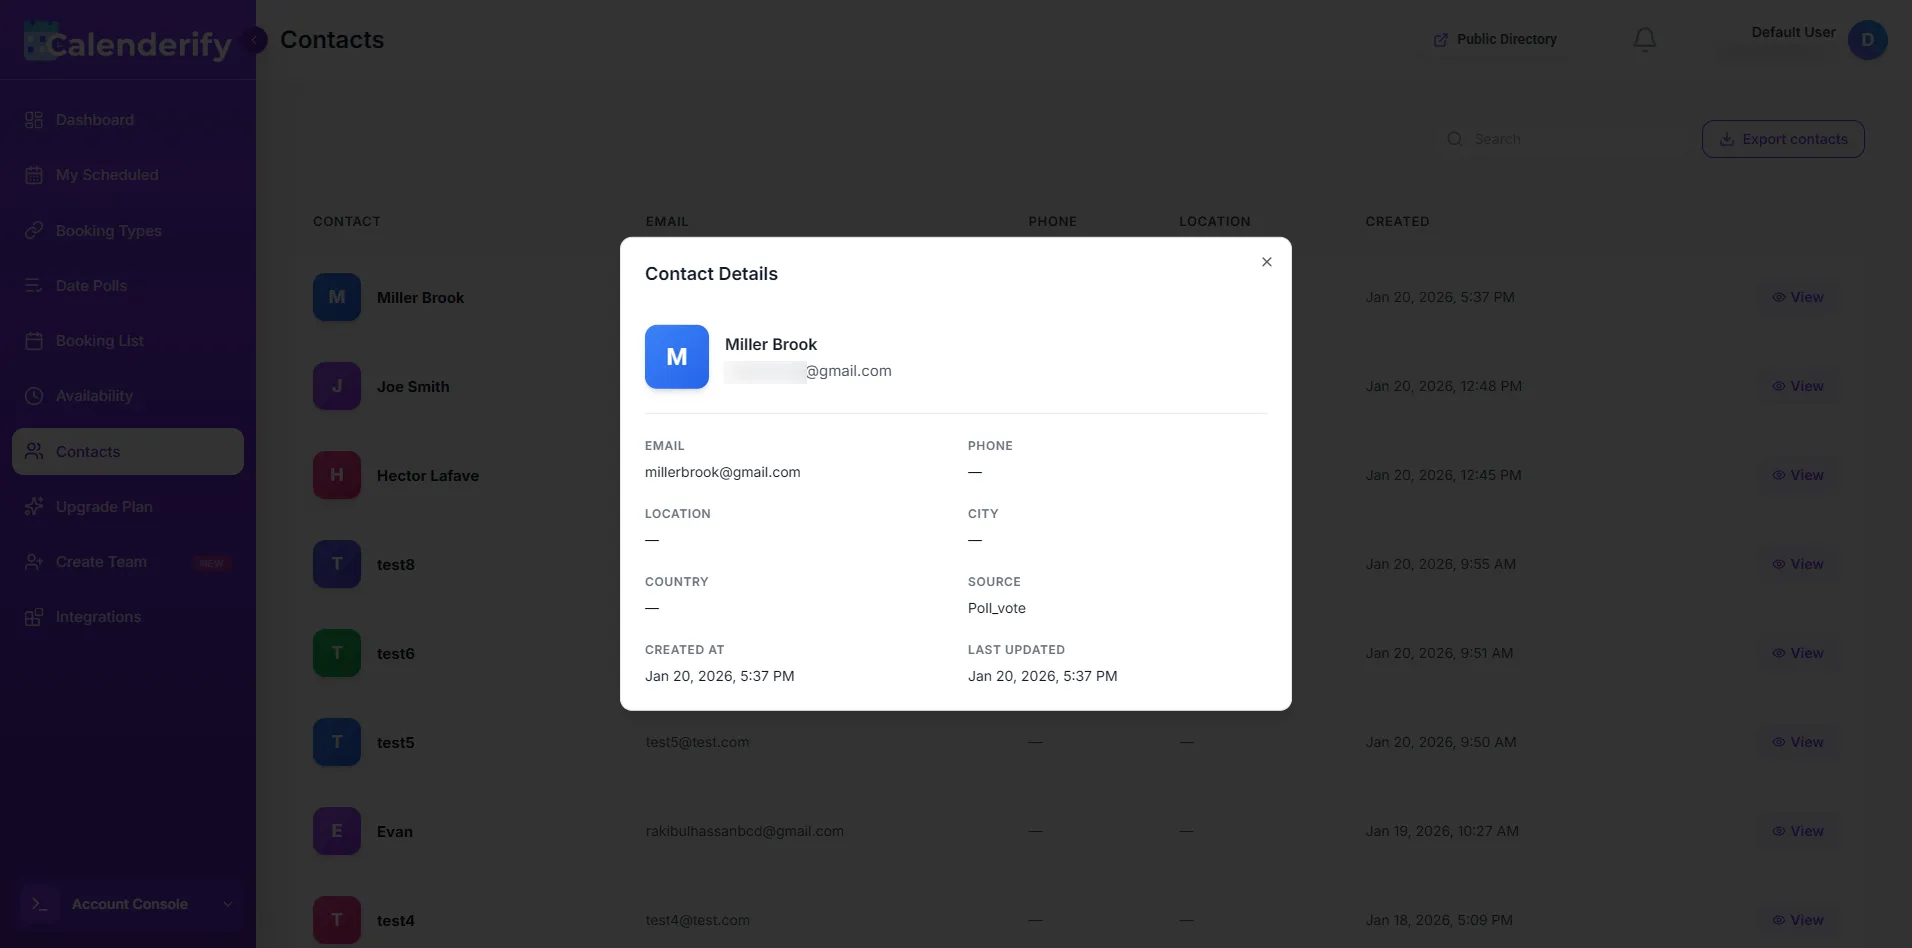
Contacts
ParticipantsParticipant contact details
Contacts store participant information for bookings and polls.
-
View participant names and email addresses.
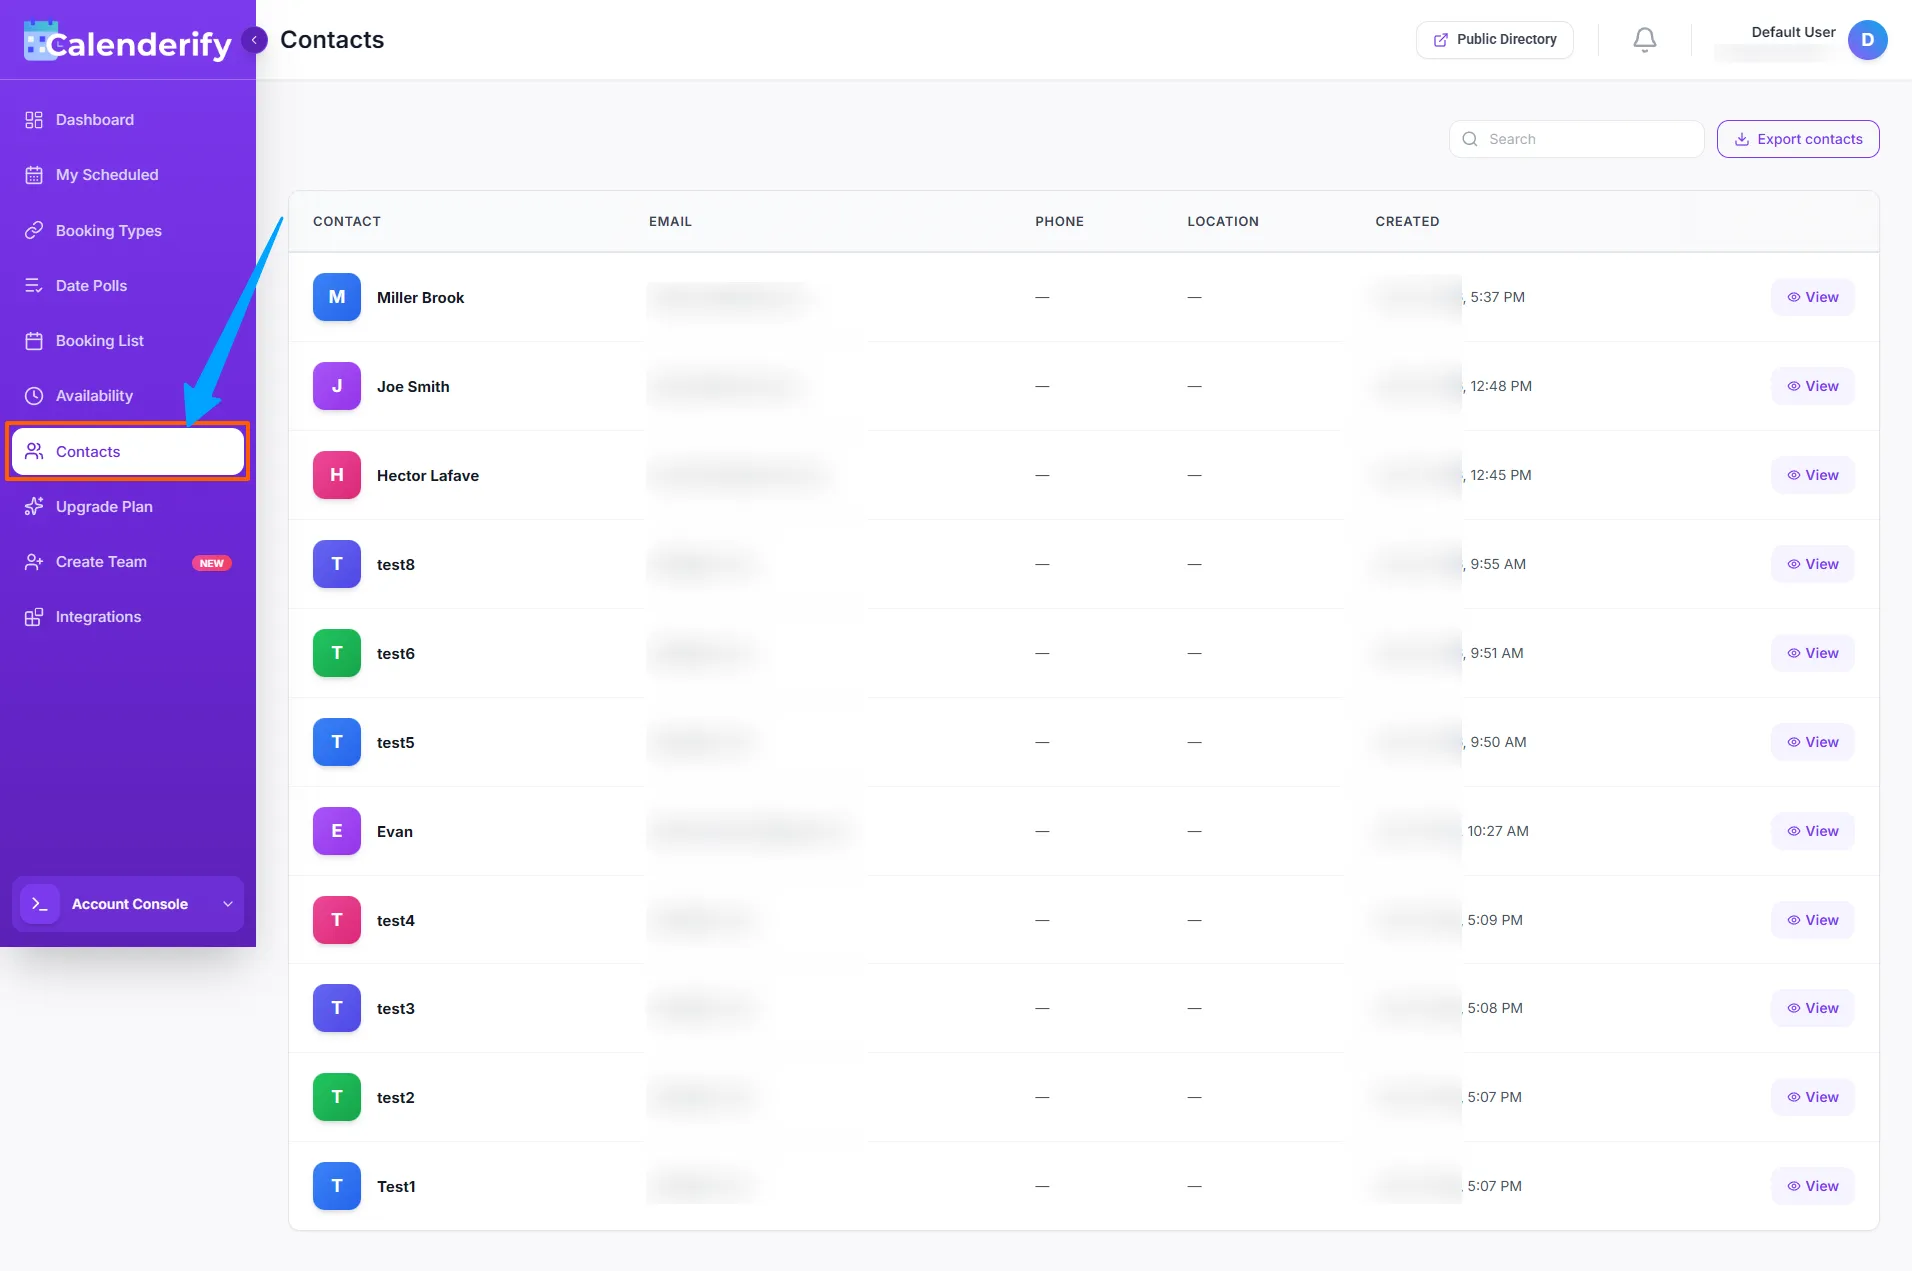 See participant names and emails
- Use participant details when sending invitations.
-
Access participant lists and contact details for coordination and follow-ups.
 Use contact lists for follow-ups
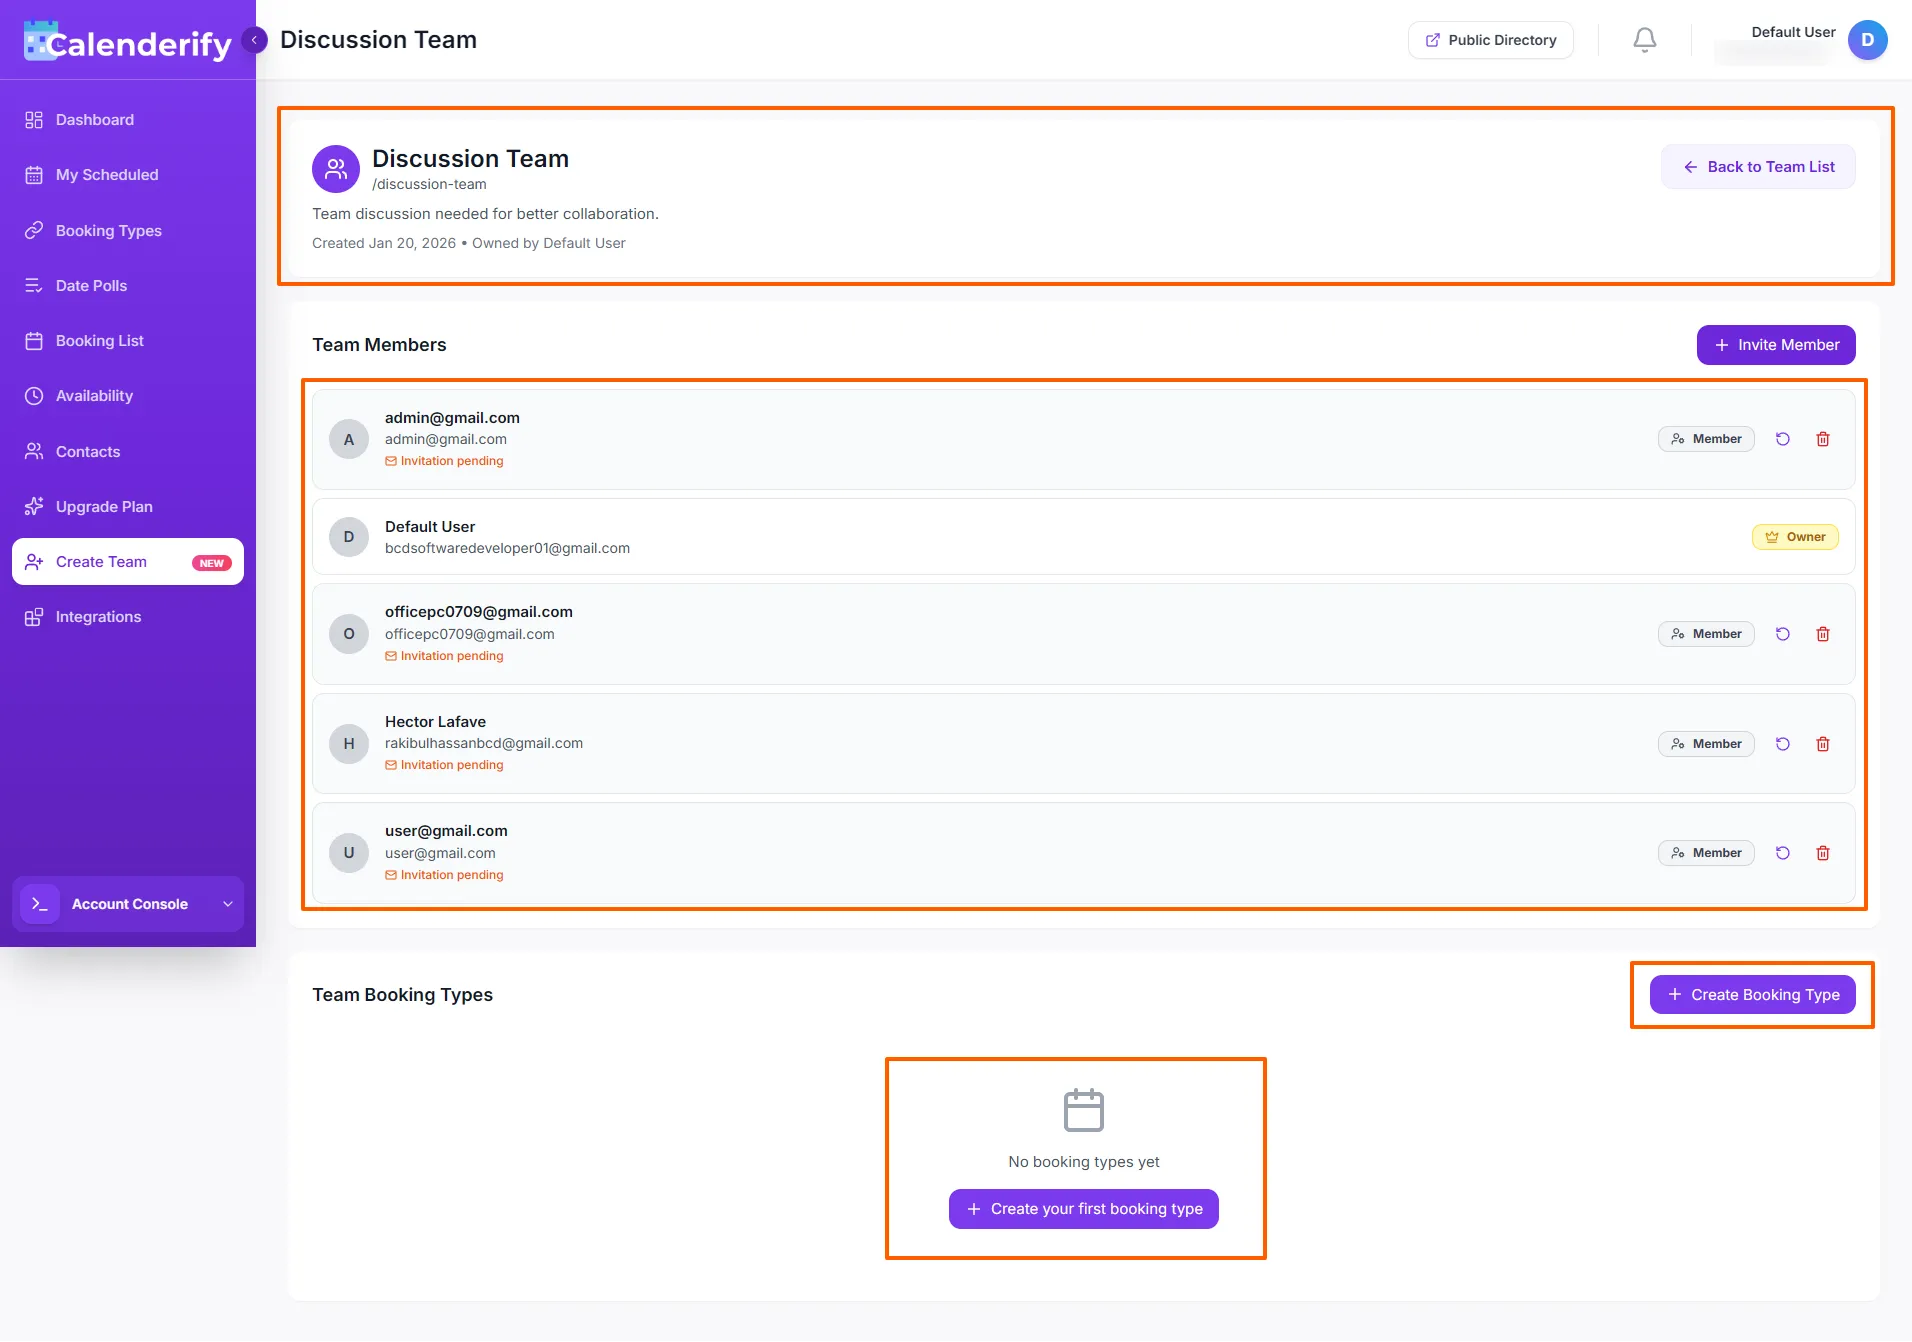
Teams
CollaborationManage teams
Teams help you manage meetings with collaboration and shared scheduling.
-
Create and manage teams.
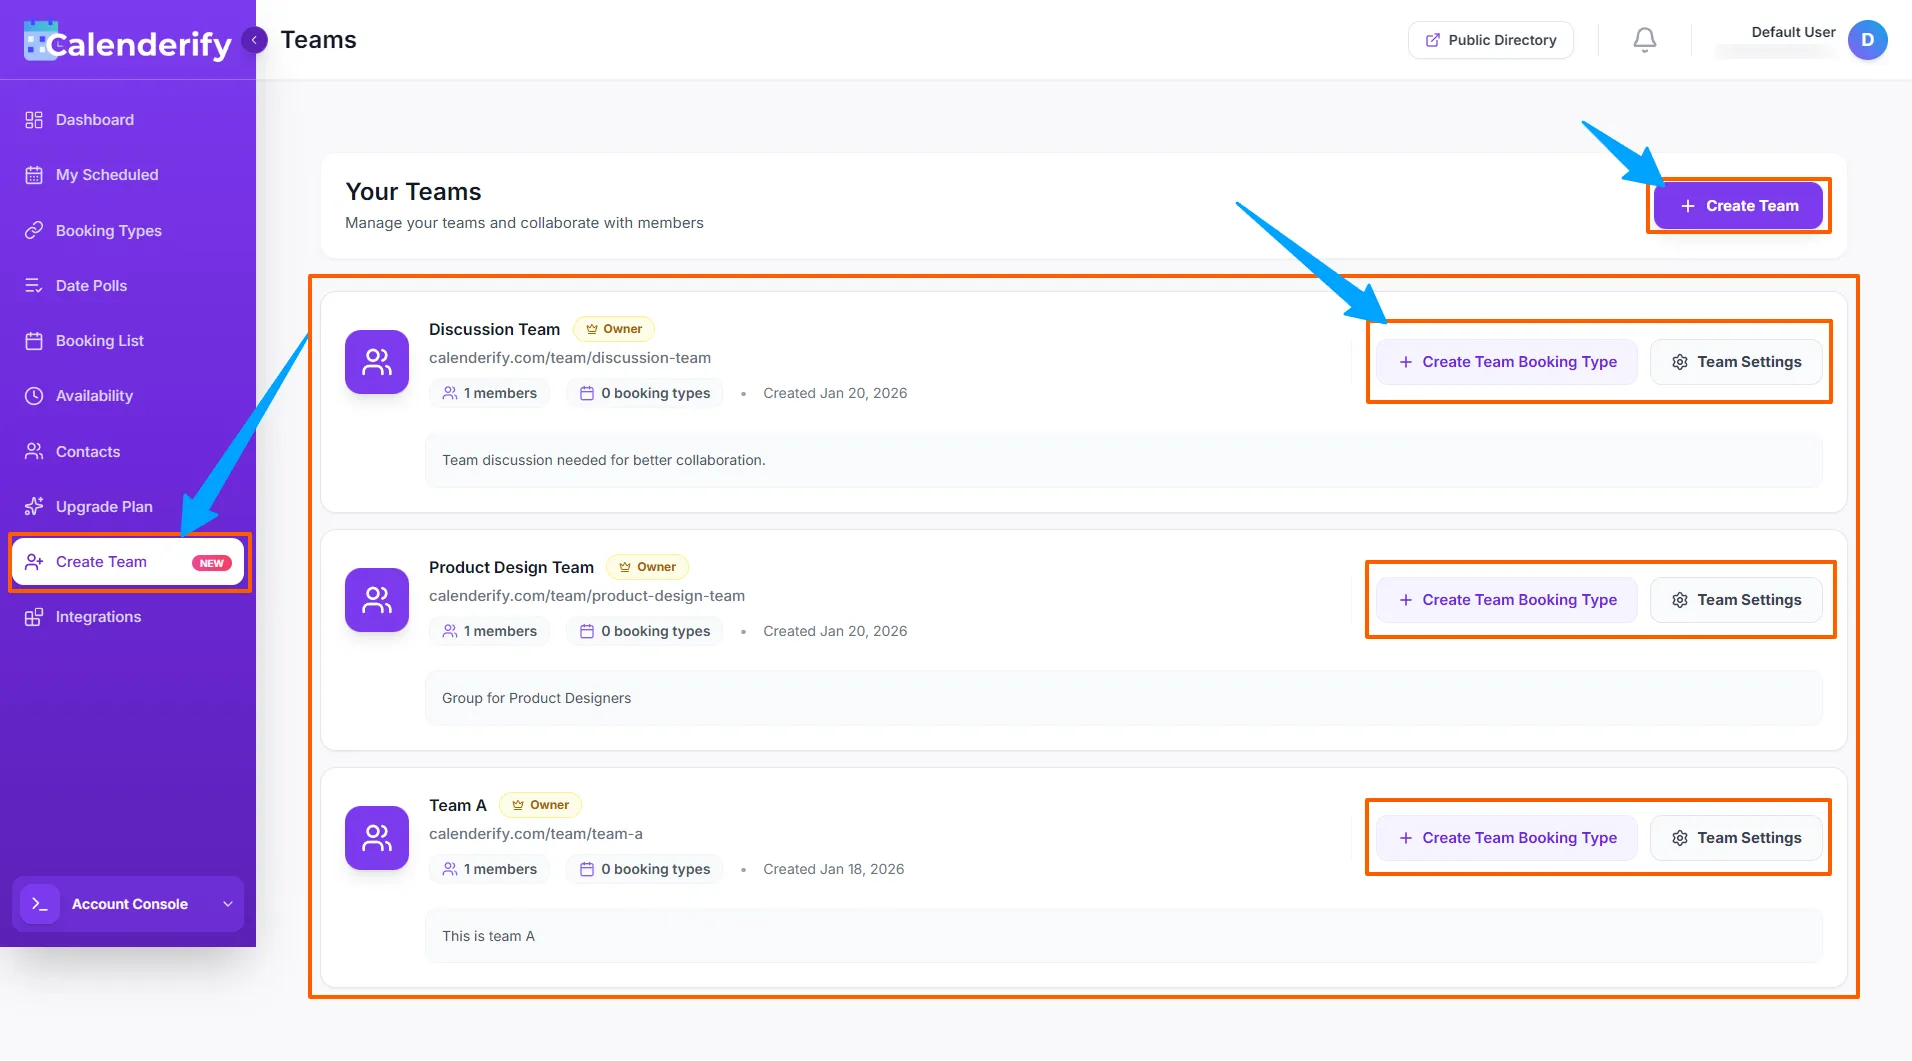 Create a new team and add members
-
Plan meetings for team collaboration.
 Schedule meetings with team collaboration
- View the participant list details inside teams.
Integrations and Embed
ConnectCalendar integrations
Connect your calendar to the service you want to use, such as Google Calendar or Microsoft Calendar.
-
Open Integrations.
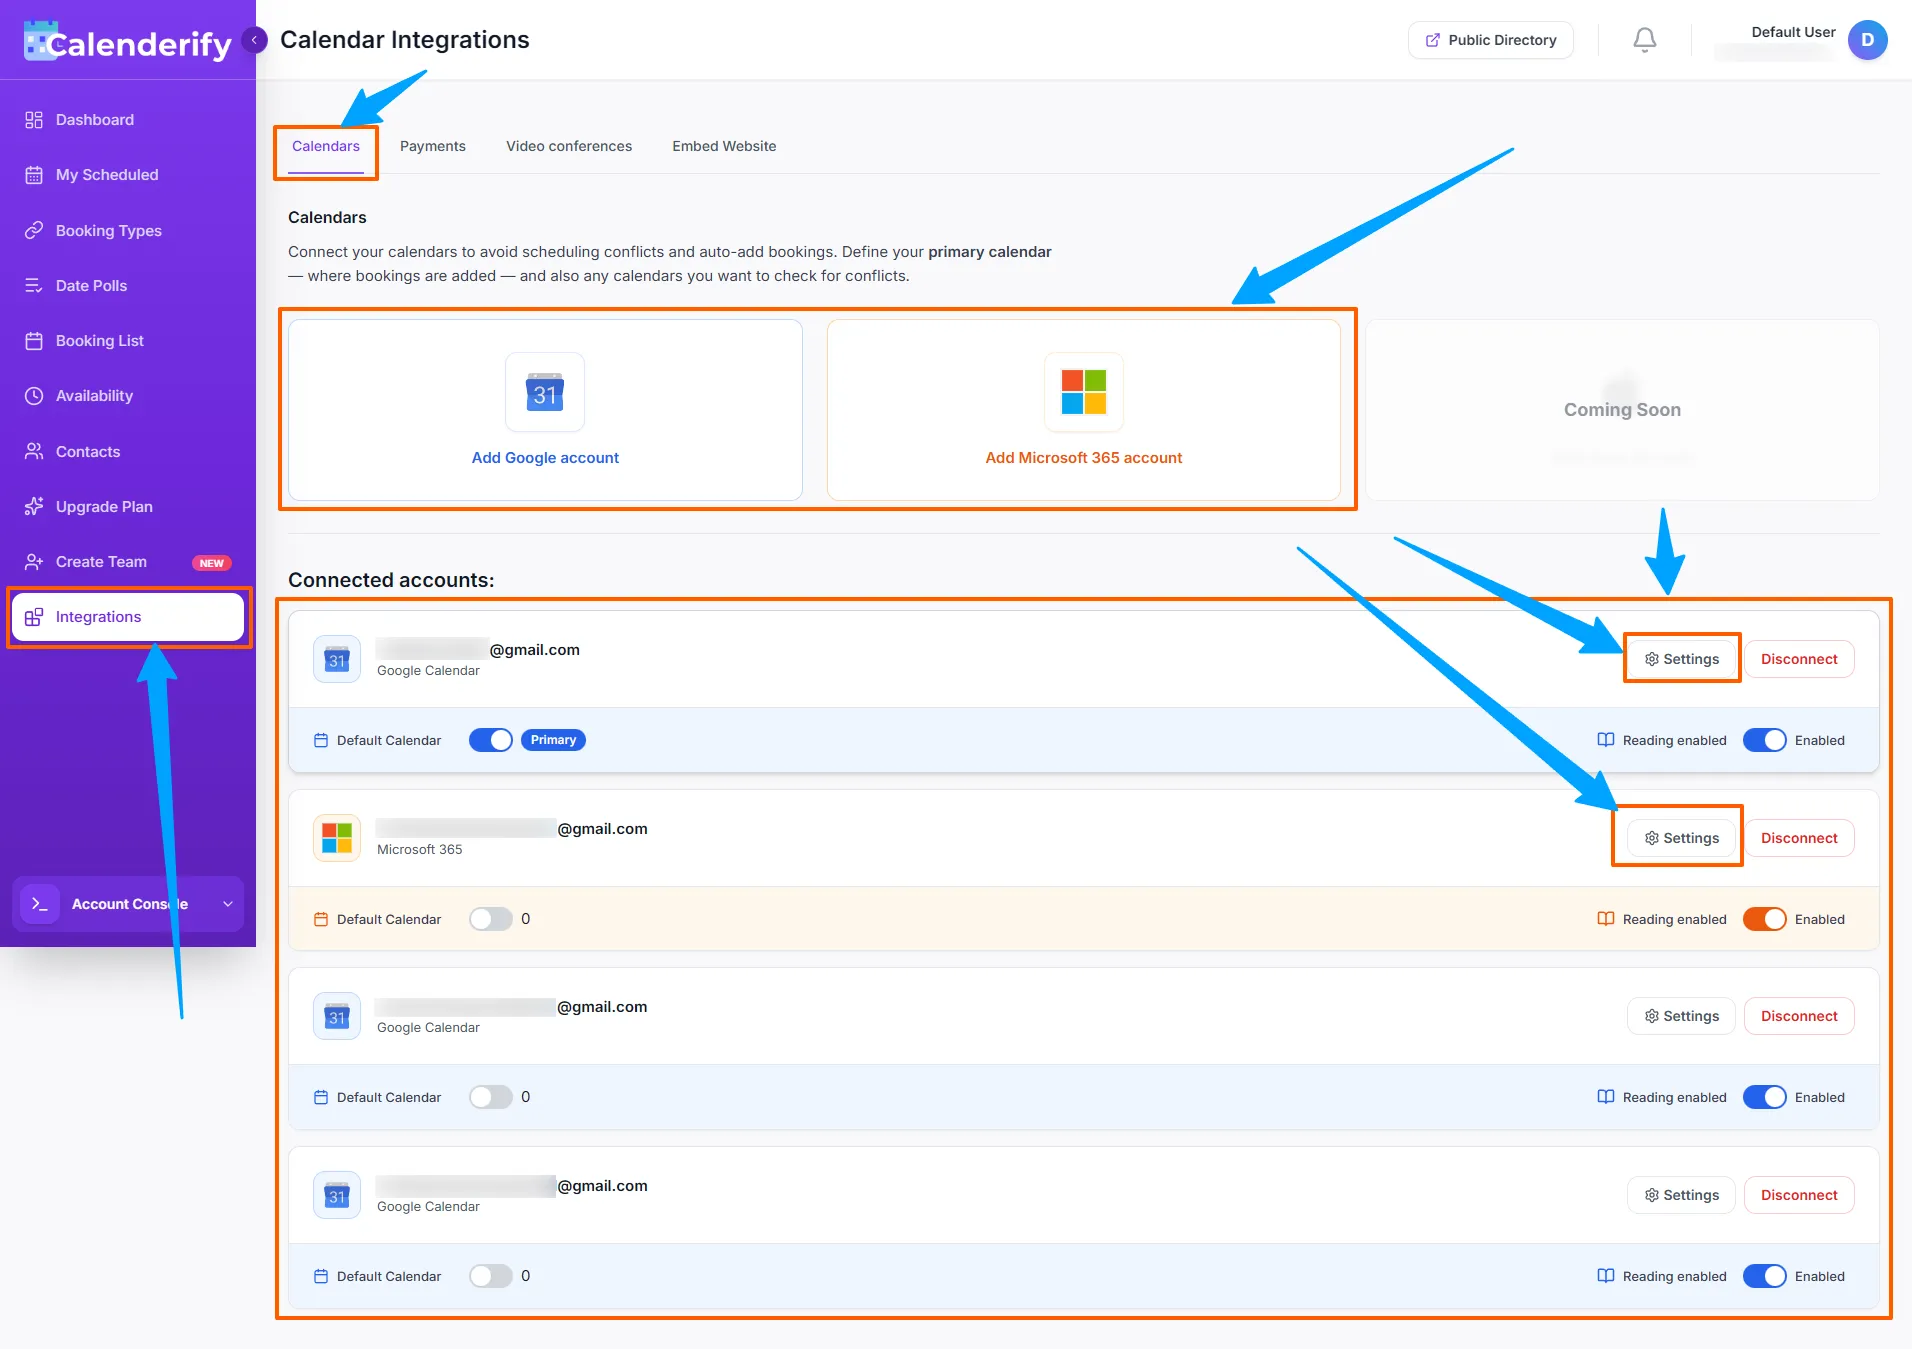 Open the Integrations section
- Connect Google Calendar or Microsoft Calendar.
- Use calendar sync to support scheduling and booking management.
Payments
Connect Stripe or PayPal to unlock paid booking features.
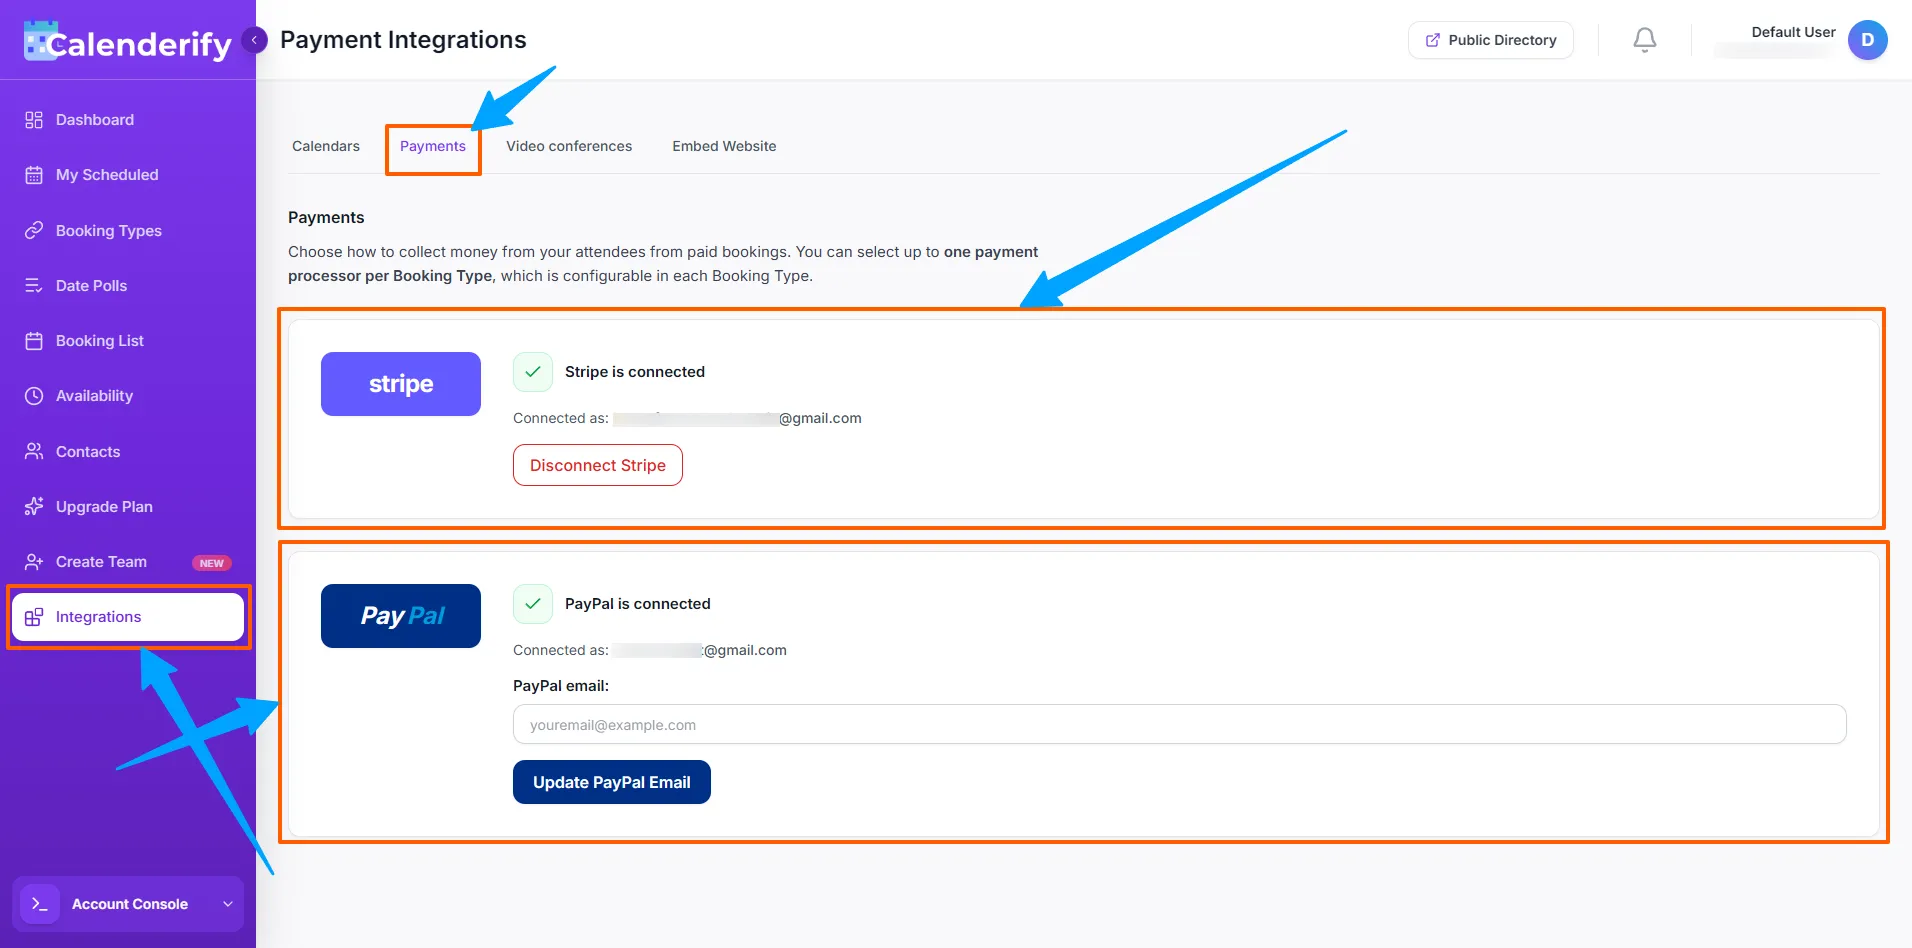
Supported payments: Stripe, PayPal
Video conferencing
To join a video conference, connect your video conferencing option or add a custom meeting link.
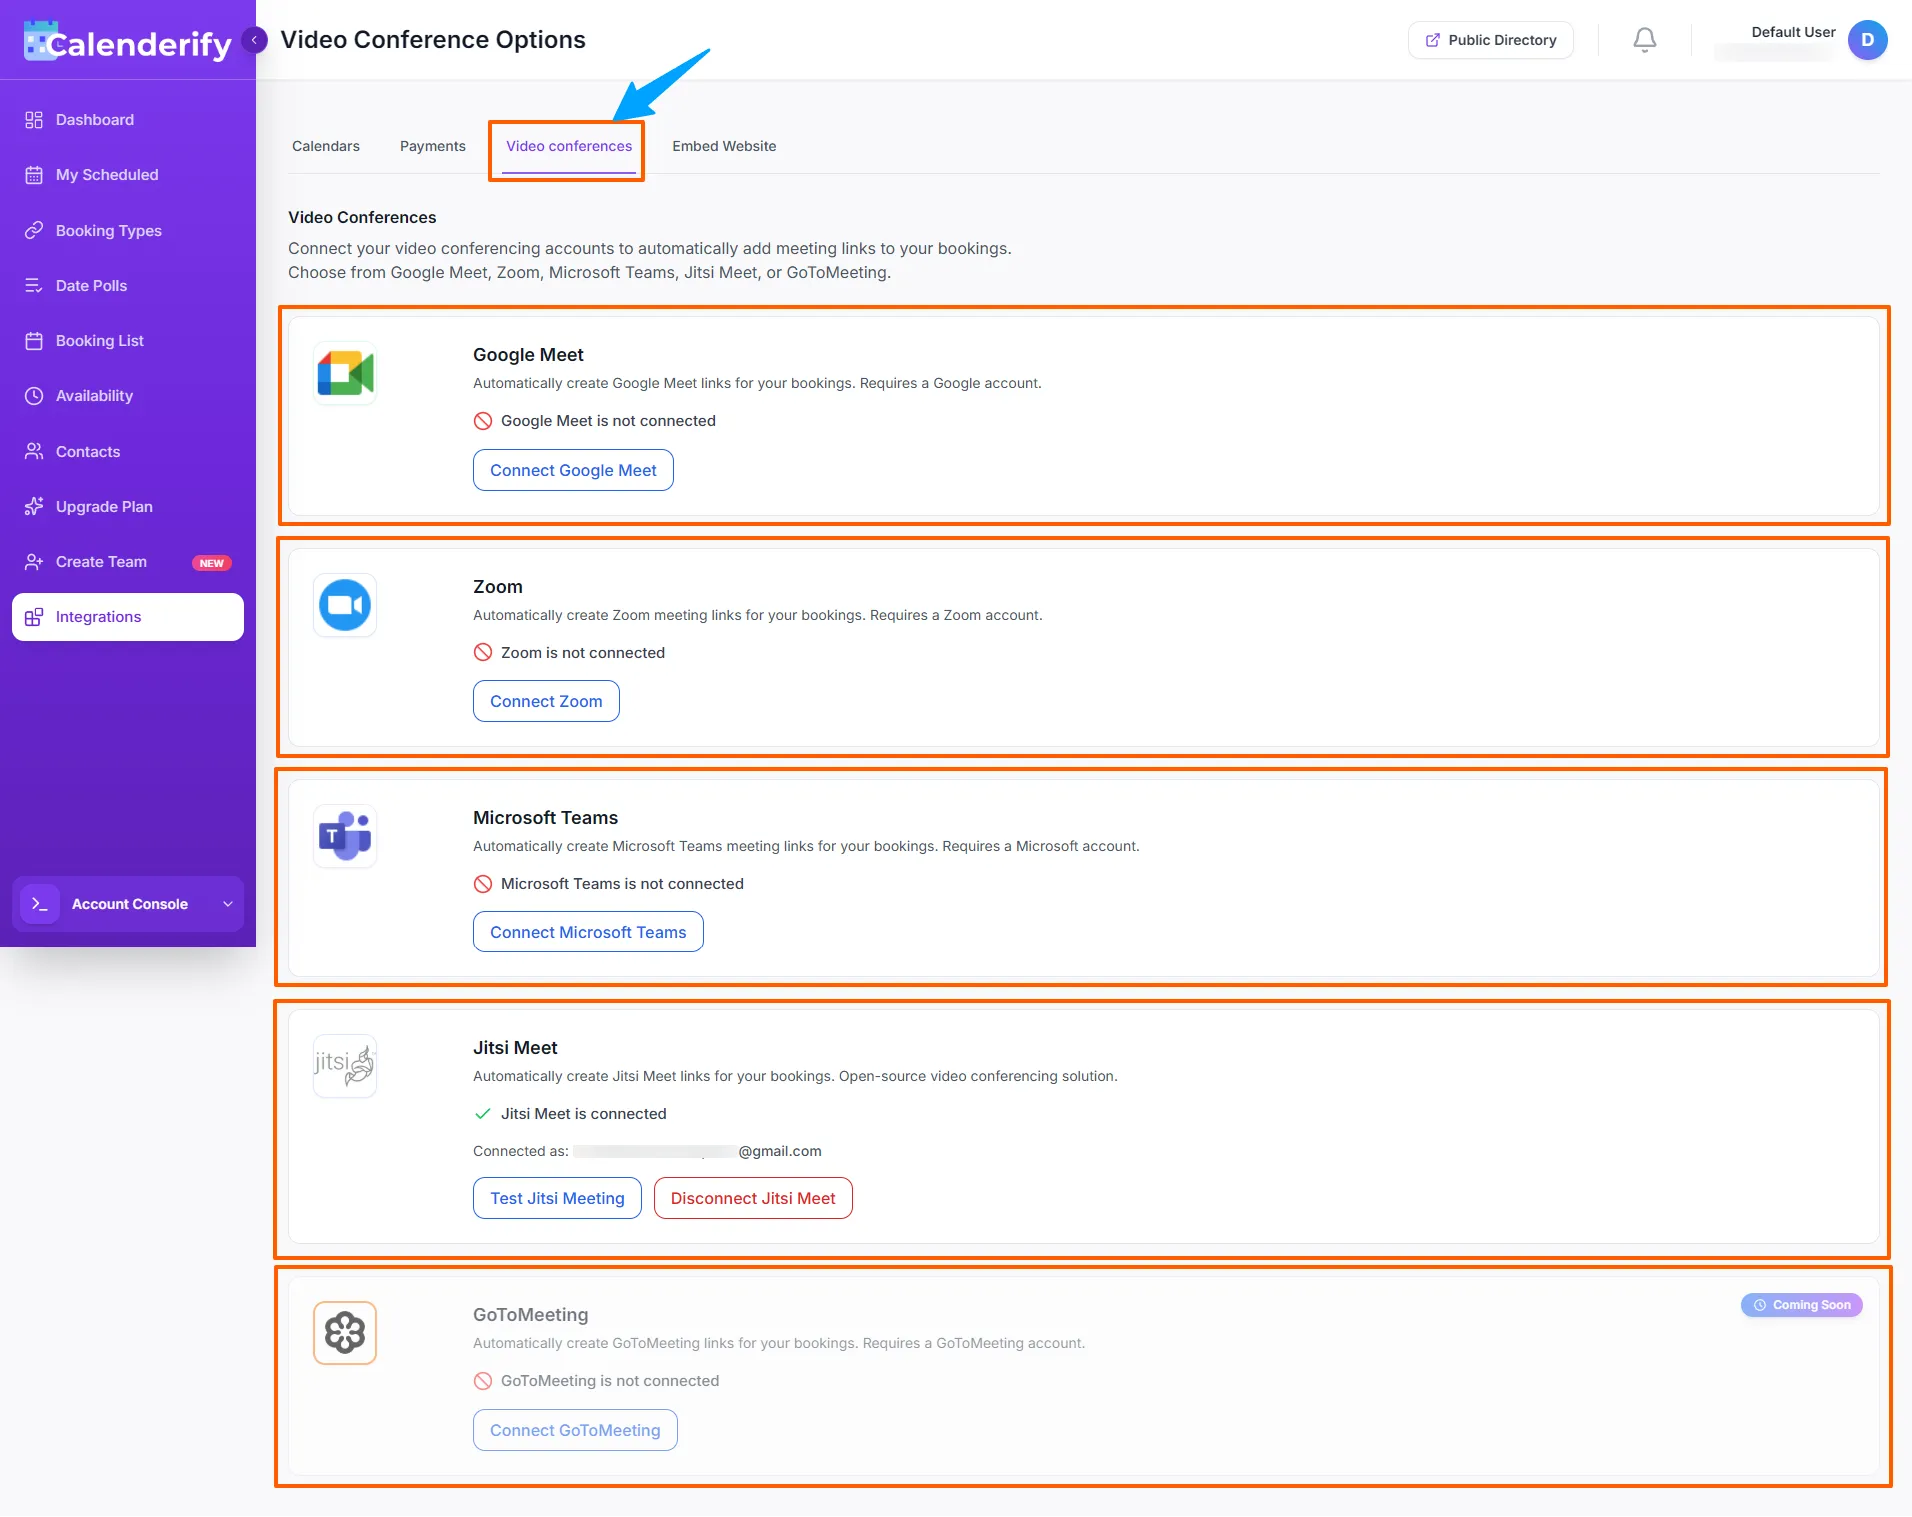 Want to join a video conference, need to connect to the video conference link.
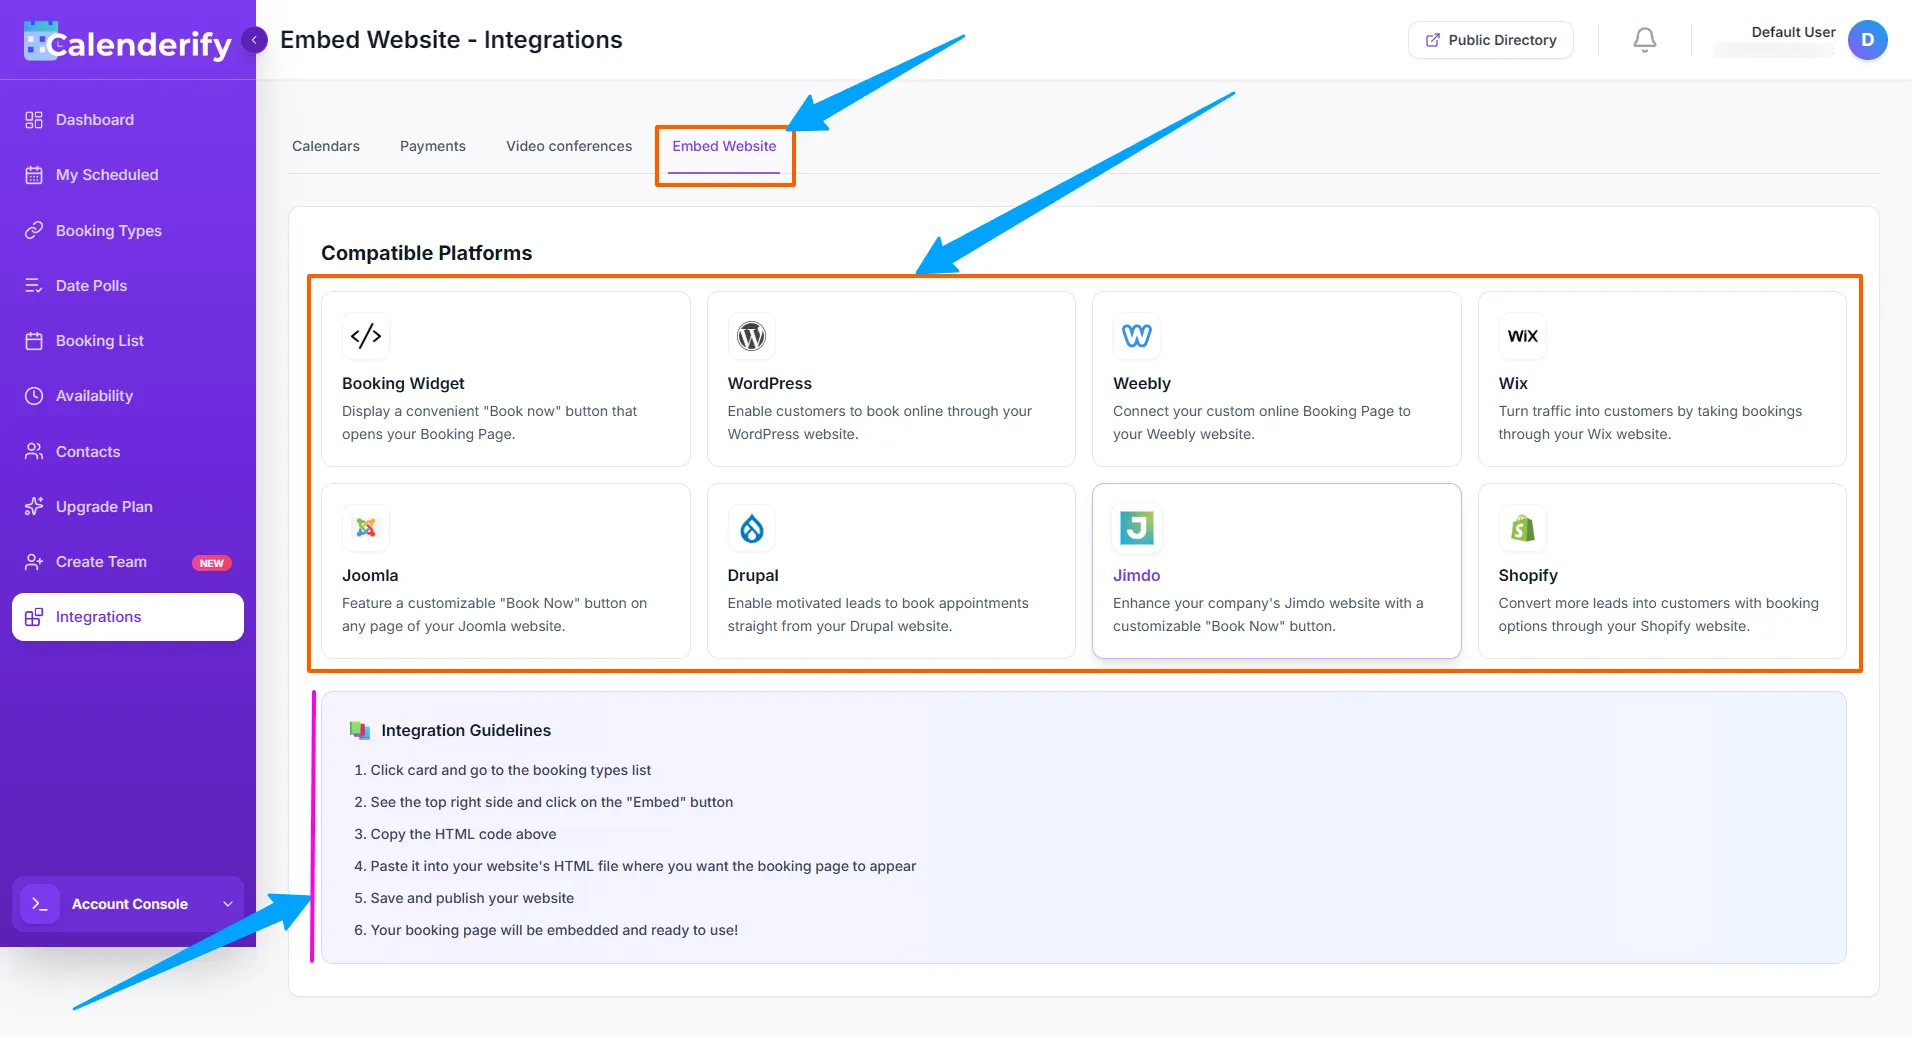
Embed website
You can embed a booking page into your website using the embed code. Follow the instructions shown in the Embed option.
- Click card and go to the booking types list.
- See the top right side and click on the "Embed" button
- Copy the HTML code above and paste it into your website's HTML file where you want the booking page to appear
- Save and publish your website. Your booking page will be embedded and ready to use!
Integration Guidelines
 You can use a meeting link through custom embed website code. They just need to follow the instructions.
Zoom Support Document
ZoomInstall Zoom on Android or iOS (Mobile)
Install Zoom Workplace from your app store, then sign in to your Zoom account.
-
Open Google Play Store (Android) or Apple App Store (iOS) and search for Zoom Workplace.
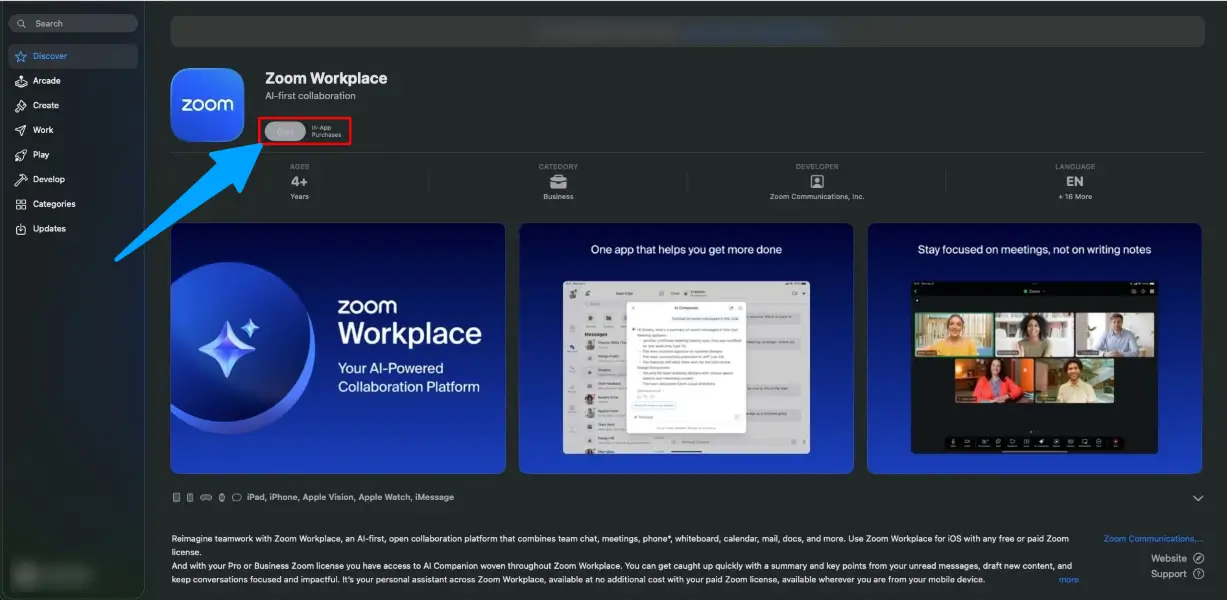 Search for Zoom Workplace and open the official app listing.
-
Tap Install, then open the app.
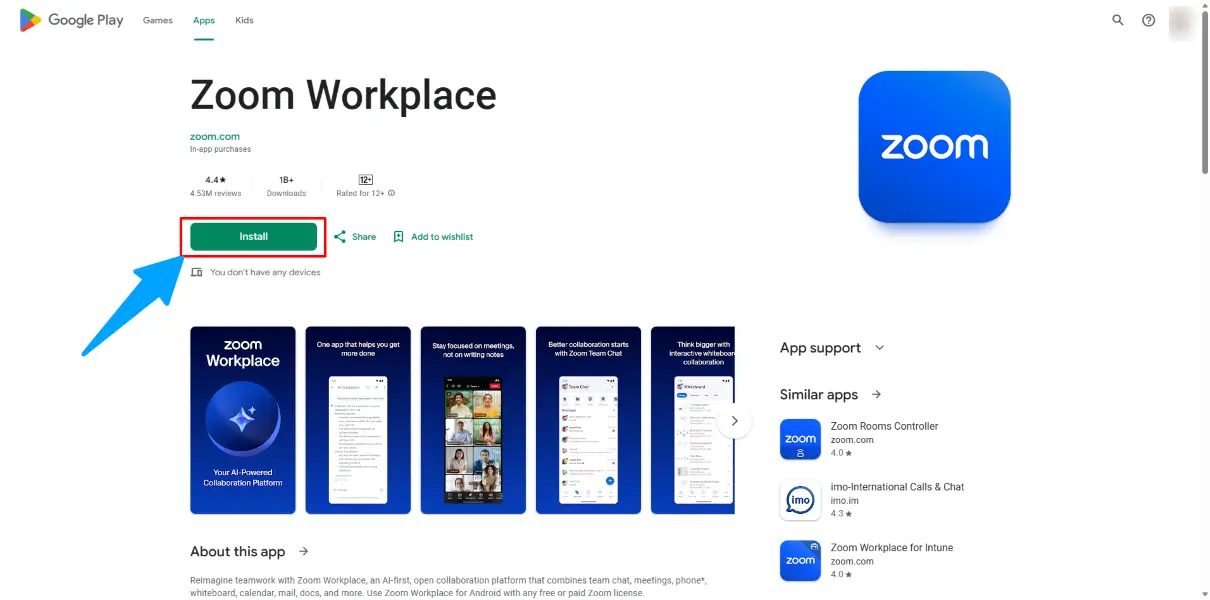 Install and open Zoom Workplace.
- Sign in to Zoom (or create an account if needed).
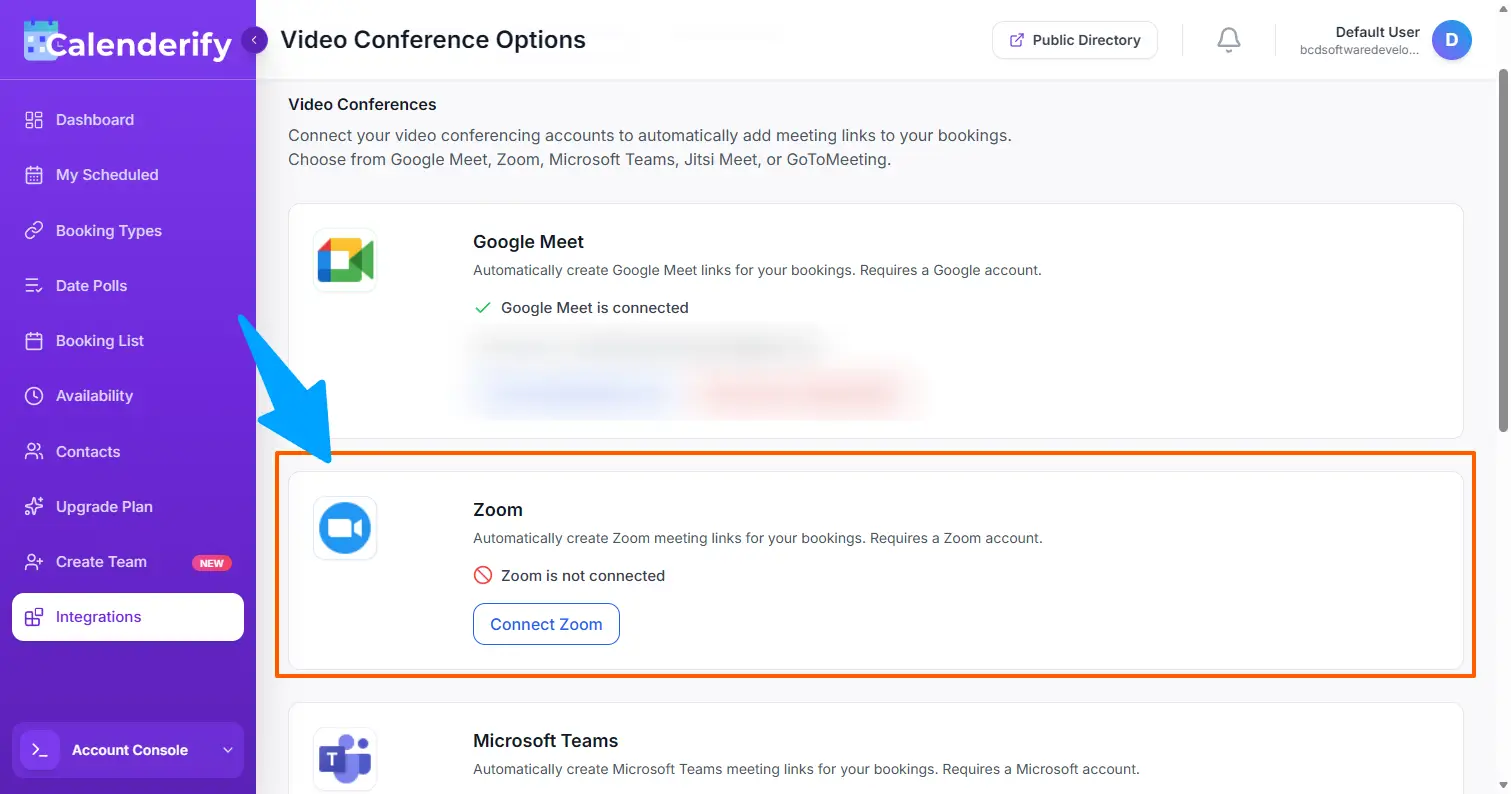
How to add Zoom to Calenderify
To use Zoom for bookings, connect Zoom inside your Calenderify dashboard using the same email you use for scheduling.
-
Open Integrations in Calenderify and select Zoom.
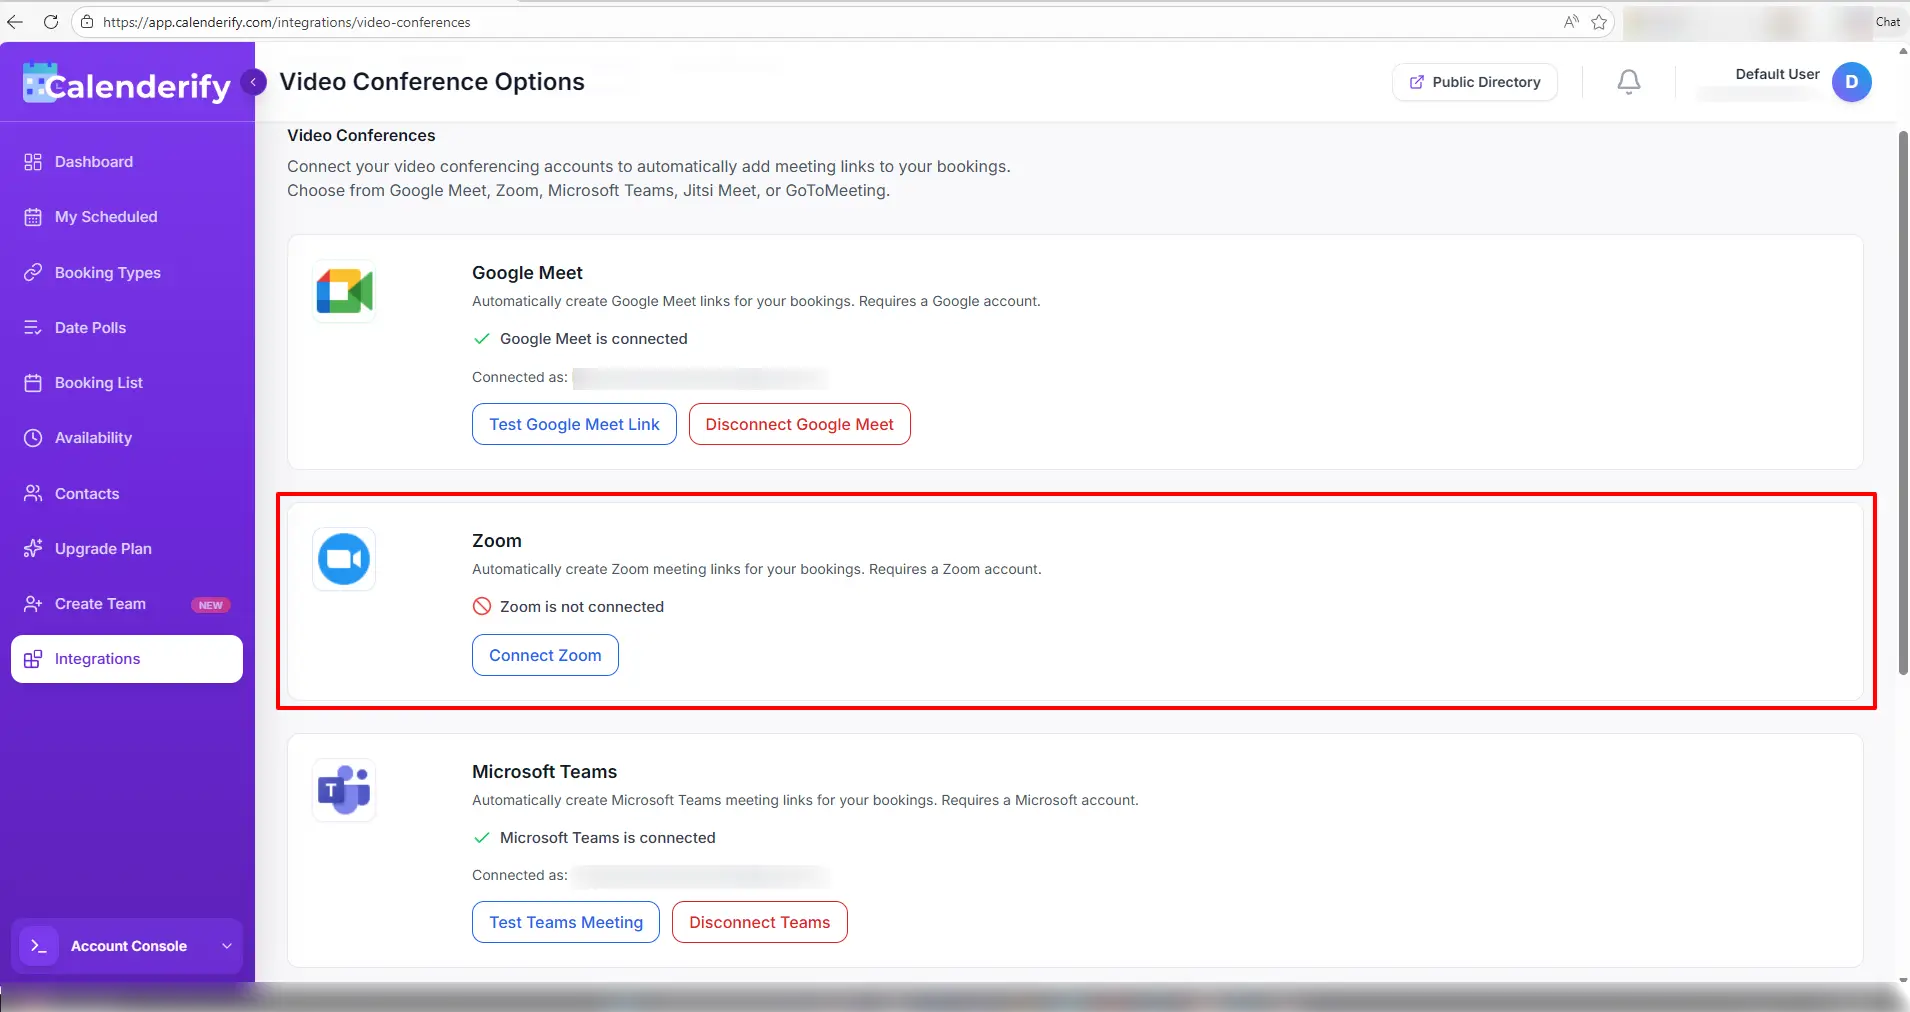 Go to Integrations and choose Zoom.
-
Connect Zoom using your Calenderify account email.
 Authorize Zoom Workplace so Calenderify can auto-create meeting links.
-
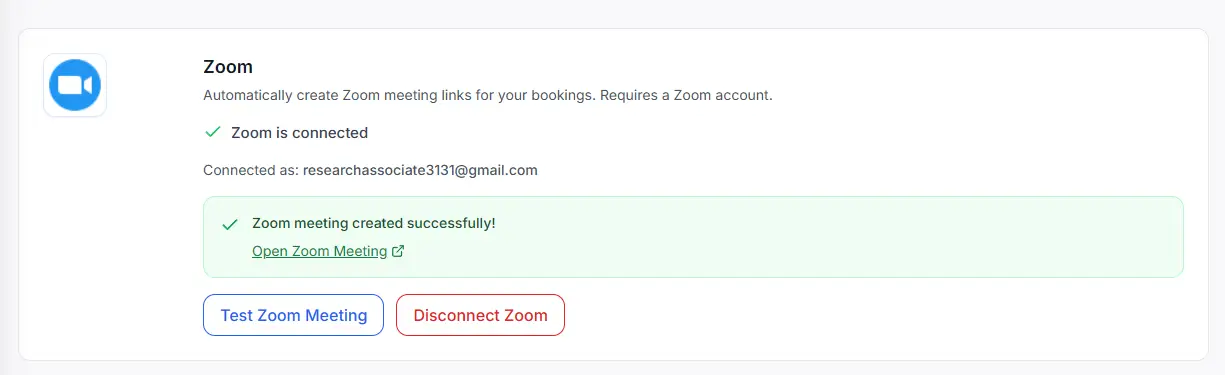
After connection, Zoom meetings are created automatically for eligible bookings.
 Success confirmation appears after connecting.
Tip: If your Zoom email and Calenderify email do not match, meeting links may fail to generate.
What happens when a user joins the meeting
When attendees join, Zoom may show a confirmation pop-up indicating the meeting was created via the integration.
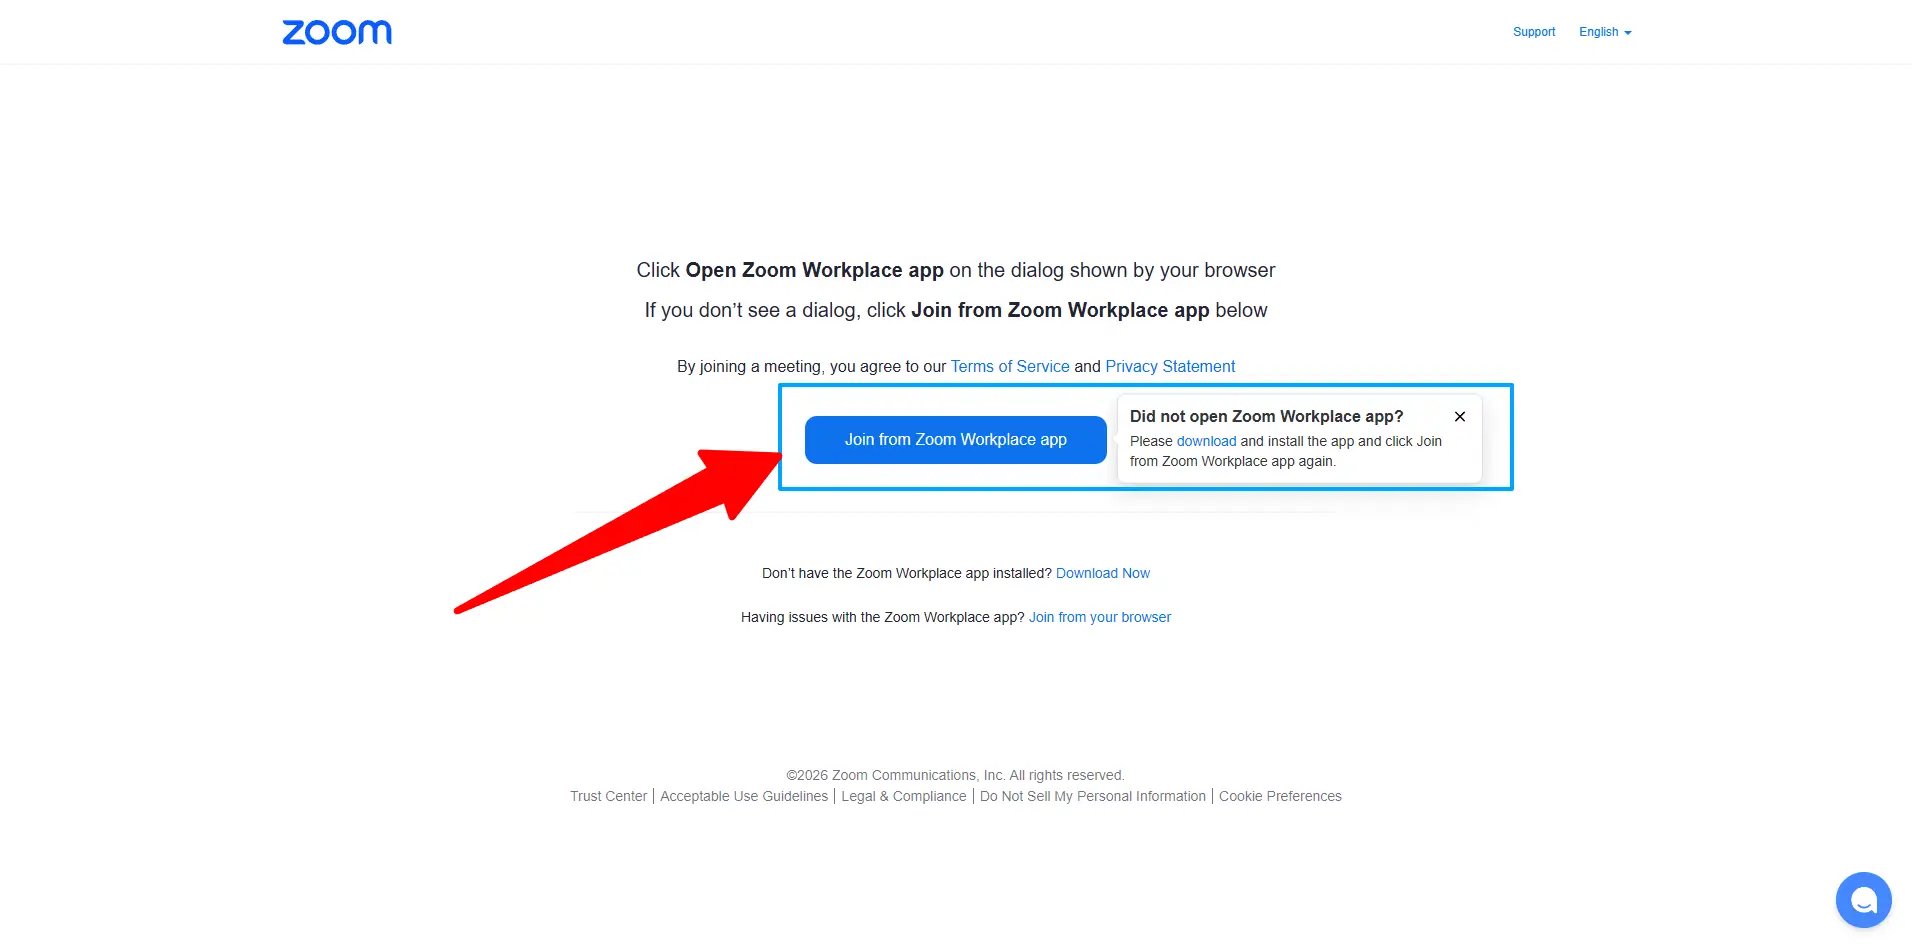
Install Zoom on Windows or Mac (Desktop)
Download Zoom Workplace from the official Zoom website, then install and sign in.
-
Go to the Zoom Download Center: zoom.us/download
 Open the Zoom Download Center.
-
Under Zoom Workplace for Windows or Mac, click Download.
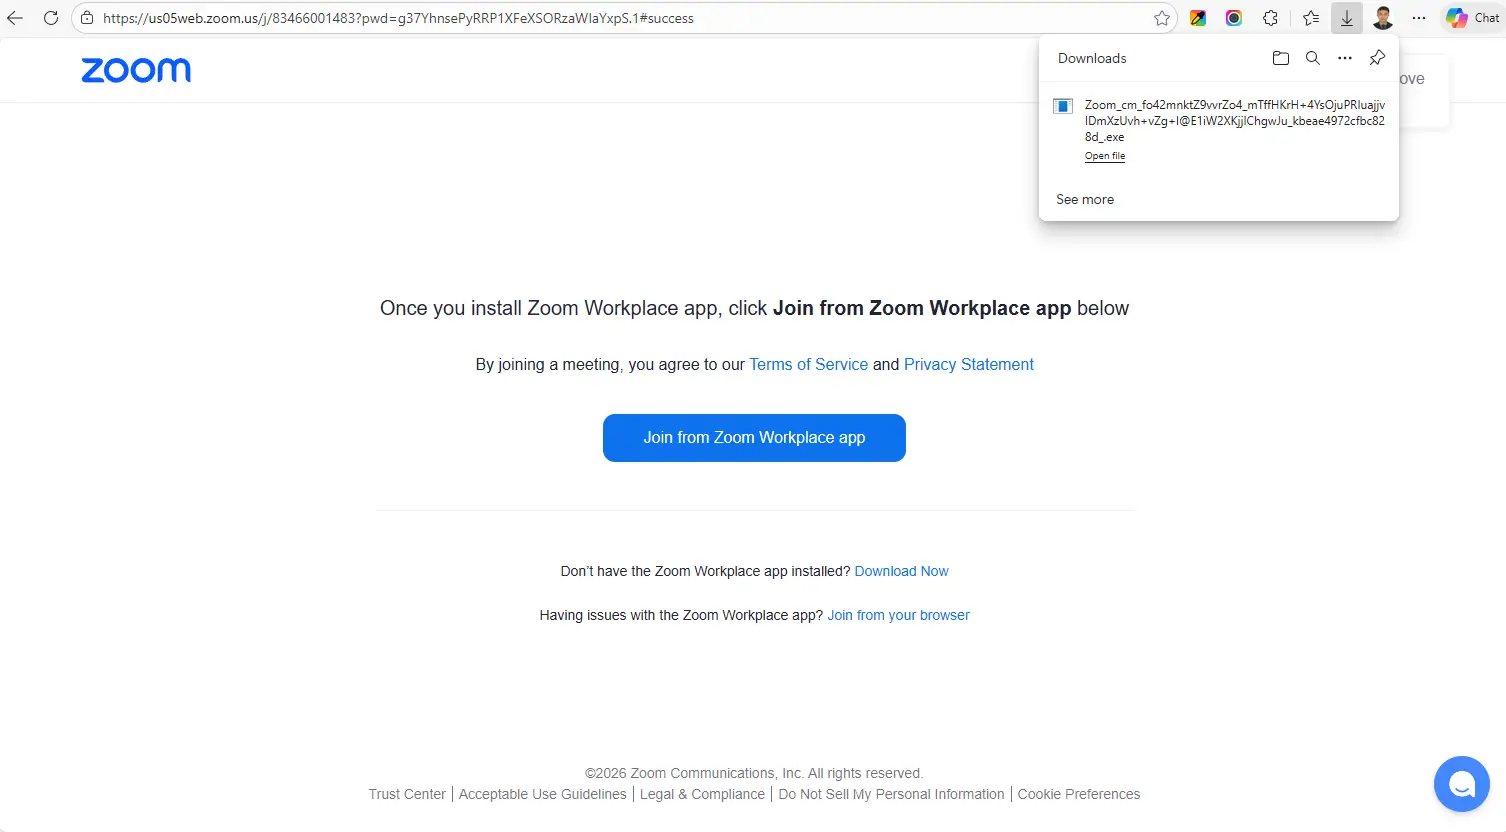 Download Zoom Workplace for your OS.
-
Run the installer and complete setup, then sign in.
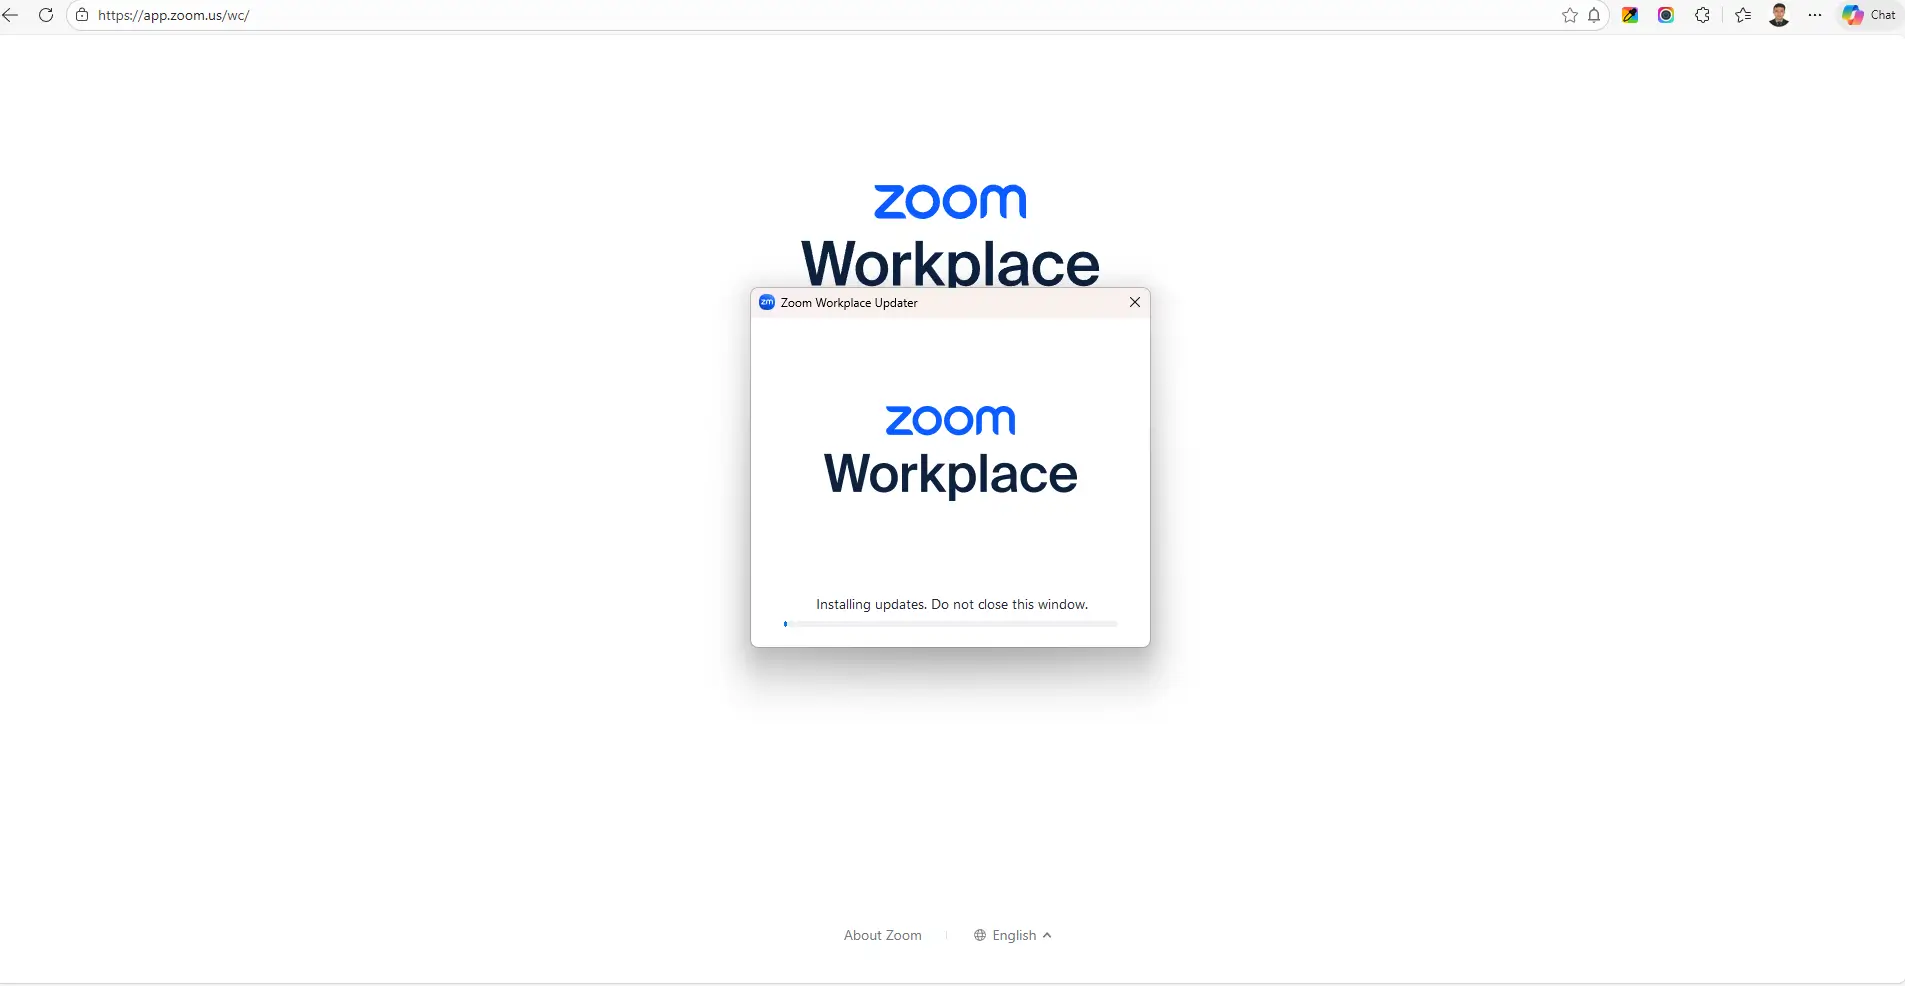 Install Zoom Workplace and sign in.
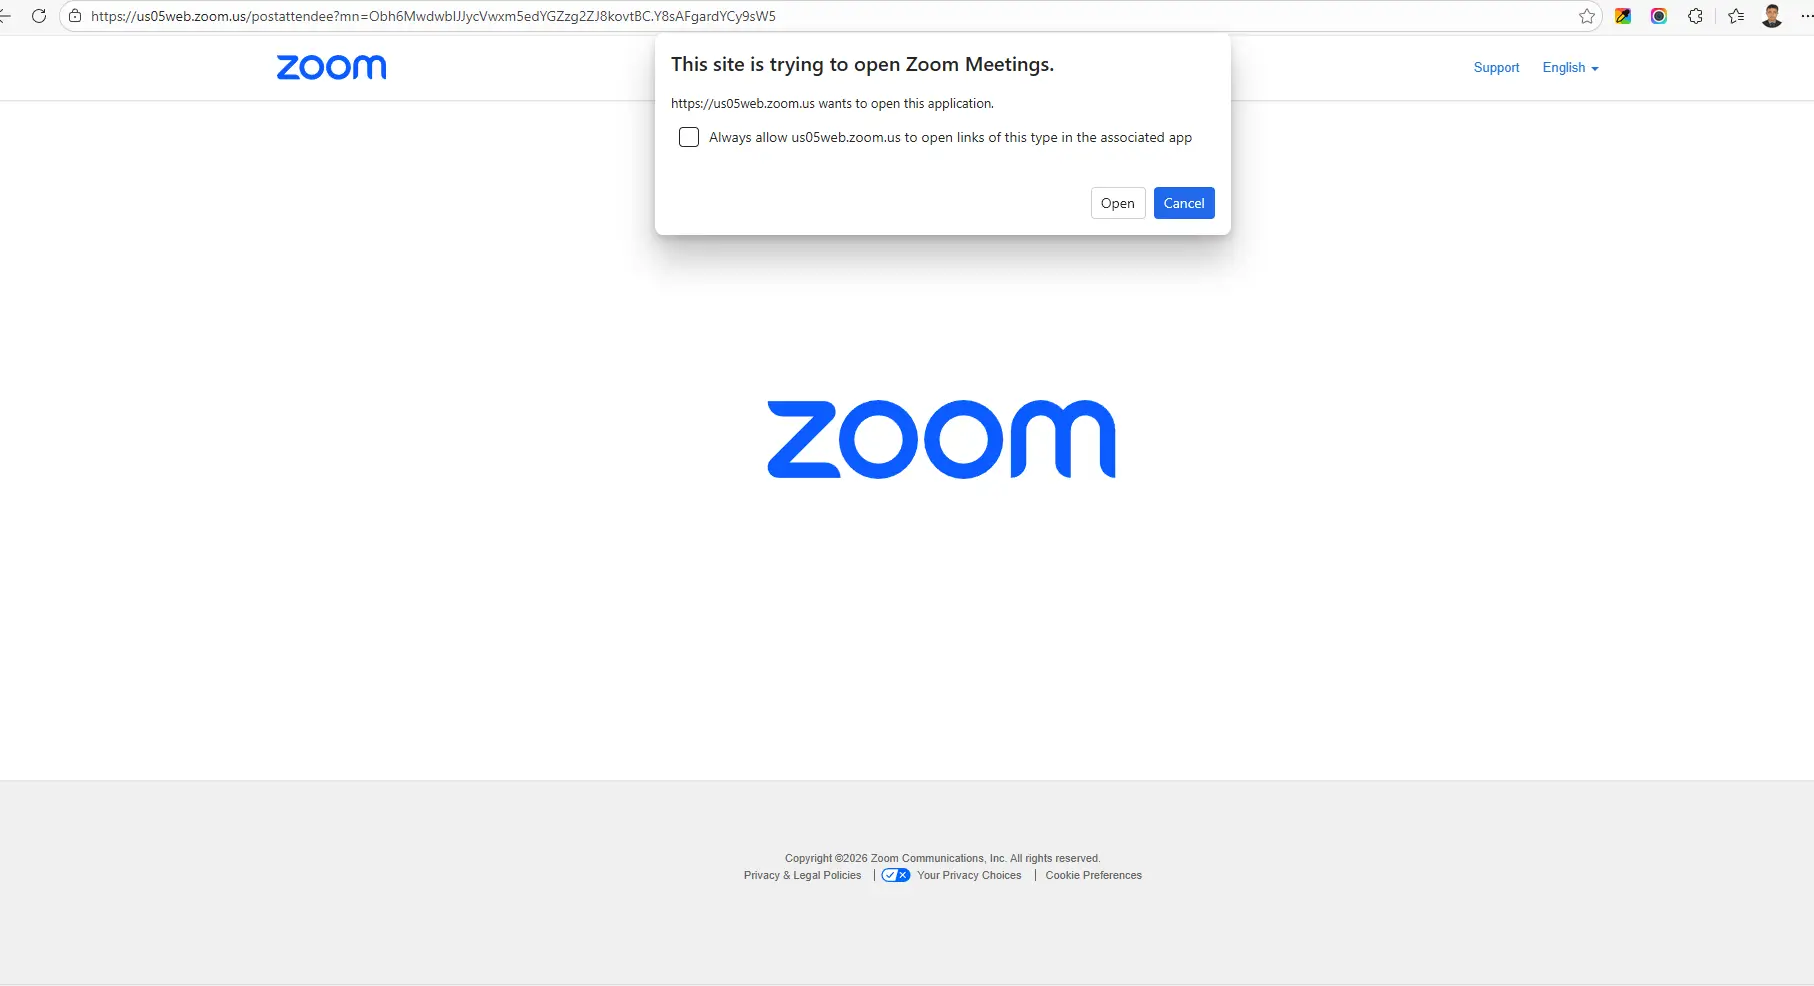 Then the Zoom pop-up came.
Windows: ZoomInstaller.exe | Mac: zoomusInstallerFull.pkg
Common connection issues and fixes
If Zoom links are not generating or connections fail, try these quick fixes.
- Zoom meeting not created: confirm your Zoom email matches your Calenderify account email.
- Missing meeting link: disconnect Zoom, then reconnect from Integrations.
- Permission error: ensure Zoom authorization is approved (especially for organization accounts).
Reconnect Zoom from Integrations if links are missing.
How to remove Calenderify from Zoom
If Zoom was installed account-wide, removal may require admin access.
- Sign in as Zoom Admin and open Zoom App Marketplace.
-
Go to Manage → Apps on Account → select Calenderify → Remove or Disable.
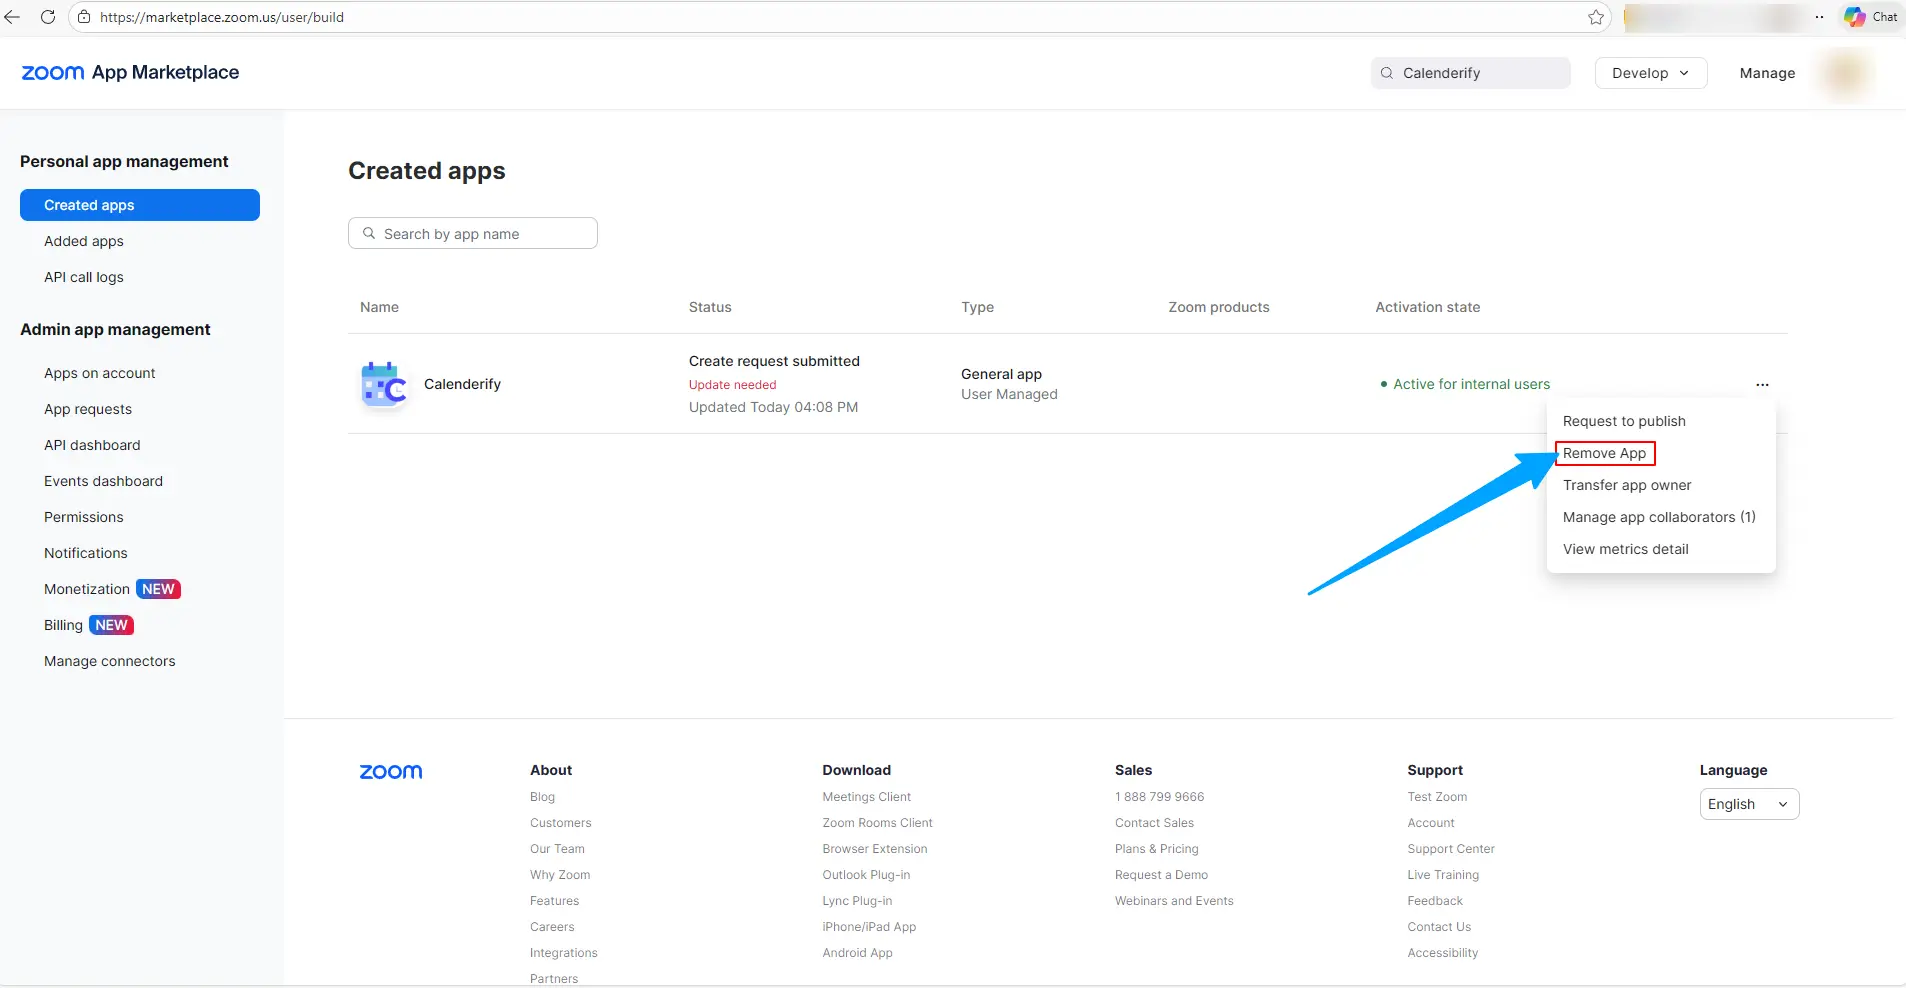 Remove or disable Calenderify from your Zoom account.
Admin link example: https://marketplace.zoom.us/ (Manage → Apps on Account)
What happens to your data after disconnection
Disconnecting Zoom revokes access immediately. Your Calenderify booking records remain for history and booking management.
- Zoom access (tokens) are revoked instantly, so Calenderify can no longer access your Zoom account.
- Calenderify may keep booking history (date, time, attendee details) for account records and audit logs.
- Zoom meetings already created remain in Zoom unless you manually delete them.
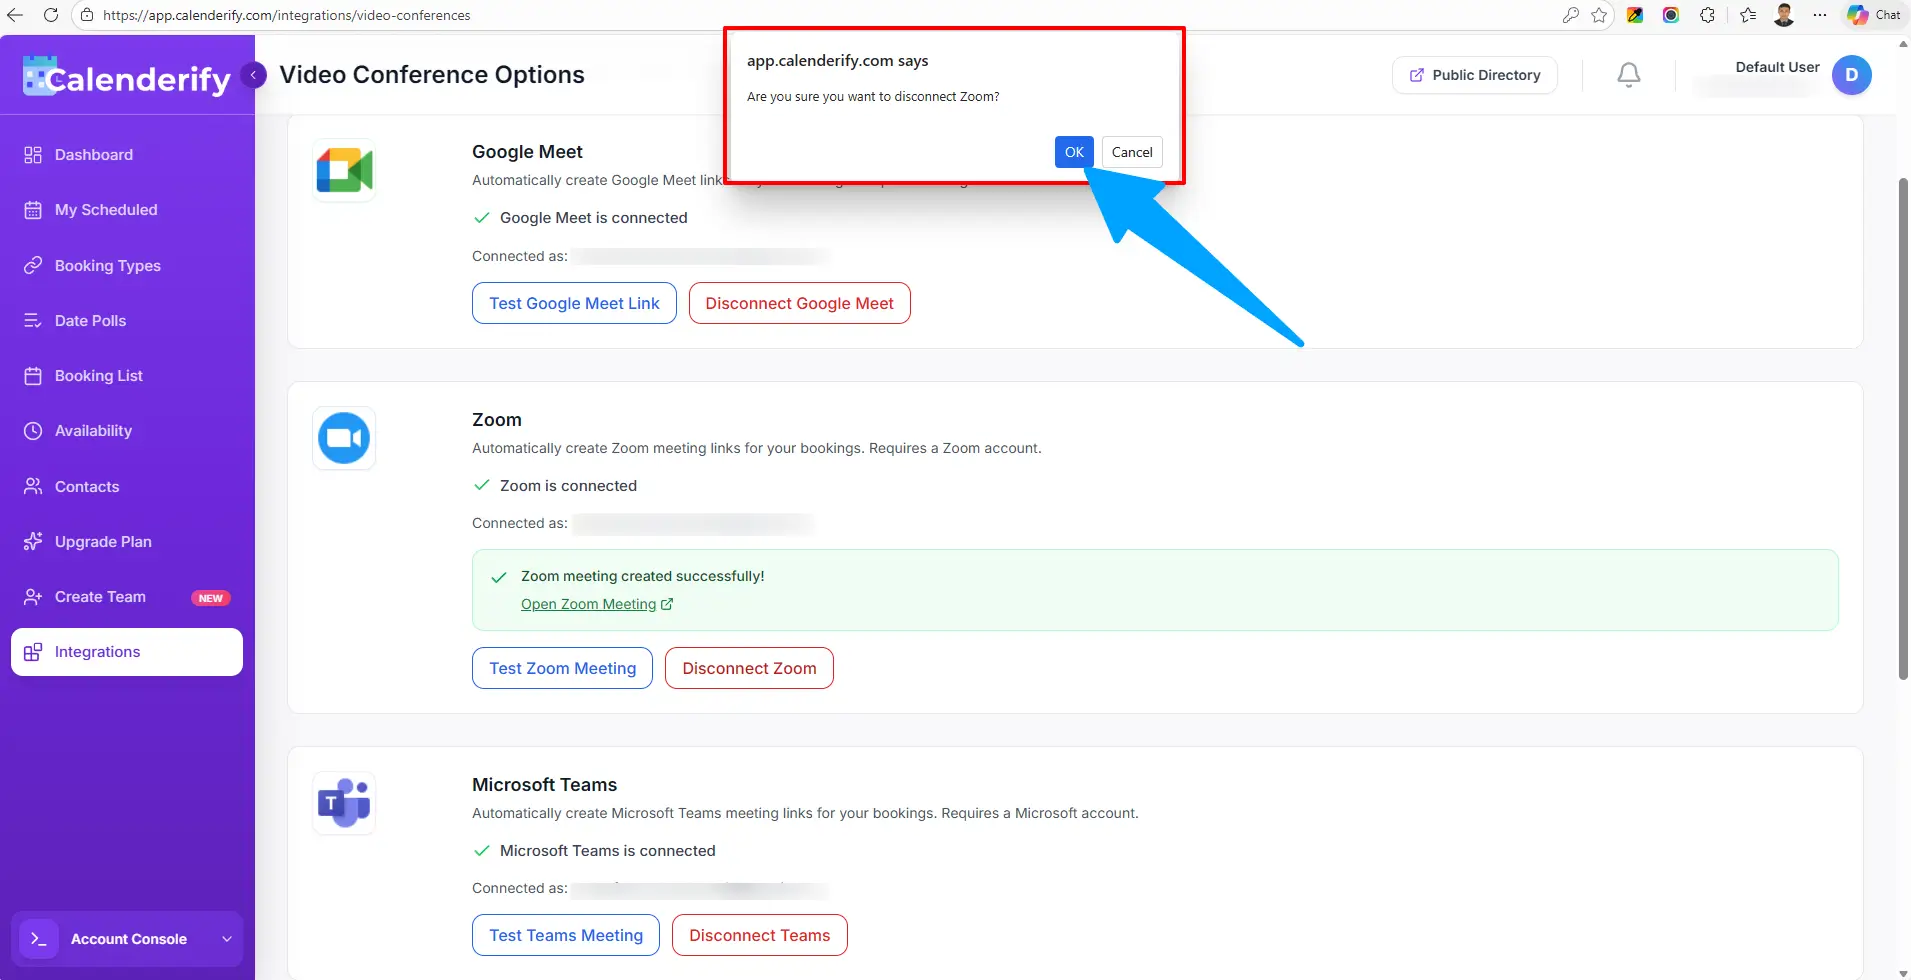 Disconnecting revokes access, but existing meetings stay in Zoom.
 The user will see this after removing Zoom from Calenderify.
Upgrade Plan & Pricing
UpgradeUpgrade your plan
Upgrade your Calenderify plan to unlock advanced features, higher limits, and premium booking capabilities.
-
Open the Pricing or Upgrade Plan section from your dashboard.
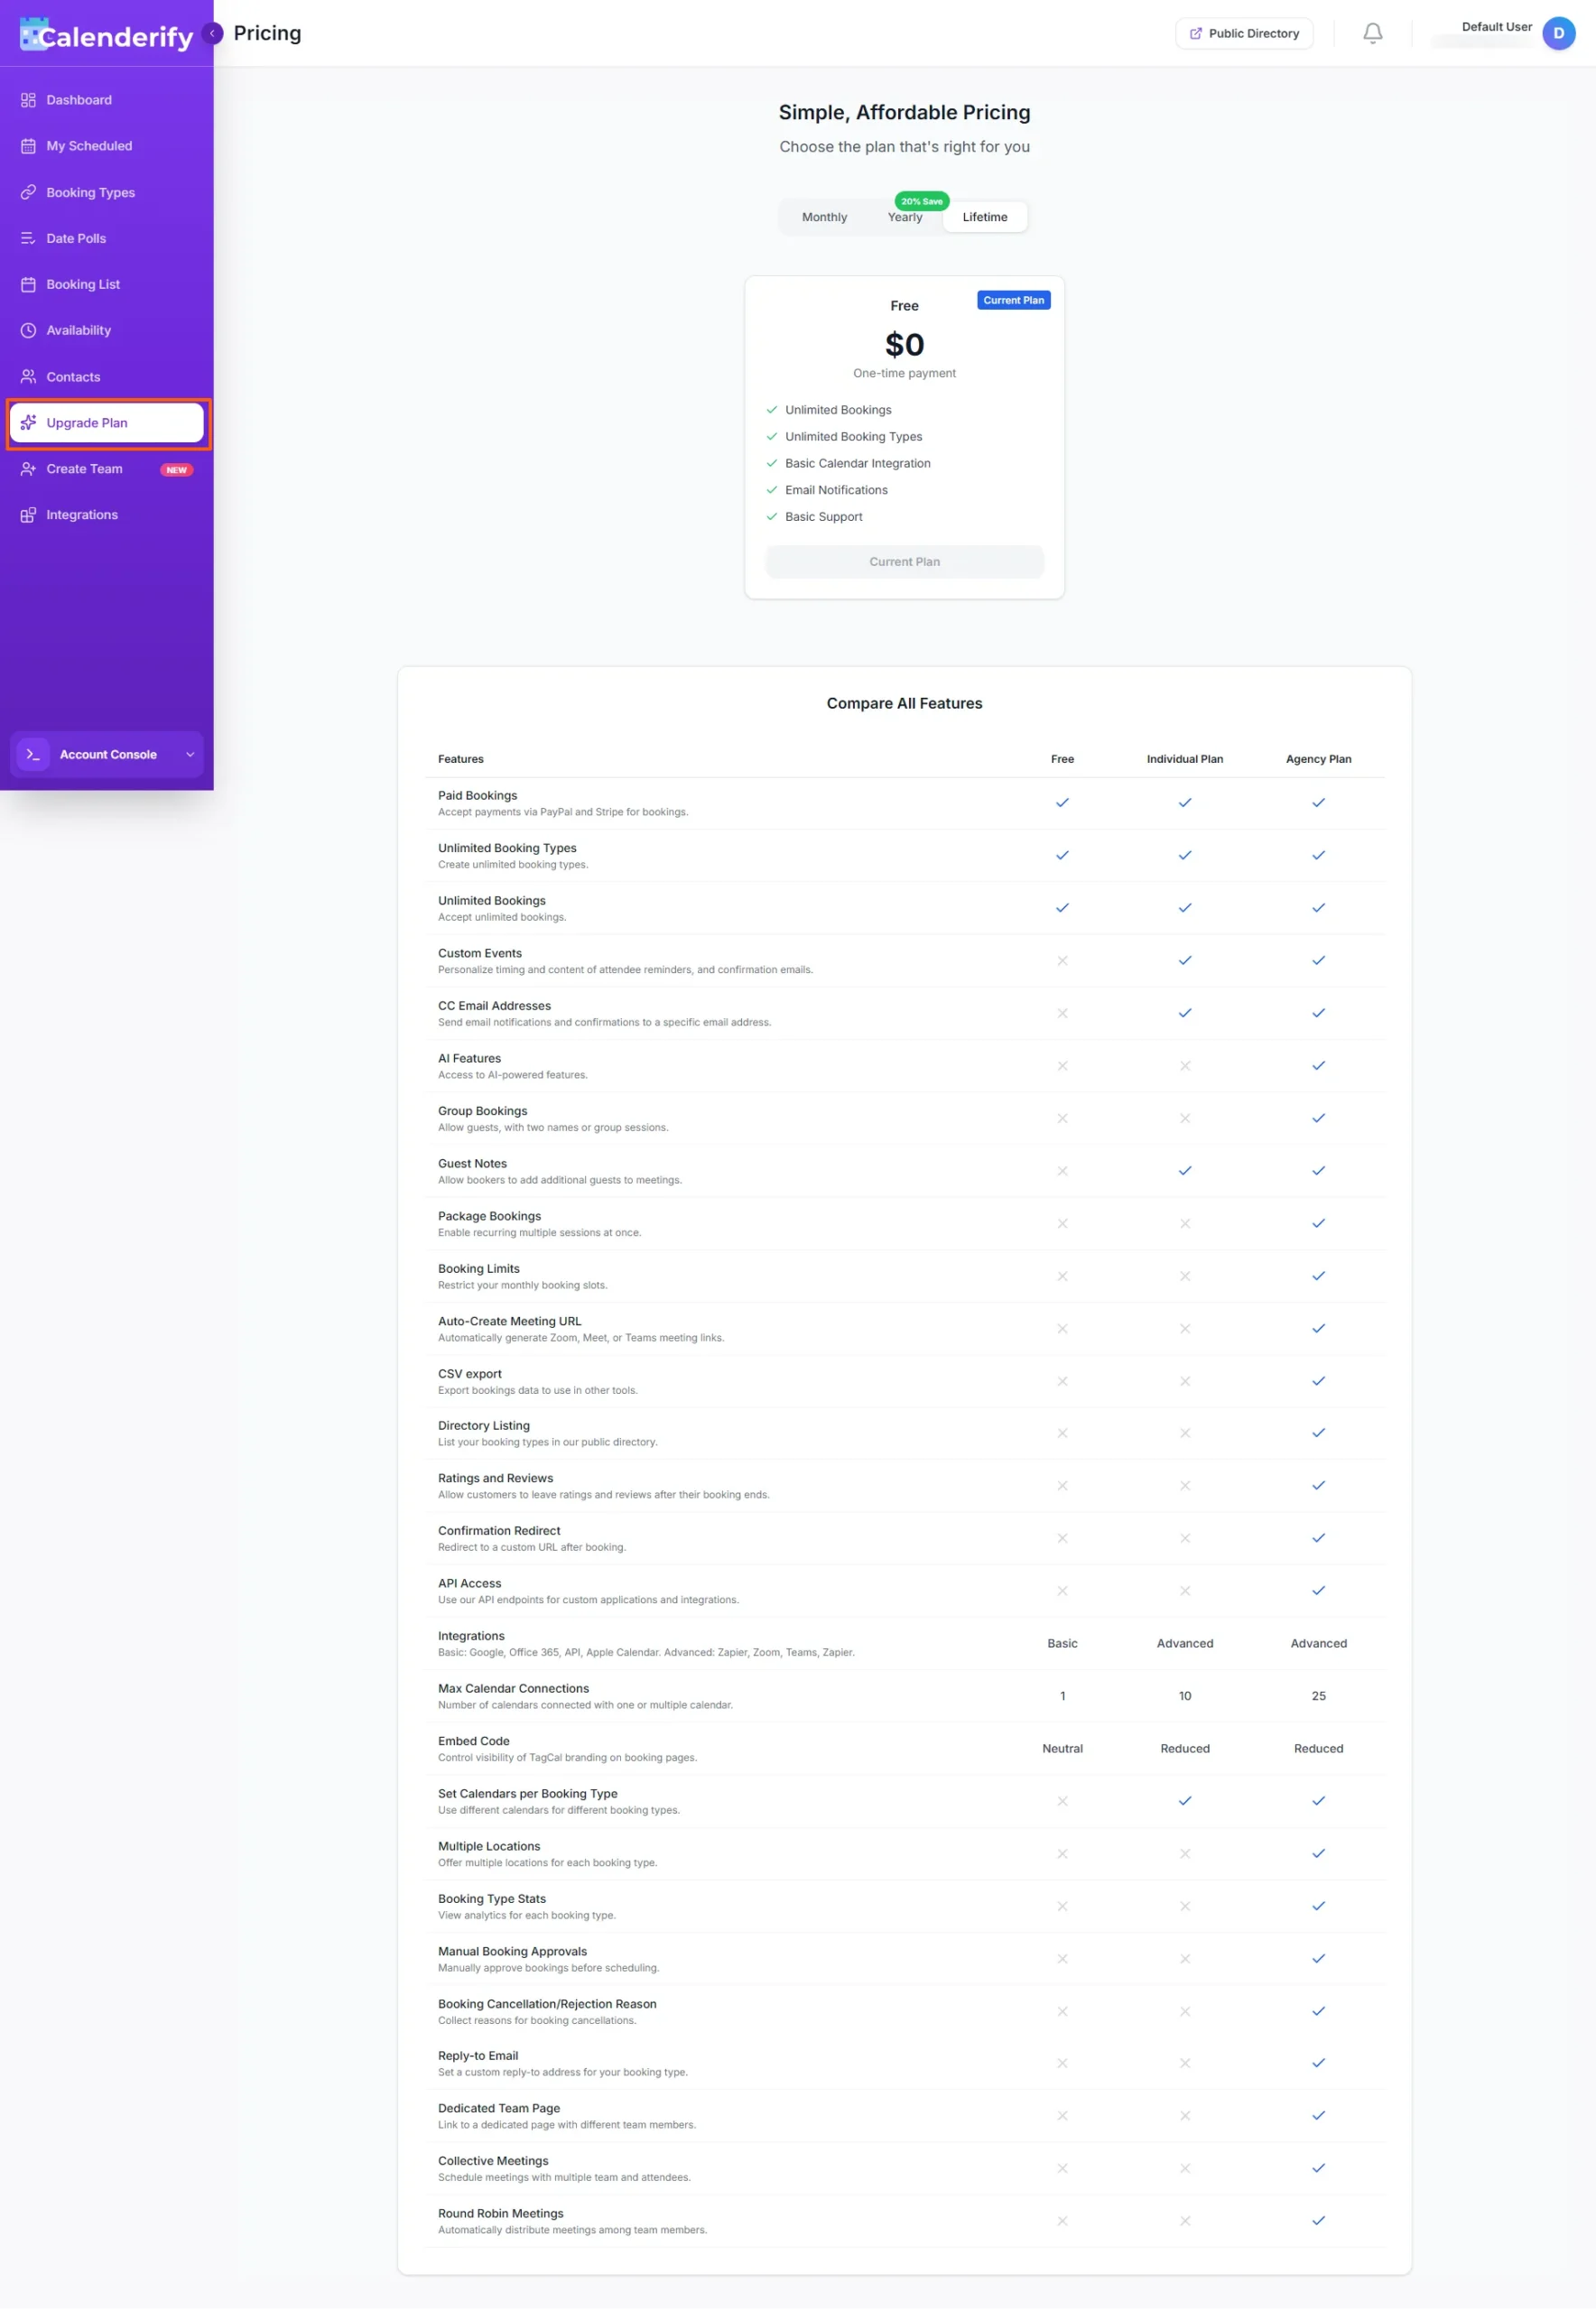 Access pricing and upgrade options from your account
-
Compare available plans and choose the one that fits your needs.
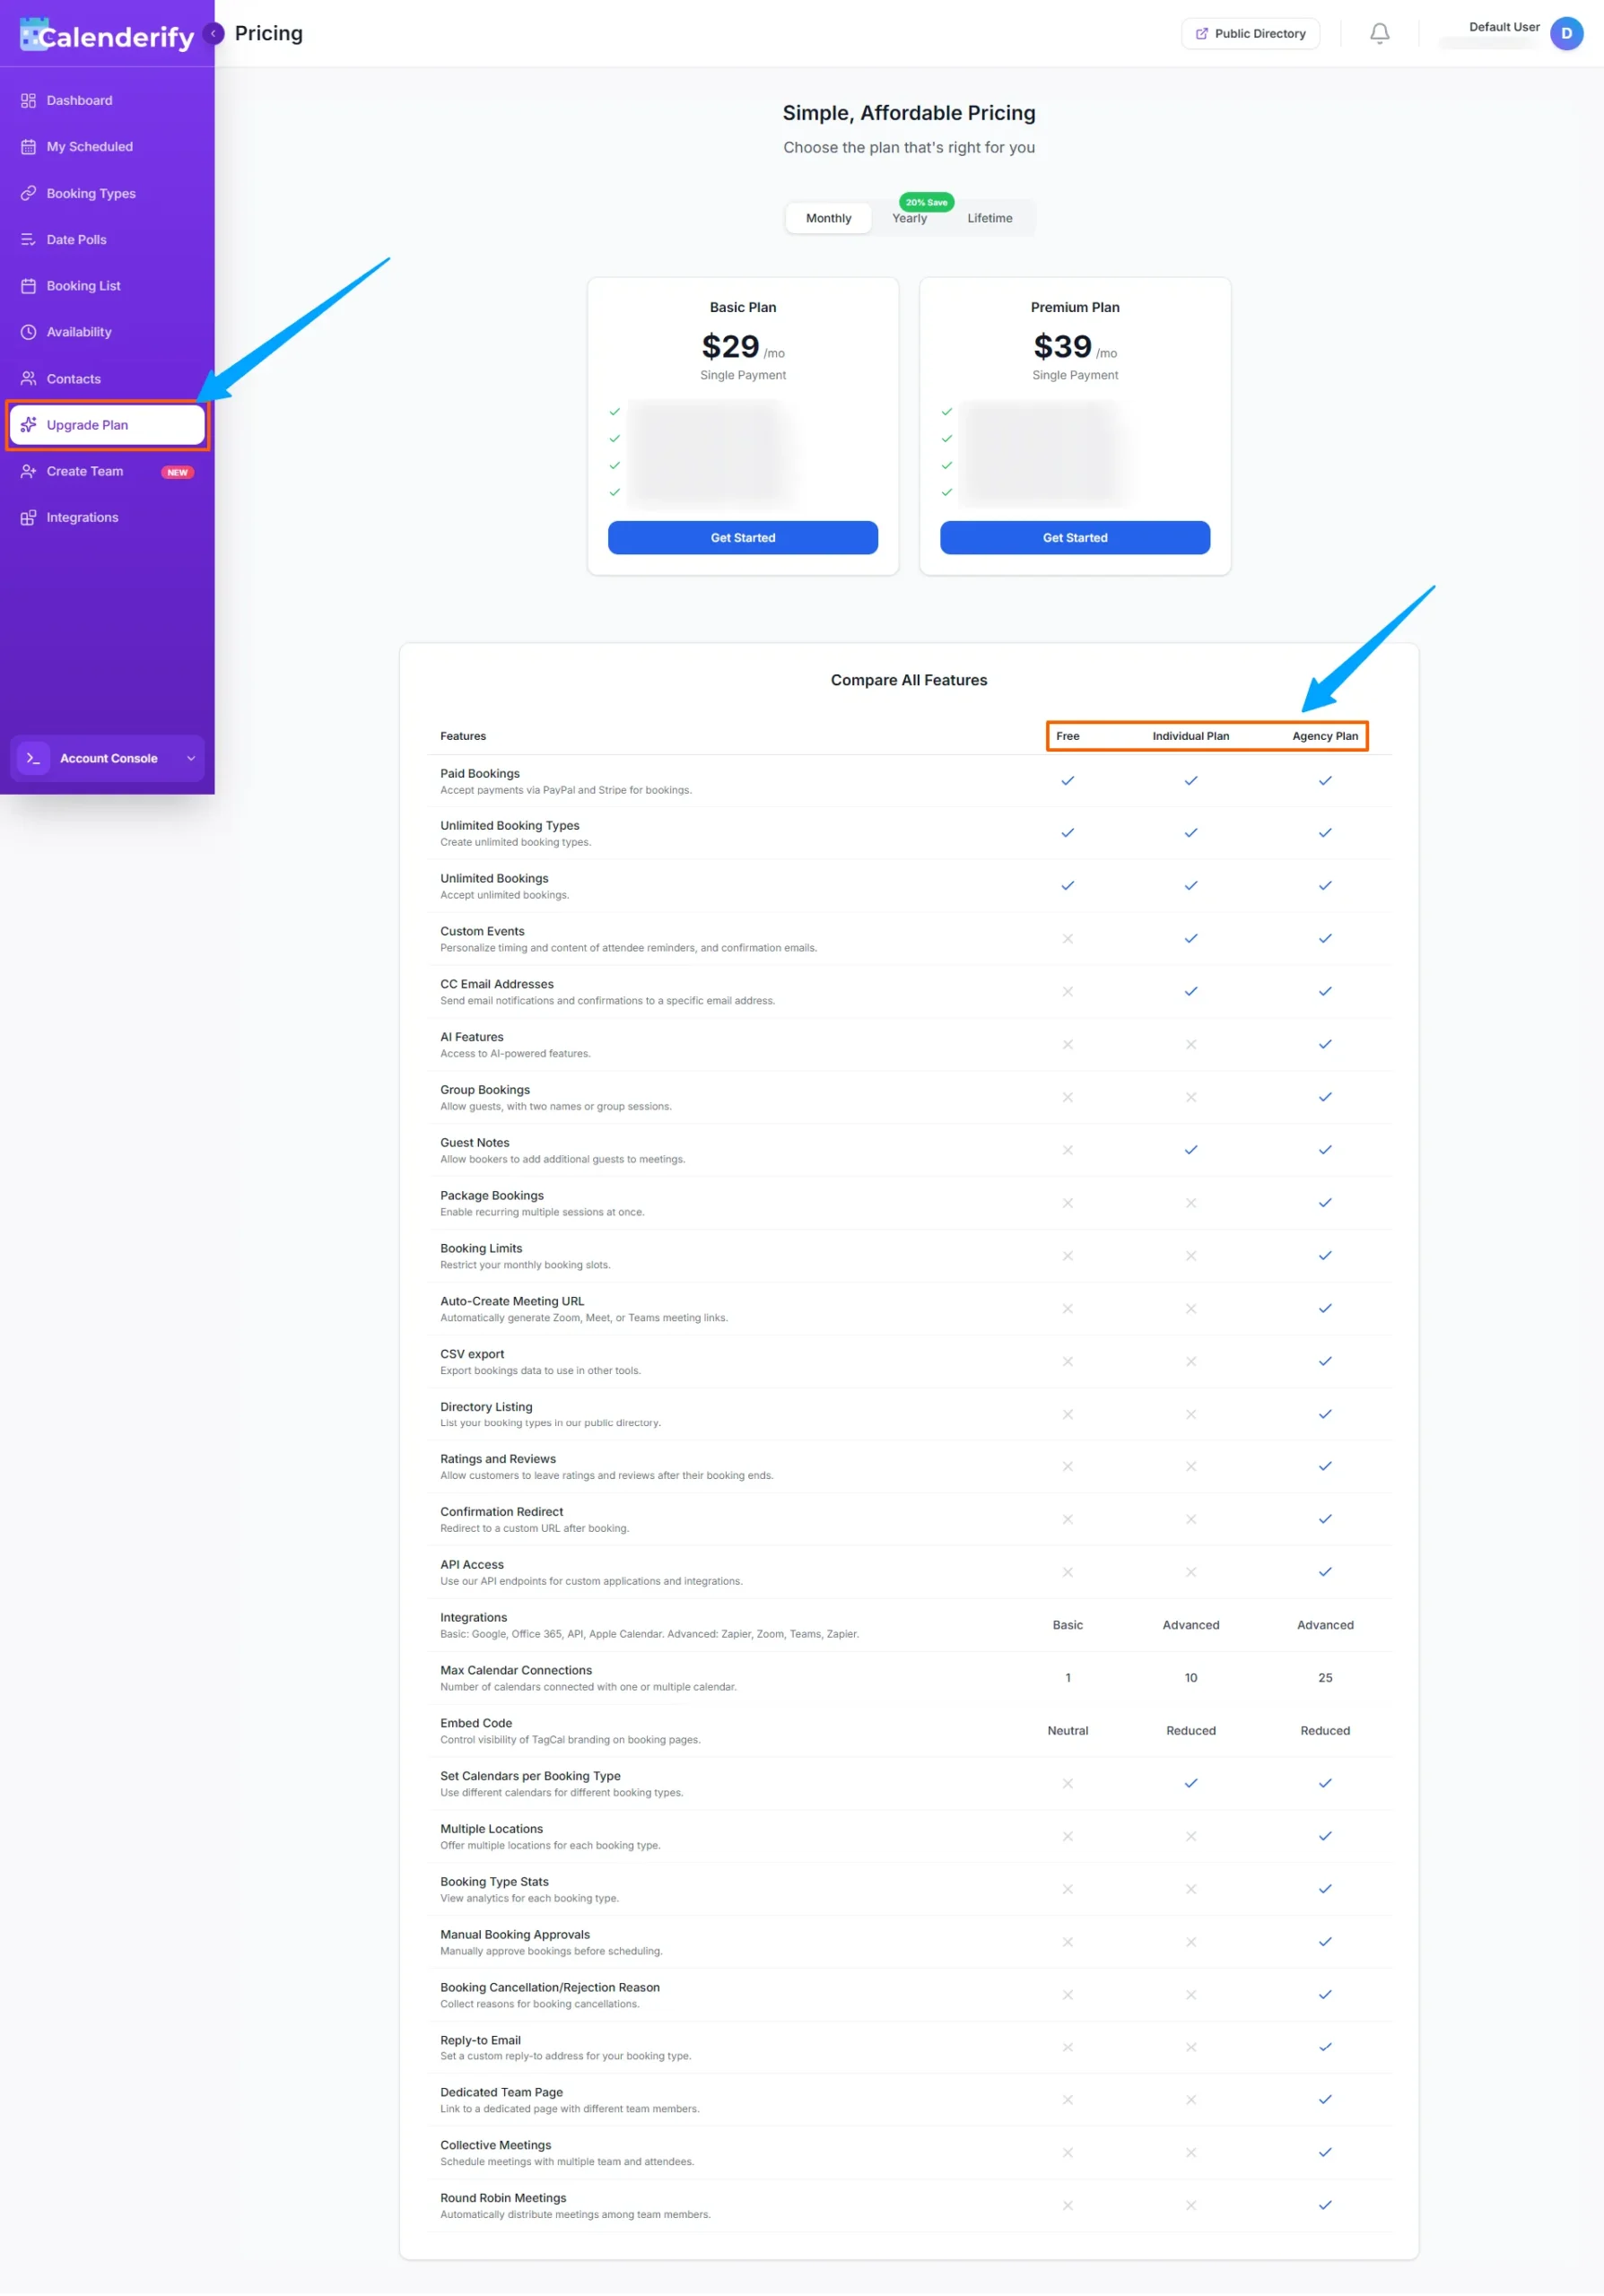 Review features, limits, and pricing for each plan
-
Choose a yearly subscription to save 20% compared to monthly billing.
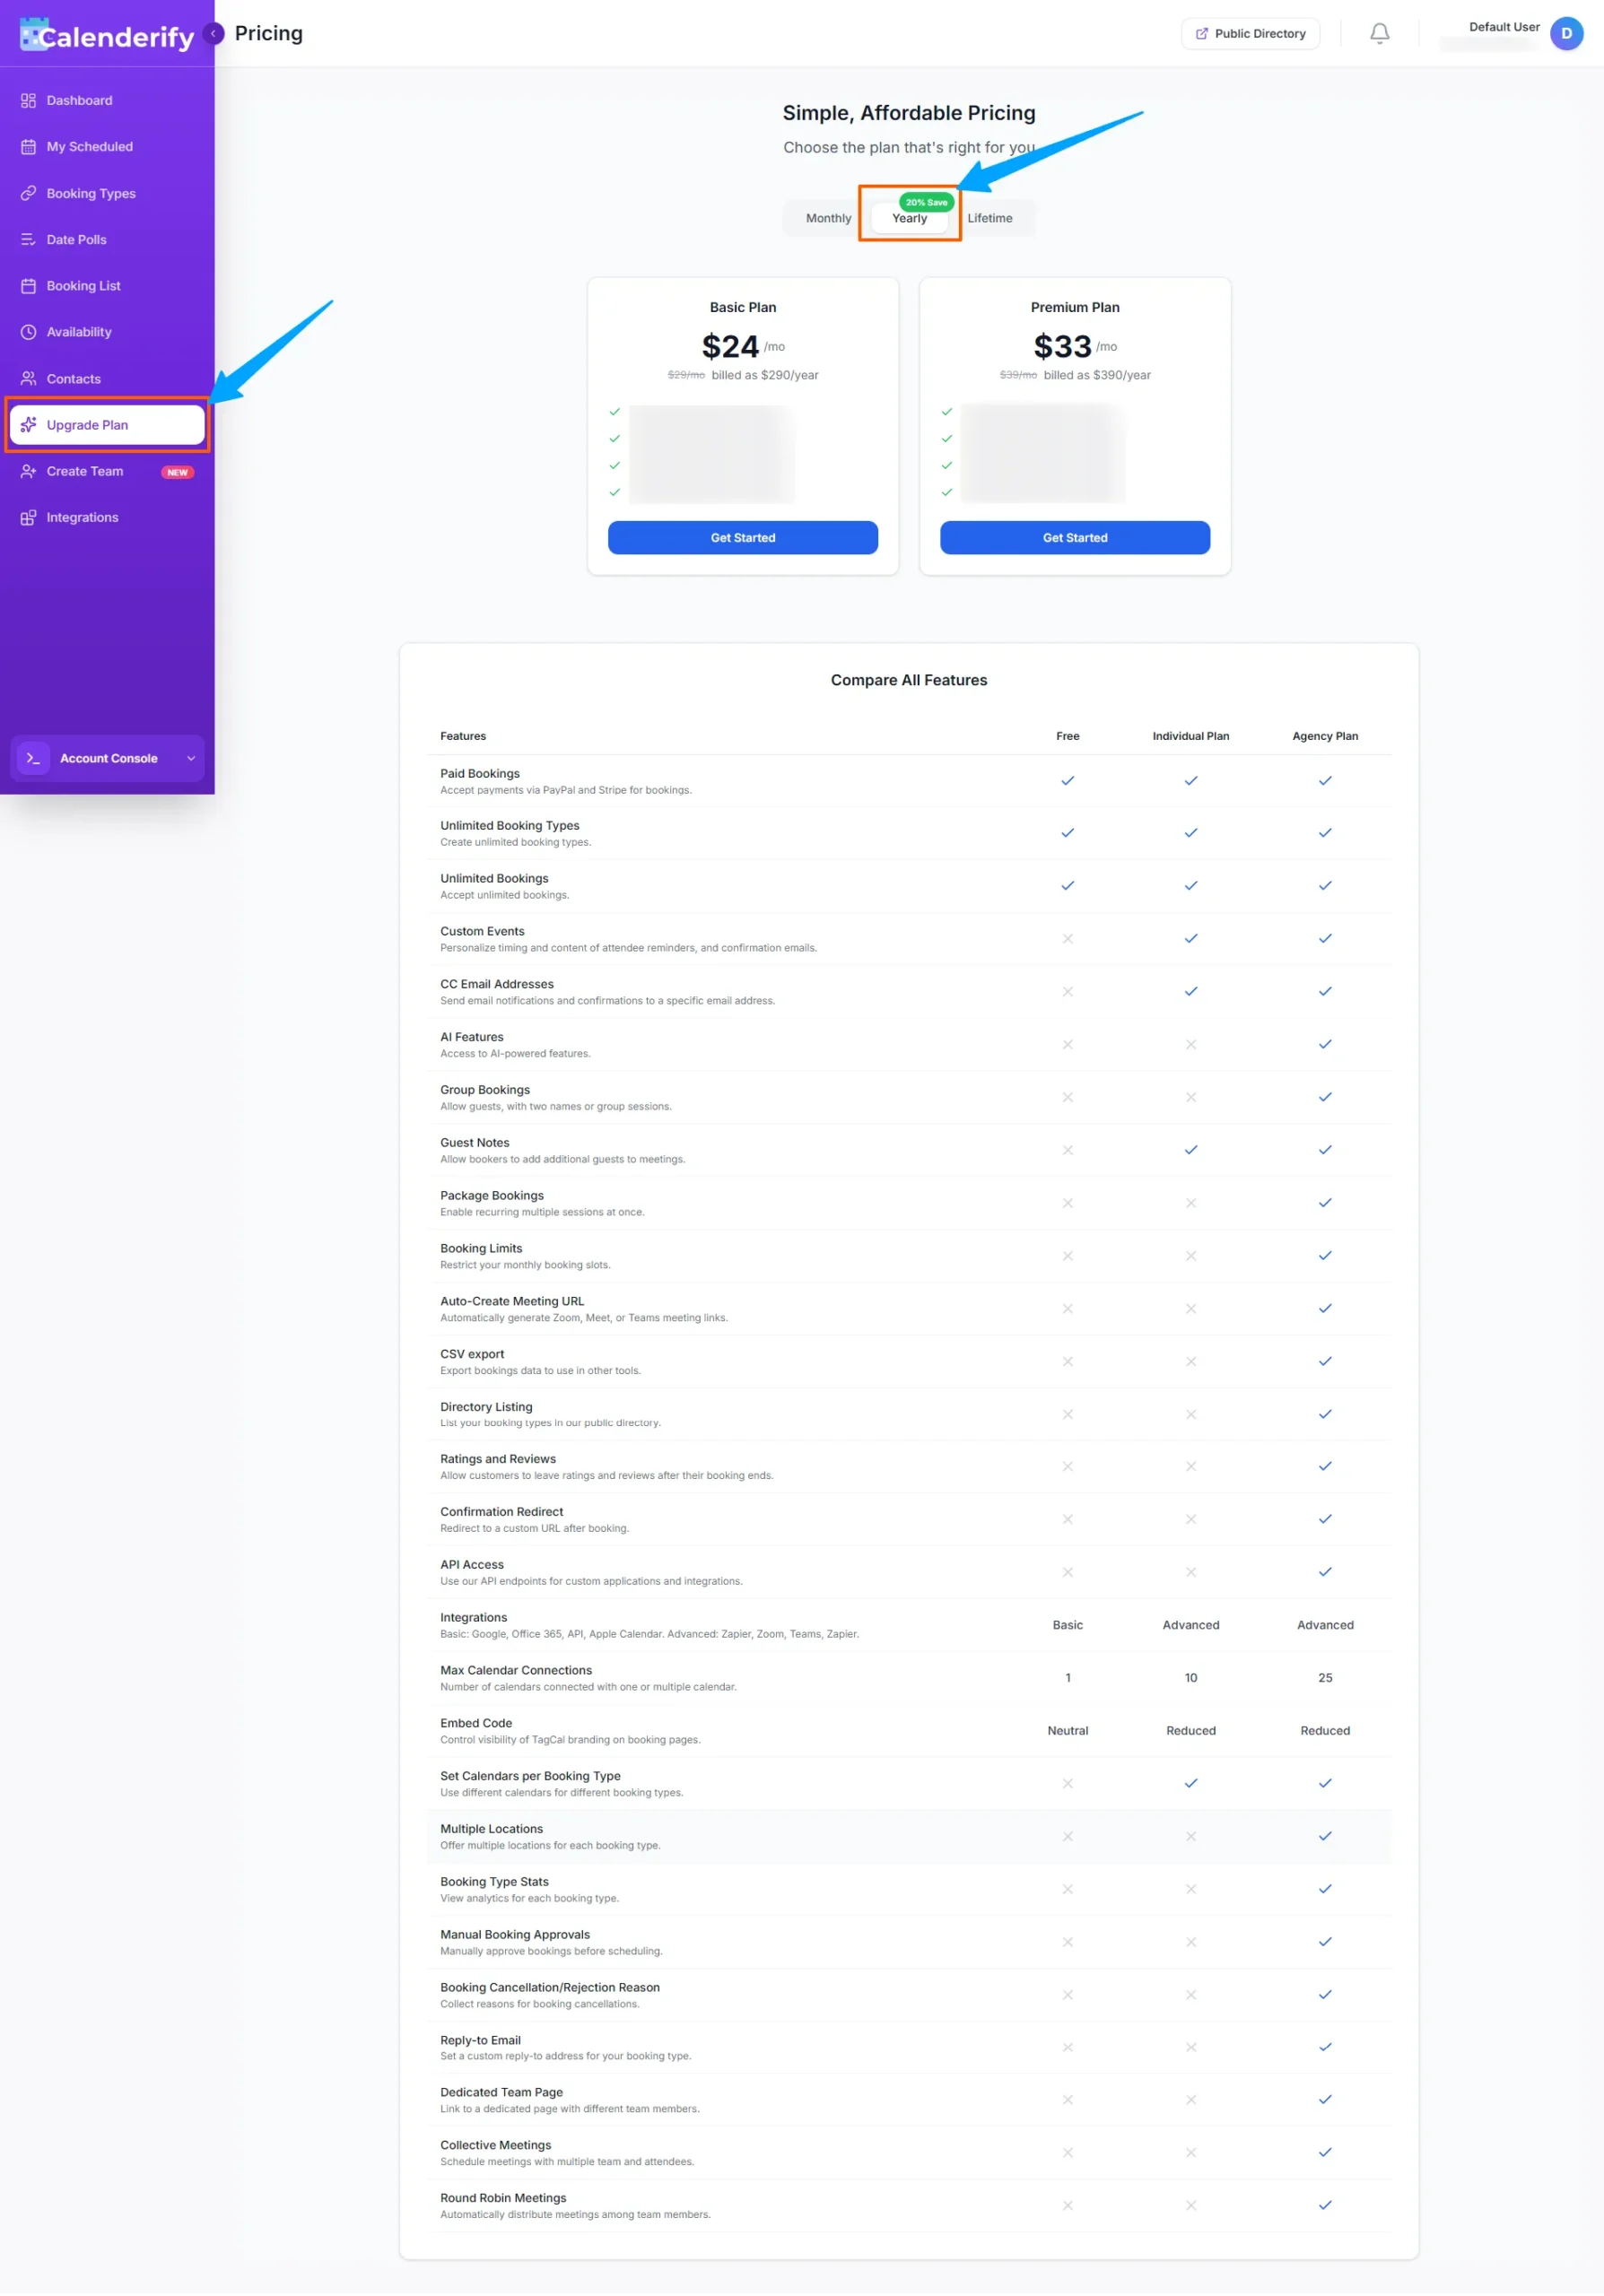 Switch to yearly billing and save 20% on your Calenderify plan
Profile and Billing
AccountProfile details
In your profile section, you can see profile information and update personal details.
-
Open your profile settings.
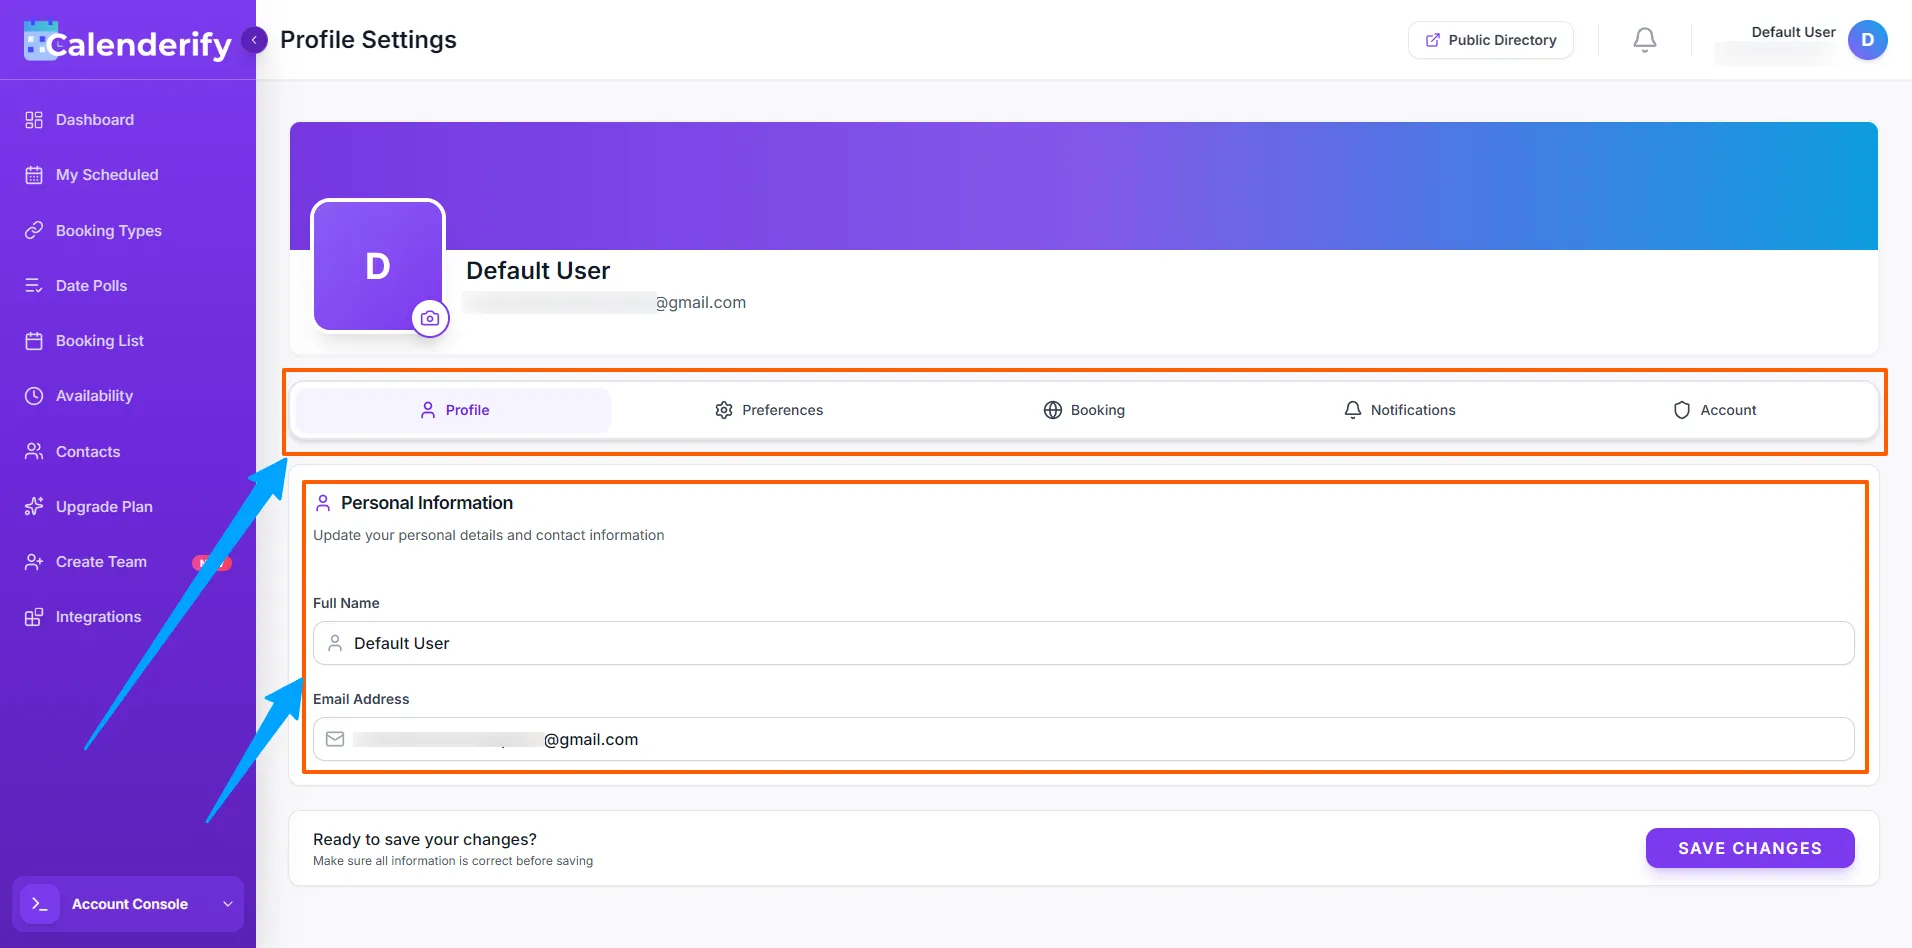 Open Profile from the account menu
- Update your personal information.
Plan details
View a summary of the subscription package you currently hold.
-
Open Plan details in your profile.
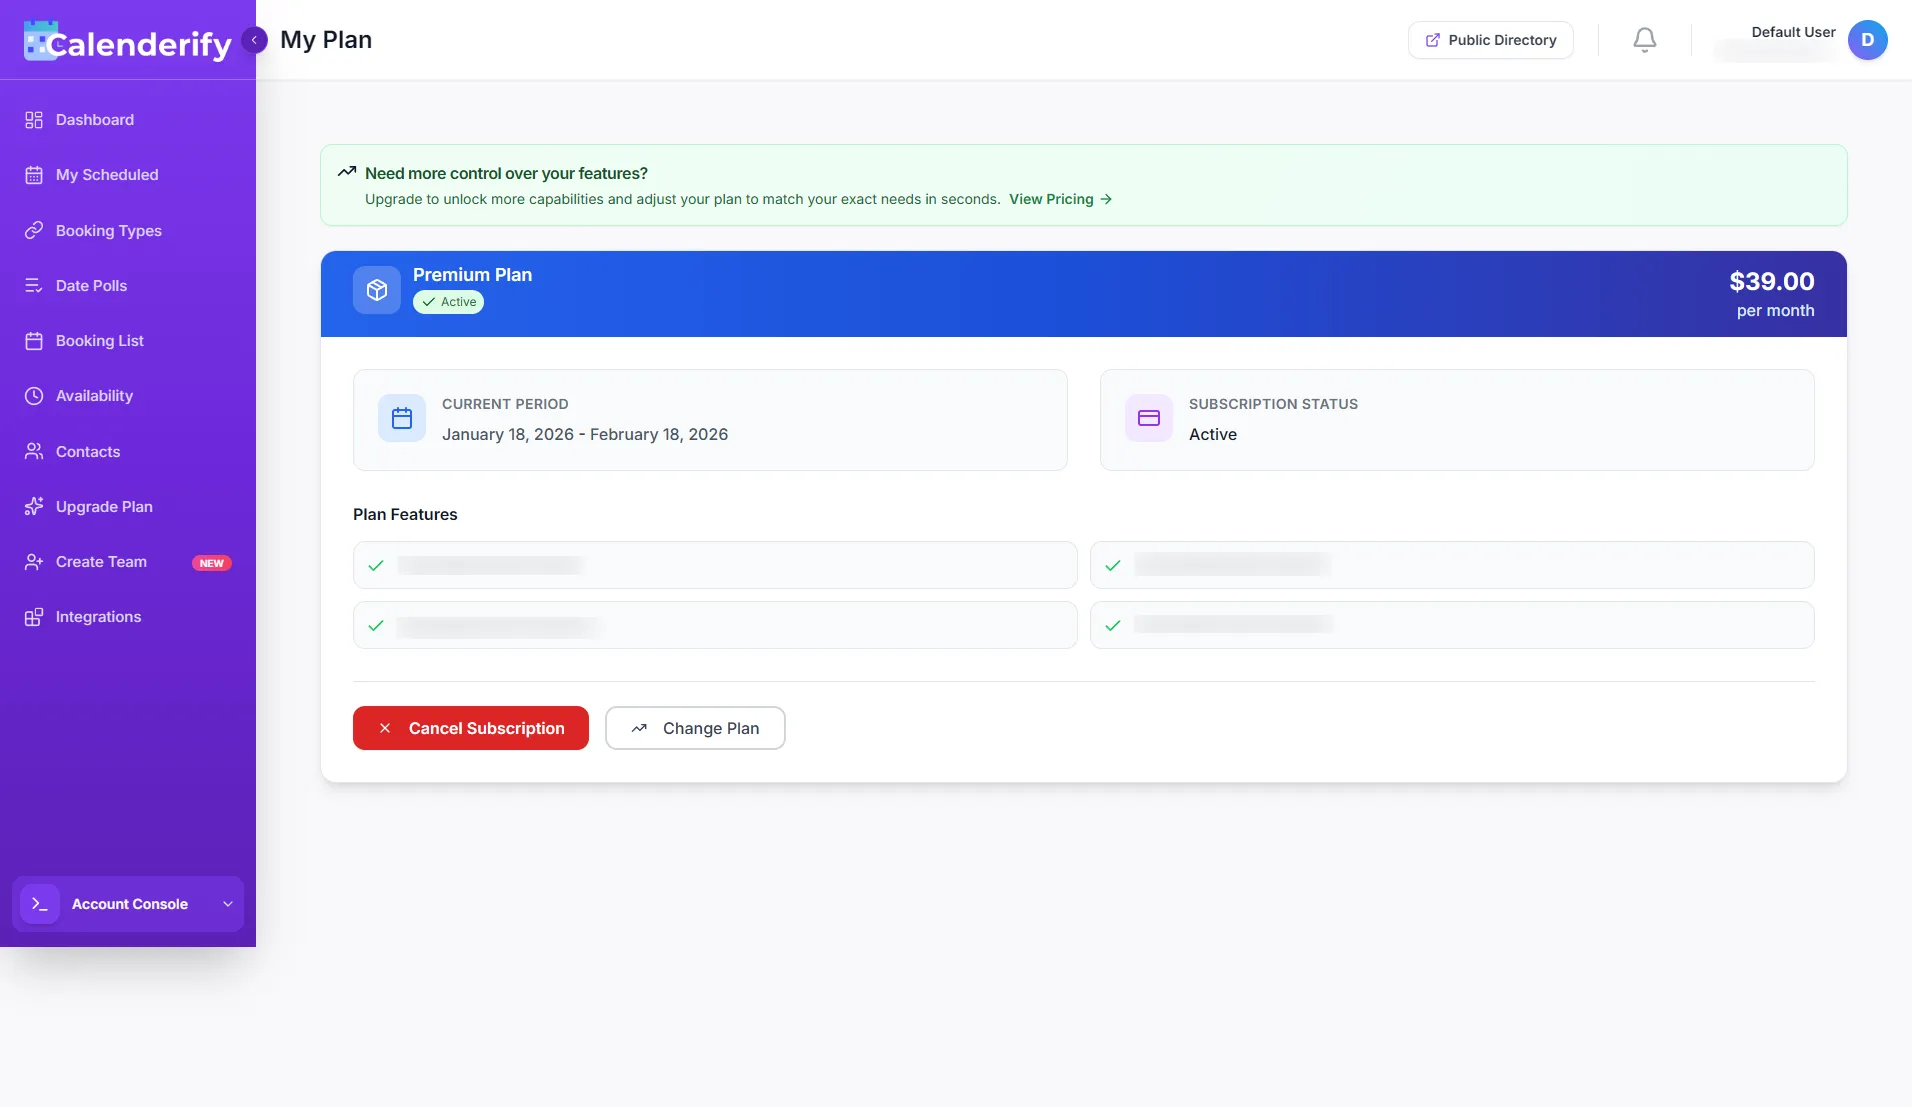 Review your current subscription plan
Total earnings
View total earnings inside your profile earnings section.
-
Open Earnings section from profile.
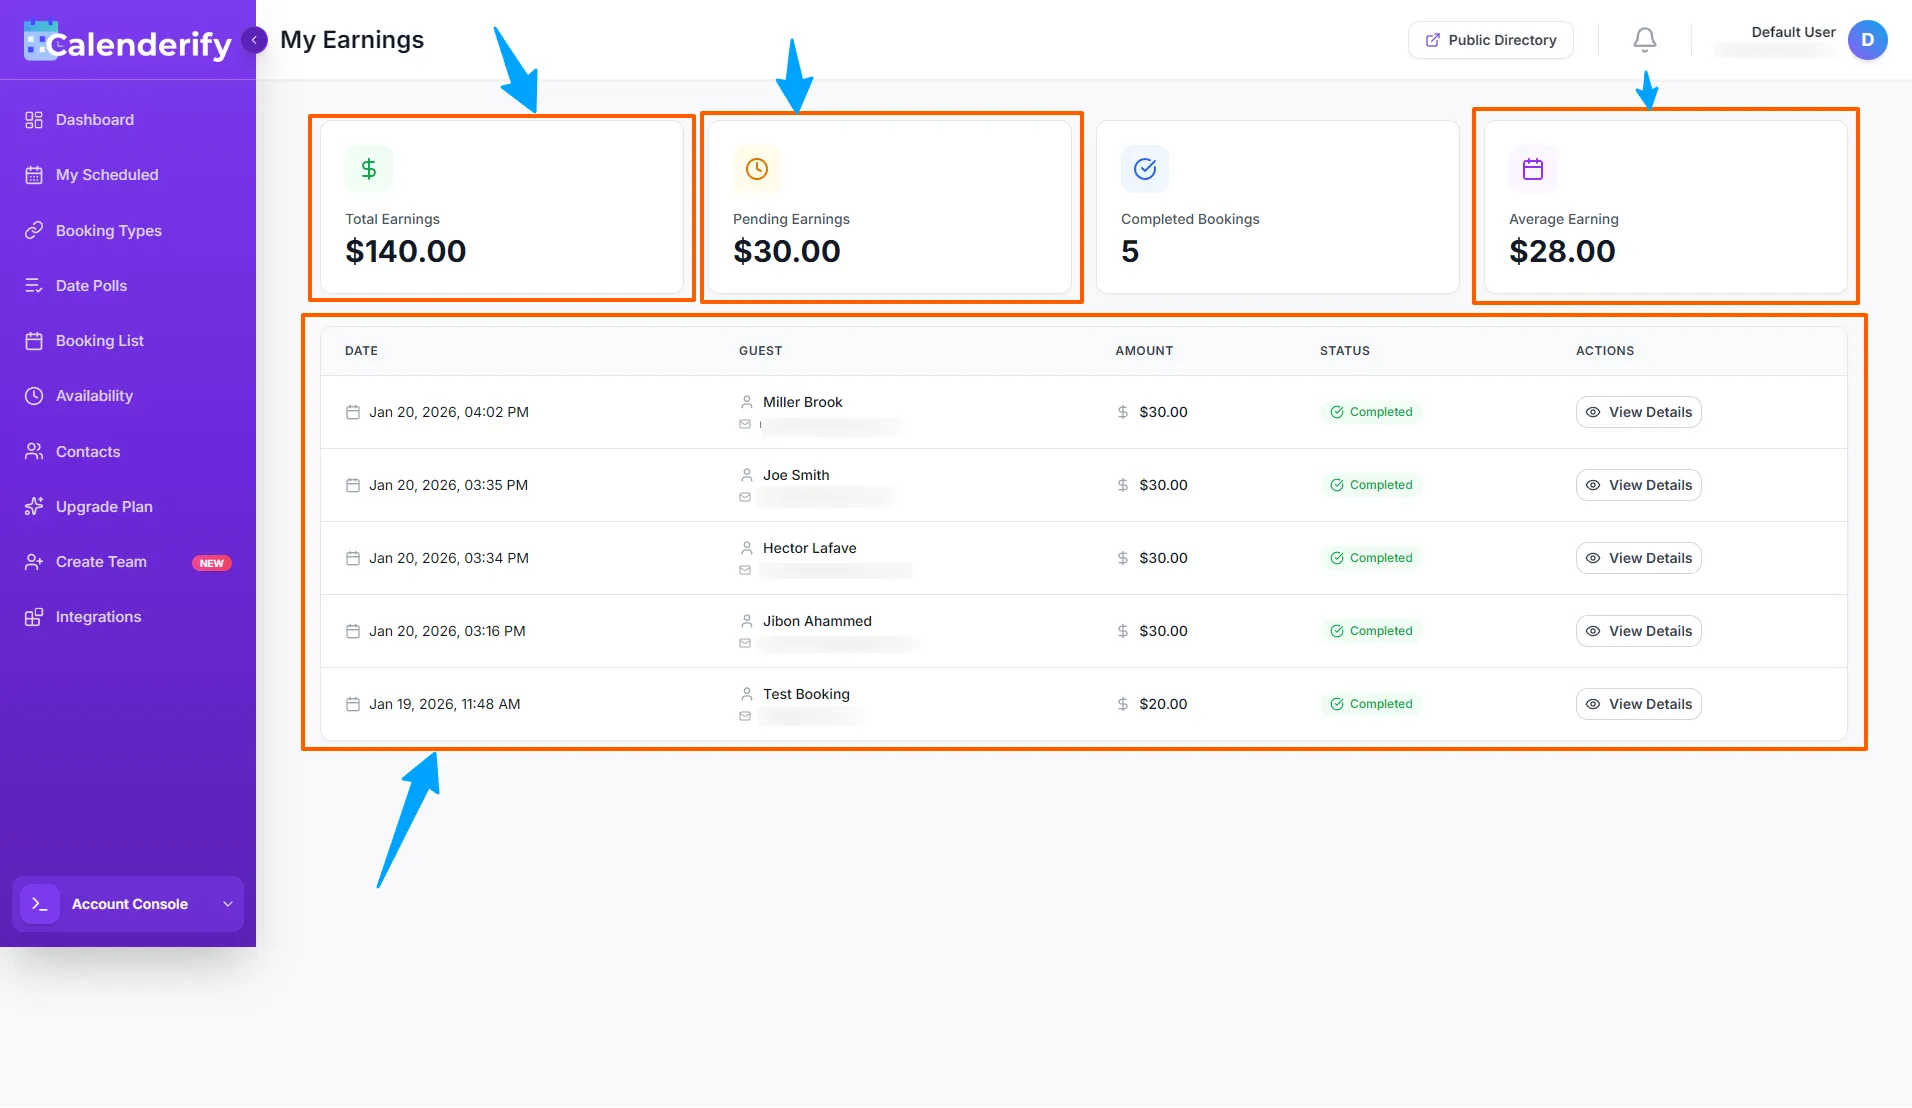 View your earnings summary
Billing history
View billing history, including previous billing records and history.
-
Open Billing History.
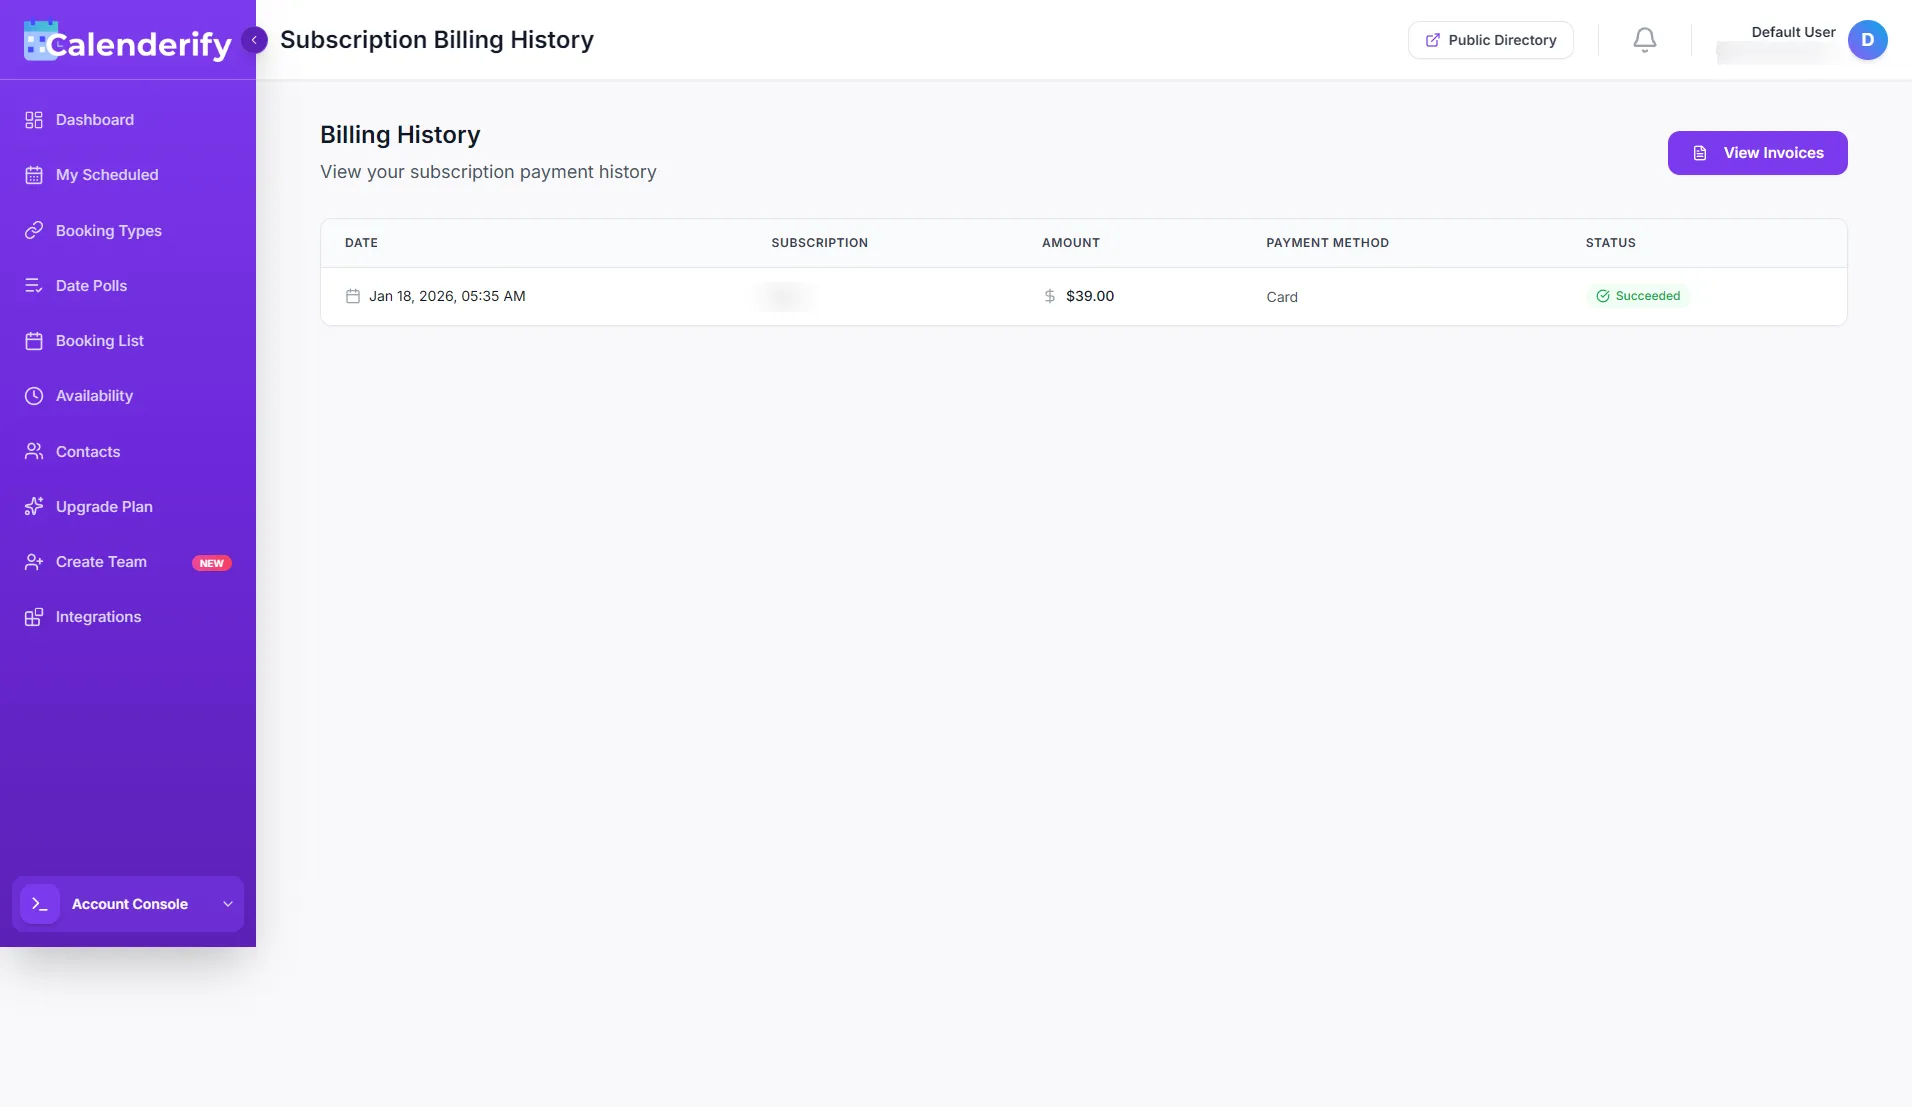 See invoices and billing history
Directory
Public PageDirectory page details
In the Directory Page section, you can see social activities and influencer profiles.
-
Open Directory.
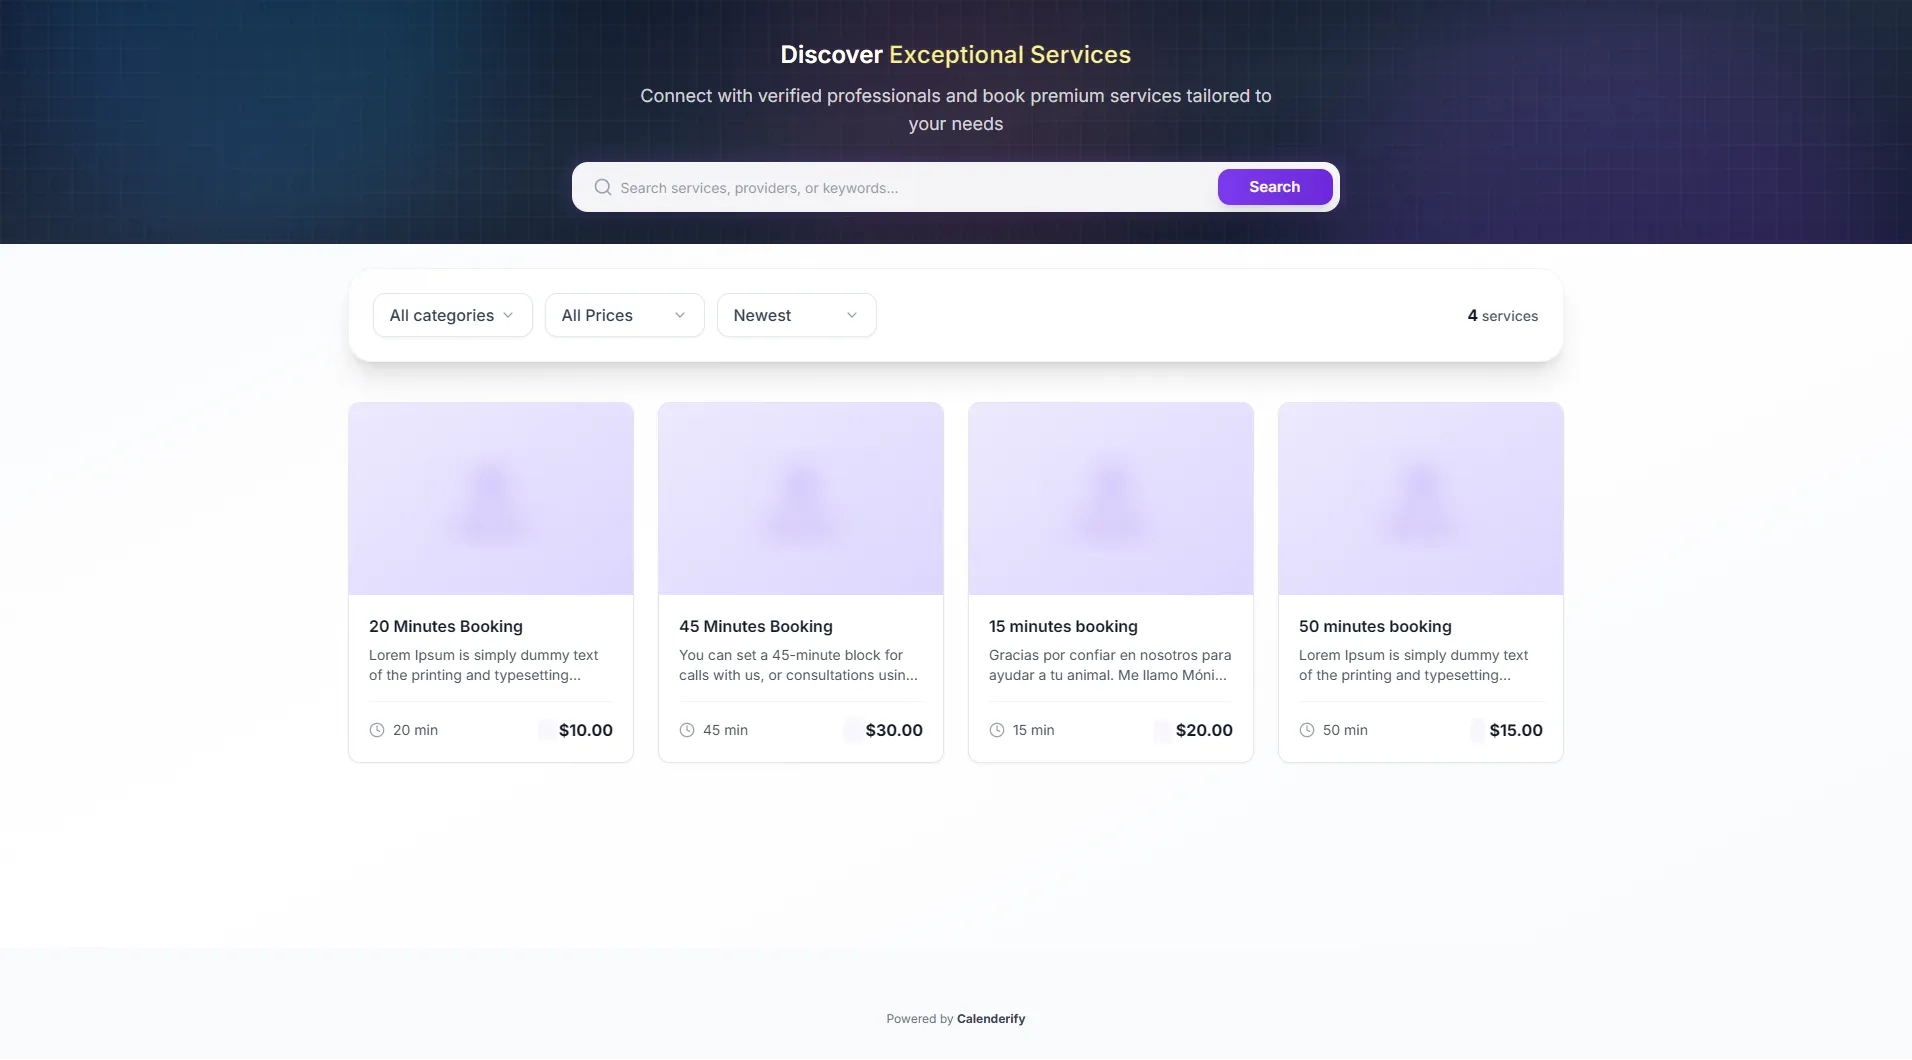 Open Directory from the sidebar
- View public events and paid services.
Frequently Asked Questions
Quick answers to common Calenderify questions.